Hedgehog made from origami modules. Vase "rainbow hedgehog" What materials will be needed
VKontakte
Classmates
The art of origami has its roots in Japanese traditions, but today it has become very popular in most countries. Most often, only one sheet is used to assemble paper crafts, after which you need to fold it in a certain sequence.
Traditional origami assumes that the craft will be folded without the use of glue or scissors. The second variety, in which paper sculptures are folded, is called kirigami.
Folding paper crafts is quite difficult with children, but this art must be taught from an early age. For a baby to master the process of creating paper crafts, it takes some time and patience. Start working when he is five years old, starting folding on his own, and at this moment the child can carefully observe the process. Then you can transfer part of the work to him, gradually moving on to more complex tasks.
This pastime is good for developing motor skills, coordination, creative and spatial thinking. With its help, you can make a child assiduous and help him learn the capabilities of his hands. It is also good to learn geometry with origami, since in technology they work with angles, circles, squares and other basic concepts of science.
Today we will try to make the first paper craft that the child must handle on his own. We will make a cheerful hedgehog from several flowers using the kirigami technique.
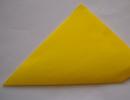
To make the figure howl bright, take three contrasting colors. At the base there will be a small square that needs to be bent diagonally to form a triangle. After this, a rectangle of a completely different color is selected; the width of the figure should be equal to the length of one side of the triangle.
From the resulting triangle you should make the muzzle and body of the future hedgehog. To do this, bend one side of the triangle up so that the edge of the other side protrudes. Then you can turn the figure over to the other side.

At the next stage, we create hedgehog needles from a rectangle. Let's make an accordion (corrugated model), bend the figure in the middle.

Glue the sides that are in the center. From the rectangle we get a “fan”. The origami hedgehog carries a ruddy apple on its back, which can be folded from a small rectangle according to the above principle.

Connecting the parts of the craft involves using a small amount of glue. You need to attach the needles to the hedgehog shape in the form of a yellow triangle, after which you can attach the apple to the needles. We draw eyes on the muzzle and mark the tip of the nose on the protruding half of the figure.
Well, I’ll finally upload the entire master class here.
To begin with, you will have to spend several evenings making triangular origami modules.
We need Green modules - 40 pcs. Blue modules - 40 pcs. Lilac modules - 40 pcs. Pink modules - 40 pcs. Red modules - 40 pcs. Orange modules - 40 pcs. Yellow modules - 89 pcs. White modules - 847 pcs. Total 1176 pcs.
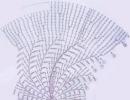
I put them in these Christmas trees, 10 pieces each, so that they don’t take up much space and are easier to count and sort by color.

Let's proceed directly to the assembly. As usual, starting is always more difficult, but you can do it!!! I believe! Firstly, you should remember from the very beginning that in this work ALL colored modules are put on with the long side out, and ALL white modules are put on with the short side. Therefore, we start the first row like this: One colored module on the long side, one white module on the short side, etc. (see photo)

In the second row (and in all even rows) ONLY white modules with the short side. (see photo) (Place the pockets of the modules of the second row on the corners of two adjacent modules of the first, this way the modules are assembled and fastened into a product)

Third row - again we alternate white and colored modules, but this time with a shift: over the white module of the first row we put on a colored module (of course only with the long side), and over the colored module of the first row we put on a white one (naturally with the short side). (see photo)

We perform the first three rows simultaneously until we secure them into a ring. Then we continue to build one row at a time, making sure that the colors alternate correctly and do not forget to put on the white modules on the short side and the colored modules on the long side. In the photo there are 5 rows.

Well, it’s time to give our star the shape of a vase; to do this, just lift the edge up so that the colored “needles” remain outside. We hold the vase with our hands so that it does not open and continue to collect. After a few rows, lo and behold!, our product will hold its shape on its own.

Moreover, due to the fact that when assembling you did not forget to put on the white modules on the SHORT side and the colored ones on the LONG side, the inside of the vase turned out to be snow-white, and charming colored “needles” appeared on the outside.

Well, you’ve come to the end: you’ve run out of all the color modules except the yellow ones! It's time to compare your result with what I got and if everything matches, you can move on to making the border.
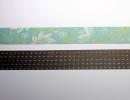
Border! To complete the border you will have to slightly break one of our rules: We put 2 yellow modules not on the corners of two adjacent modules, but directly on top of the modules of the previous row, then we skip two modules and put on two more yellow modules in the same way and so on all the way around. Now we connect those white modules that remained empty between the yellow ones in the middle with another white module (see photo). Ready? Fabulous!
An origami hedgehog consisting of 7 modules is absolutely not a complicated craft. The main thing is to carefully follow all the steps, and you will be able to do the second module from memory. In the original, the hedgehog is made of 7 sheets of paper, it turns out to be large and solid. But I made much less, I got 6 squares from one sheet (1 square of a different color).
What materials will be needed?
- Light orange or yellow construction paper for the hedgehog's head;
- Brown paper for body modules;
- Scissors, glue stick;
- Moving eyes.

How to make an origami hedgehog?
Creating modules
The hedgehog consists of 7 modules, one is the head, and 6 are the body. Therefore, you need to prepare 6 identical squares of brown and 1 yellow.

Let's make a module. Take one square to work.

Fold it in half from corner to corner.

Press the fold well. Straighten and then fold the square into a triangle again, but this time from the other corner to the opposite corner. There should be 2 cross folds on the square.

Pull the top corner and bend it to the middle of the square, in the area where the fold lines meet.

Then fold the corners on the right and left in the same way. You will get an envelope like this. Let it stay that way, upside down.

Fold the top part forward (or towards you) along the middle fold line, as if folding an envelope in half.


Therefore, straighten the corner back, the goal is achieved, the fold is visible.

Direct this corner inward, exactly along the line of the fresh fold, only bent in the other direction.

Press the sides and folds together.

Now direct the free corner of the former envelope inward as well. It should be on top of the inner right.

Also press all sides and folds.

And the final stage of creating the module is to direct it inward to the corner on the left, exactly as we did on the right side.

Turn it over as shown in the photo and the module is ready.

Using this pattern, make 6 more modules from brown paper squares.

Assembling modules
Everything is ready, it’s time to start assembling the origami hedgehog.
First make the torso. Connect all the modules together, placing each subsequent one on the inner fold of the previous one, see photo. We need to apply glue to the sides of the models so that the parts are secured in the position we need.


Each module should converge at one point with its lower corners, as if forming something like a fan. On top, you need to try to make equal spaces between the protruding corners. Only the last 2-3 may be a little larger. Ideally, the bottom of all modules should be straight and in full contact with the surface.

Now make the head of the hedgehog. To do this, place the yellow module in the same position as all the modules at the very beginning, before connecting them.

And then bend both bottom corners up, aligning them along the edge. The hedgehog's nose was on top.

So turn your head over.

Glue it to the body. Add eyes on both sides and the origami hedgehog is ready. Despite the lengthy explanation, the craft is easy and interesting to make.


The figurine is very cute, but a little heavy to assemble. But since the best craftsmen have gathered here, you will succeed))) Well, let's start creating. For assembly we will need: Strips of paper, yellow or flesh-colored (any color suitable for the Hedgehog’s face), as well as black and white for the eyes. Gray modules 1\16 A4 105-115 pcs. 1\32 A4 20-25 pcs. a black bead for the nose, PVA glue or a glue gun, whichever is convenient for you (I used a gun) Well, not a lot of patience LET’S GO….
From yellow strips (7mm) we glue one long one. Then we twist it into a disk with a diameter of approximately 55 mm. Important! For further convenience of forming the muzzle, we twist the disk tightly (so that it does not fall apart), but NOT TIGHT.

From this disk, starting from the center, push the paper outward, slowly moving towards the edges, forming a Cone. Here it is. You need to act smoothly and carefully so that the figure does not fall apart.

We move the upper part of the cone to the side. This will be the “snub nose” of our hedgehog)))

It should turn out like this. I remind you that you need to act carefully, slowly... Otherwise, if the figure falls apart, you will have to twist the disk again(

Now that we have given the desired shape to the Hedgehog's face, we secure everything with glue. Strong and reliable, because this will be the “Foundation” for our product. (You can use either gun glue or PVA.)

Now we make the body, as in the photo. we assemble 3 rows of 1\16 A4 modules as follows: 1p. 12 modules, long side out 2p. 13 modules, long side 3p. 14 modules, short side out. Rows 1 and 2 are the base, and row 3 is the starting row of the body.

Now we glue the base to the inside of the head, as in the photo, so that the nose is directed upward, the needles are also on top. Note that the needles are short side first. Lubricate the gluing area thoroughly with glue, the modules should also be glued together (It’s not too late to do this at this stage of assembly)

modules of the next row are placed between the modules of the previous row. Like this.

The same thing, but closer. We fix the modules with glue to the first row. We continue the row in the same way, take our time, glue carefully so that the glue is not visible from the outside.

Bottom view, second row.

And this is what the completed second row should look like from the side. This row makes 13 modules. and so on in checkerboard order

3rd row. 14 modules. Glue the outer modules onto one adjacent module.
The body of a hedgehog has a spherical shape. So, focusing on the final result, we round the torso a LITTLE with each row.

4 row. 13 modules

5 row. 12 modules

6th row. 13 modules 7 row. 12 modules

Now we take smaller modules 1\32 A4. We make 8 rows of them. 9 modules (in some places we glue them through two modules) 9 rows. 7 modules. Task 8 and 9 rows - Fill the empty space in the back of the hedgehog's body. Here you can take another number of small modules, add another row... It depends on the shape of your hedgehog.

Finally the finished hedgehog!!! All that remains is to glue on the eyes and nose.

Now he's alive =)

You will succeed)))
Thank you all so much for your attention)

Today I will teach you how to make a hedgehog from origami modules with your own hands, with a step-by-step and detailed diagram and photo instructions. This craft will not take much of your time and will bring you a lot of pleasure and joy. You can do it with your children or parents. Prepare white modules and strips of orange paper measuring 5 mm.
Let's get to work.
We take the cut strips and glue their ends together, making one long strip. We make a circle with a diameter of 5.5 cm. We roll the circle carefully, slowly, otherwise everything will fall apart and you will have to reassemble it. We make stripes in quilling style.

From the resulting circle, make a cone. We start pushing from the center and continue until the very end. But this must be done carefully and with concentration so that it falls apart.

We twist the hedgehog's nose.


We take the white modules and start making the body.
The first row is 12 modules, with the long side.
Second row - 12 modules, long side.
Third row - 12 modules, short side.

Take the cone (hedgehog's head) and fill it with PVA glue.


We continue making the body.
The second row - 13 modules, we insert all the modules between the modules of the previous row, and grease them with PVA glue.


The third row - 14 modules, also glued with PVA glue.


Fourth row - 13 modules.
Vase "Rainbow hedgehog" consists of 847 white, 89 yellow and 40 modules each of green, lilac, blue, red, pink, orange. In total you will need 1176 triangular modules.
Fold the modules into 10 pieces of Christmas trees so that they take up less space, are considered lighter and are sorted by color.

It should be remembered that during assembly everything color modules put on with the long side out (DSN), and all white modules- short side out (SSN).
We start the 1st row like this: 1 color DSN module, 1 white KSN module and so on (see photo)

2nd row (and in all even rows) only white KSN modules (see photo)
(Place the pockets of the modules of the 2nd row on the corners of two adjacent modules of the first, this way assembly occurs - the modules are fastened into a product)

3rd row - alternating white and colored modules, but this time with a shift:
over the white module of the first row we put on a colored module (of course only DSN), and over the colored module of the first row we put on a white one (naturally KSN).

Complete the first 3 rows at the same time and connect them into a ring.
Then we continue to increase one row at a time, observing the correct alternation of colors and do not forget to wear white KSN modules and colored DSN.

Give the craft the shape of a future vase, lifting the edges up so that the colored “needles” remain outside.
Holding the vase with our hands, we continue to collect it further.
After a few rows, our craft will hold its shape on its own.

Thanks to the fact that when assembling the vase, you did not forget to put on the white DSN modules and the colored DSN modules - the inside of the vase will turn out to be snow-white, and colored “needles” will appear on the outside.

At this stage, you have run out of all color modules except yellow ones!
If everything matches, then you can proceed to making the border.
We put 2 yellow modules not on the corners of two adjacent modules, but directly on top of the modules of the previous row, then skipping two modules and putting on two more yellow modules in the same way and so on throughout the circle. Now connect those white modules that remain empty between the yellow ones in the middle with another white module (see photo).