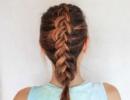
How to knit mittens with a knitting pattern. Knitting step by step openwork mittens on knitting needles. How to tie a thumb
Delicate, warm, comfortable, stylish knitted mittens - what else brings so much inspiration to needlewomen in winter? Moreover, both the process of knitting mittens and the result obtained at the end are beautiful. Knitting this accessory is quite simple, and it will look exclusive. If you know how and love to knit, and at the same time want make to your loved ones exclusive gift on New Year – there is no cooler idea than making mittens with knitting needles: descriptions and diagrams are already waiting for you on this page, as well as exclusive video tutorials.
Beautiful mittens with a pattern are a unique, and most importantly, warm find for those who like to look unusual. Of course, today almost any item can be bought in a store, but for your own model of mittens you can choose the yarn yourself, choose a pattern and chicly decorate your pair of mittens with the decor you want. Of course, such a designer model in the store will not be cheap, but you can make it yourself.
Before you begin work, you should carefully measure your hand so that your future product looks perfect.
What measurements should you take before knitting mittens?
- Girth of the hand along the line running from index finger to little finger(we run a measuring tape along the bones).
- From the beginning of the hand to the tip of the middle finger.
- From little finger to wrist. The length of the thumb is also taken into account.
- We measure distance between thumb and wrist.
You also need to choose the appropriate size for your future masterpieces. There is a special mitten size scale for men, women and children.

 When you calculate the size of the mittens and measure your palm, you should take into account the thickness of the yarn and the size of the knitting needles. If the knitting is quite dense, then a little more yarn is needed: when knitting mittens with plaits or braids, we take 30-40% more yarn e, than is required.

The yarn is calculated as follows:
- for women's mittens - 100-120 g of yarn;
- for children - 60-70 g of thread.
The table shows how many stitches you need to cast on to knit certain mittens. We start knitting with a brush and knit in the round on 5 knitting needles . We knit the cuffs with an elastic pattern- through one front and one purl loops or 2 through 2. Let’s move on to the instructions for knitting a mitten cuff for beginners.

- Loops we cast on on 2 knitting needles.
- Then divide the number of loops into 4 parts(equally) and throw on the knitting needles.
- Row of loops close it in a circle and tie the ends threads together.
- The cuffs will be 5-7 cm.
- After you tie the cuffs, add one stitch on each needle.
- We knit the main part of the mitten to the thumb area.
Knitted mittens with a pattern: diagrams and step-by-step instructions
Now that you know how to take measurements correctly and knit cuffs, you can move on to considering the pattern of mittens with knitting needles with a pattern.


Beautiful patterns on mittens are not just for women. Men's mittens with a pattern also exist, and they look impressive and stylish.


Unusual New Year's mittens will give you a festive mood.


Let's take a closer look several stylish schemes.


Mittens with braided knitting needles: diagrams and description
In the process of knitting mittens, it is very important to position them correctly. thumb. Thumb hole for right mitten will be on the third spoke, for the left - on the fourth knitting needle. In the photo you can see a small master class on finger knitting (one of the options).

- We knit a hole for the finger. On each knitting needle you have the same number of loops, for example, 12. We knit the first loop on the third knitting needle, and pin the next 10.
- On right knitting needle cast on 10 chain loops(the same number of loops you removed on the pin). We knit the final 12th loop.
- Knitting in circles to the level of the little finger.
- Reduce the number of links: on the first and third spokes knit with a shift of 2 loops(beginning), and on the second and fourth knitting needles we knit 2 joint loops for the 2 upper parts (end).
- On every spoke reduce the number of links (through the row), until half the stitches remain on each needle (from the original number). Reduce the number of loops in each row.
- When you have 8 stitches left, close the ring and tighten from the inside out.
Knitting the thumb
- We transfer the removed loops to the knitting needle.
- When we were knitting air loops, we now have edging ones. We recruit from them new loops in multiples of 3.
- Distribute the loops onto 3 knitting needles and knit in the round to the tip of the nail. We decrease the loops as described above (in step 4).
- We collect the last 6 loops and tie them from the inside out.
 These 2 patterns will help you master the technique of knitting with braids.

 Here is another option for knitting mittens with a braid pattern - cute owl – for girls.
 Elegant women's mittens with flowers can be knitted for free using this pattern.
How to knit baby mittens with knitting needles?
Perhaps every mother wants to learn how to knit mittens for children. This is another sure way to give your child your love, care and warmth. Children's mittens are even easier to knit than adults, because they are smaller in size.  Instructions for knitting children's mittens will explain to you all the nuances of the work. This knitting method is considered the simplest and most universal, and the mittens are suitable for a child of 7 years, and for 2 years, and for 1 year (see size table).
 And this one set of children's patterns will complicate your task a little, but will cause a storm of positive emotions in your baby.
 This is what tender and cool “hedgehog mittens”. From the front they look quite neat, but on the back of the hand there are soft “needles” made of threads, and on the fingers there is a hedgehog’s face. This photo shows a detailed MK.
 It should also be clarified how to finish work.
- First way. To round the toe, decrease stitches at the end and in the middle of each needle. We close the last loops into a ring and pull the thread from the wrong side.
- Second way. On the first and third knitting needles we knit every two first stitches with a shift. At the same time, we pull one loop through the second. On the second and fourth needles we knit the last two stitches together.
 And according to this scheme you can knit mittens on two knitting needles.
 This manual contains detailed description, how to knit a finger in such an accessory as seamless mittens.
 Jacquard patterns also welcome on children's mittens.
 Knitted on 3 needles cute fox mittens. Your child will love this new cozy friend.
 You are such a beauty can be knitted on 5 knitting needles.


Popular today mittens with Indian wedge.
 Children's mittens with ornaments look laconic and stylish.
Knitting mittens: beautiful patterns with knitting needles
Let's continue interesting topic knitting mittens and mittens. We have prepared for you several more ways to knit mittens.
 - to stay closer friend to a friend.
Knit mittens with knitting needles to keep your hands warm even in the most severe frost!
Mittens are the most practical and convenient accessory for cold winter. Today you can buy mittens on the market different models, but it’s more pleasant to wear if you knit them yourself.
- If you learn how to knit clothes, then you can create entire sets for winter - a hat, scarf or snood and mittens. These things complement each other perfectly if they are created in the same style using the same pattern.
- To learn how to knit beautiful mittens, you must first create simple model mittens - with a simple pattern and without a seam.
- Based on the skill of knitting such accessories, you can knit any warm items of clothing for your husband and children.

Every woman should know how to knit mittens, just like woolen socks. Let's look at how to create simple women's mittens and men's knitting seamless.

Diagram and description:
Such a product can be plain, or you can add a thread of a different color to the elastic or stockinette stitch. The knitting pattern for such mittens is simple: 2x2 elastic on the wrist, the rest is stockinette stitch.
- For the knitting process, prepare wool yarn- 70 grams and 5 short knitting needles №3.
- For a wrist girth of approximately 20 cm, you need to cast on 36 loops(9 loops on each knitting needle).
- Knit the right mitten first. Mentally, number the knitting needles for yourself: on the 1st and 2nd knitting needles there are loops of the lower part of the product (palm), on the 3rd and 4th knitting needles - the upper ones.
- First tie a 2x2 elastic band 7 cm high.
- Then knit in the round facial loops to the beginning of the thumb - 7 cm.

We continue the steps:
- Knit the thumb on the right part on the first needle, and for the left - on the second knitting needle. So, knit the first loop of the first knitting needle with regular stockinette stitch, and remove the remaining 8 stitches with a safety pin and fasten it.
- Then cast on 8 yarn over stitches on the same needle. and knit the last 9th stitch in stockinette stitch. The mitten had a hole for the thumb.
- Now knit to the nail of the little finger - 8 cm.
- Toe mittens knitted with decreasing stitches. On the 1st and 3rd needles, knit the first two loops together behind the back wall. Pre-turn the first loop. On other knitting needles, knit two loops together at the end behind the front wall.
- Knit like this until there are 2 loops left on each knitting needle.. Tighten the loops and fasten from the inside out.
- Thumb knitting- remove the pin and insert one knitting needle in place of this pin, and thread the second one on the opposite side. It turned out 7 loops on the bottom knitting needle and 6 loops on the top.
- Distribute stitches onto 4 needles: three will have 4 loops, and one will have 3 plus one loop pulled out from the side edge.
- Knit your finger in a circle to the beginning of the nail. Then start decreasing.
- Decrease on the toe is done as on the toe. When there is one loop left on each knitting needle, pull the loops and fasten from the wrong side.
- Knit the left mitten similarly to the right one, but in a mirror image.

If you have mastered the technique of knitting with stockinette stitch, then you should start knitting openwork patterns. Mittens using this pattern look original and stylish.
Knit such openwork mittens with knitting needles, it will turn out interesting, and your hands in such an accessory will be feminine and beautiful.

Pattern diagrams with descriptions:

- Cast on 44 stitches - 11 stitches on each needle. Tie a 2x2 elastic band.
- Knit the first row with knit stitches.
- On the next row, decrease 2 stitches together. Do this on each knitting needle.
- Two knitting needles - stockinette stitch. Start knitting the other two knitting needles: purl, the rest knit, the last one - purl.
- Again, knit stitches on two needles.
- One purl and 6 knits, yarn over, knit, yarn over, slip one loop, remove 2 loops to the left side. Pass the next loop through the loop you removed and pull through it. Next, knit to the end of the needle.
- Two knitting needles again in stockinette stitch.
- Purl loop, 7 knit stitches, yarn over, knit stitch, yarn over, knit stitch, place the loop on the right needle and knit two stitches down. Pull the loop that was crossed over through the next loop. Then knit to the end of the needle.
- Again 2 knitting needles.
- Purlwise, slip 3 stitches onto a free needle and leave to work. Knit three, then transfer stitches from the auxiliary needle and knit in stockinette stitch. Knit two stitches, yarn over, knit stitch, yarn over, knit 2, slip 1 stitch onto a working needle, decrease two stitches. Pull out the thrown loop, knit 2, purl.
- Two knitting needles in stockinette stitch.
- Wrong side, 9 knit stitches, yarn over, knit stitch, yarn over. 3 knits, 3 knits. Cross the loop and 2 together. Pull the loop through, wrong side out. Rapport is ready. Continue this way until the toe of the mitten.
Watch the video for details on knitting this pattern. The craftswoman made double mittens with a knitted lining.
Video: Knitting Double mittens - Openwork leaves with braids. Part 1
Video: Knitting Double mittens - Openwork leaves with braids. Part 2
Video: Knitting Double mittens - Openwork leaves with braids. Part 3
Video: Knitting Double mittens - Openwork leaves with braids. Part 4
Video: Knitting Double mittens - Openwork leaves with braids. Part 5
Video: Knitting Double mittens - Openwork leaves with braids. Part 6
Video: Knitting Double mittens - Openwork leaves with braids. End.
Here are a few more openwork patterns for knitting mittens:
You can knit mittens and a shawl with this pattern to create an interesting set.

An original pattern that is easy to knit. Leaves and cones will perfectly decorate your mittens.

Beautiful diamonds stacked on top of each other will look great on the top of the mitten.

Mittens for lovers are stylish accessory, which symbolizes the warmth of feelings and unity. In these mittens, it’s nice to feel the warmth of your loved one while walking together in severe frost.

Knit mittens for lovers with knitting needles with a white heart on a red background, or vice versa, with a red heart on a white background. In addition, you can make a common mitten so that when walking along the city streets, you can always hold hands and bask in each other’s warmth.
Diagram describing a common mitten:
- The photo shows that the elastic band of the mitten for each hand is knitted separately. Knit 7 cm with a 2x2 pattern - 2 pieces. Cast on 16 stitches on each needle. We will knit with two knitting needles.
- Now connect two elastic bands on circular knitting needles.

Let's continue:
- Knit in stockinette stitch in the round. There is no need for a hole for fingers on such mittens. Therefore, knit 7-8 cm before starting to create the heart.
- Knit the heart according to the pattern, first making 6 loops in the middle of the knitting on one side, with white thread, through 2 loops.
- In the next row there will already be 7 loops with a white thread through one red thread. Next, continue according to the pattern, first knitting the loops with white thread, then decreasing white until one loop remains.
- Tie the toe of the mitten as described above and when 2 loops remain, tighten them and secure them on the wrong side.
Here are a few more photos of how you can knit mittens for lovers:


The pearl pattern is often used for knitting. Even a novice needlewoman can knit mittens with this pattern, as it is simple.
How to knit women's mittens with knitting needles pearl pattern? Scheme:


Description:
- 1st row alternates 1 knit stitch, 1 knit stitch.
- 2nd row - again alternate 1 purl and 1 knit, but knit a purl over the knit stitch of the previous row, and a knit stitch over the purl.
- Then repeat the 1st and 2nd row until the end of knitting.

Double mittens are convenient to wear in cold weather or when you want to play in the snow, especially for children. These mittens will not get wet quickly, and your hands will always be warm.

How to knit winter women's and men's double mittens with knitting needles? Some tips:
- If knitting is still difficult for you, then knit the inner and outer mittens separately.
- First knit the inner mitten. Then create the ribbing of the outer mitten and stockinette stitch to the base of the thumb. Pull the outer mitten over the inner one, straighten your finger so that it is on the outside and start tying it - it will be more convenient.
- To prevent the lower part of the mitten from slipping out, make a couple of stitches in several places of knitting and secure the parts.
- To knit the lower part of the mittens, use thin yarn, and for the upper part, use thick woolen thread. As a result, the mittens will turn out warm and beautiful.
Tip: You can link two mittens separately and then insert one into the other, connecting the bottom of the elastic using a regular needle and thread or crocheting the edges. You can also knit in one piece, and then insert one part into the other. A simple fold is formed exactly in the center of the knitted elastic band.
A classic of the genre - jacquard mittens for winter in Russia. The knitting is double and dense due to the interlacing of the threads different colors. The product will be warm, and your hands in such mittens will never freeze.
How to knit jacquard women's mittens? Scheme:
Beautiful and very stylish pattern. The diagram shows all the colors of the threads used.

These mittens are knitted from only two colors of yarn, but they look so interesting.

Jacquard pattern "Owl" - stylish and fashionable.

Jacquard pattern with deer. Only a true needlewoman can knit mittens with such an ornament.


Mittens with arans look luxurious. Products with this pattern are knitted for both adults and children. They turn out warm and beautiful.
How to knit women's long mittens with diamonds and arans using knitting needles? Schemes:

Important: Manizkas, snoods and hats turn out beautifully with this pattern. Therefore, you can knit a whole set - elegant and stylish.


You can knit warm down mittens from mohair. You can use any pattern. “Braids”, “Aranas” and others are suitable. Here are approximate patterns for knitting mohair mittens:


You just want to put on mittens with snowflakes and go for a walk in the cold, brushing snow off the branches of trees and bushes. Knitting such mittens is simple: cast on 44 loops, distribute them onto 4 knitting needles, knit a 2x2 (7 cm) elastic band and 7 cm in stockinette stitch. Next, leave a hole for the finger, as described above, and begin knitting the snowflake itself.
Below is a diagram and description of how to knit women's New Year's mittens with a snowflake. This pattern is also called “Norwegian”:


The elegance of the hand, the uniqueness of the image, the delicate style - all this is emphasized by the “Princess” mittens. An interesting pattern reminiscent of arans will make the products original and beautiful.
So, let's learn how to knit “Princess” mittens. Diagram and description:


Mittens of the "Princess" model can be associated with different patterns. For example, the drawing “Owls”.


The pattern with plaits looks beautiful on the mittens. Here is his knitting pattern:


A deer, like a snowflake, is a symbol of winter and the New Year. Therefore, for knitting sweaters, socks and mittens, a pattern depicting this animal is used.
How to knit men's and women's mittens with deer with knitting needles? Schemes, description:

Here is another pattern for knitting a deer on mittens.

Tip: You can come up with your own deer, draw a diagram yourself and knit mittens using it. The result is a unique and original accessory.

The strands on knitted items are intertwined in a chic and unusual way. Mittens with such a pattern will definitely attract attention. This accessory will add individuality and originality to your look.
Mittens with strands are easy to knit. Below is a diagram according to which you can create the outer part of the mitten on two knitting needles. On the other two knitting needles, the inner part of the product is knitted in stockinette stitch.

It is better to see clearly how to knit such patterns. The video explains in detail how to create an interesting accessory - mittens with cords.
Video: Knitting mittens with strands Part 2 Basic pattern.

Transformable mittens are convenient because when necessary, you can open your fingers without removing the product itself from your hand. These gloves make it convenient to use a mobile phone in the cold. It is also comfortable to work, for example, for trade workers if their activities take place on the street. When you need to accept and count money for a purchase, just remove the valve from the mitten and your fingers will be free.
Tip: Transformable mittens for men and women without fingers with a folding top are easy to knit. For a woman, you can take yarn in delicate shades: beige, white, pink, and for a man - blue, black, brown.
Diagram and description:
Knit these mittens using regular stockinette stitch. Elastic according to the pattern 1x1 or 2x2. Below is a knitting pattern for transformable mittens.

Job description:


The Braided pattern looks unusual. If you knit mittens using “Braid”, you will get a stylish accessory. This pattern is easy to knit - repeat repeating from the 9th row.
How to knit braided mittens with knitting needles? Scheme:

Description of knitting for this pattern:

Stages of work:
- First, knit 7 cm of elastic, casting on 36 loops and distributing them onto 4 knitting needles.
- Then knit in regular stockinette stitch on two needles, and the Braided pattern on the other two needles.
- Leave a hole for the toe and knit until the beginning of the toe.
- Now start making 2 stitch decreases on each needle: on the first two knitting needles first, and on the other two at the end of knitting.
- When there is 1 loop left on each knitting needle, pull them off and fasten them from the inside out.

Norwegian patterns are winter, trees, deer and snowflakes. Even if you knit only a snowflake, it will already be considered a pattern in the Norwegian or Scandinavian style. On mittens you can create deer, nature or snowflakes separately, or combine them in one pattern. There are no limits to imagination!
How to knit mittens “Norwegian patterns”? Diagram with description:
Important: When knitting such an ornament, it is important to be able to pull the thread, because you need to constantly change yarn from one color to another. Monitor the quality of the drawing so that the thread tension is uniform and the pattern does not lose its shape.


The drawing process is performed as follows: straighten the knitted loops on the right knitting needle, pull the thread along them, and index finger Hold the thread with your right hand, pressing it against the last knitted loop. On the wrong side, it is more convenient to press the thread with the thumb of your right hand.
Tip: On the right side, knit with knit stitches and pull the thread of the unused color so that it remains under the right needle. On the wrong side, knit with purl stitches and with your left hand, pull the other thread in front of the work and under the right needle. On the wrong side, the threads are pulled in front of the loops.

If you have learned how to thread a thread of a different color, then you can start knitting Norwegian patterns using any of the patterns. One cell in the diagram is one loop of a certain color.
Video: Knitting (mittens with “Norwegian pattern”)
This type of knitting can be done without broaches, but the fabric will be thinner than with broaches. Watch the video on how to knit jacquard without broaches.
Video: The simplest way to knit jacquard without broaches

How to knit mittens “Braid with shadow”: description

Look how original these mittens look. Unusual, and few women knit this way. Make these mittens with your own hands and surprise your friends and family.
Pattern for knitting an Indian wedge for mittens:
- Knit the back side of the mitten as usual - with any pattern or just with knit stitches. On the palm: 1st row- Knit 15, from the 16th loop knit 2 on the front and back walls, knit 4.
- 2nd row- Knit 15, from the 16th loop knit 2 on the front and back walls, knit 5.
- Knit further 15 rows according to this pattern with adding loops to the palm in each row. As a result, there should be 15+20 loops on the first two needles.
- In the 16th row remove the finger loops onto the thread, close the knitting in a circle and continue knitting until the required length of the mitten.

You have already knitted mittens in different patterns, but you want something unusual and original. Knit mittens from thick yarn. It will turn out very interesting, and the products will be warm and comfortable.
How to knit warm women's and men's mittens from thick yarn? To knit mittens from this yarn, cast on half as many stitches as to knit mittens from thin threads. But in order not to make a mistake with the number of loops, you need to make some calculations:
- Knit with a pattern of 10 cm thick yarn and calculate how many loops you have in 1 cm of knitting.
- Now you know how many stitches to cast on for one mitten - 18-20 or a little more.
Important: Knit mittens from thick yarn in simple patterns - knit or purl stitch, tangle stitch, and so on.
If you know how to not only knit, but also embroider, then you can create mittens beautiful model. Knit mittens in one color and make beautiful embroidery on the back.
Photo of mittens knitted with embroidery:


Knitted mittens with delicate embroidery: photo
Set - hat, snood and mittens knitted: photo of models
Knit a set for yourself, your child or your husband - a hat, snood and mittens. It will decorate any image, and things made by the hands of a loved one will warm you in severe frosts.
Set - hat, snood and mittens knitted - photo of models:
Beautiful products associated with the use of Arana and Braid patterns.

Set - hat, snood and mittens knitted in pink: photo of models
A dark set created using the Braid with Shadow pattern. It will look great with a coat or jacket in a contrasting color.

Set - hat, snood and mittens with knitting needles interesting pattern: photos of models
And again the green tint is the color of the Christmas tree. Aranas and braids decorate the hat, mittens and snood.

Green set - hat, snood and mittens knitted: photo of models
A gray set, but not at all boring, and even very stylish and interesting.

Gray set - hat, snood and mittens knitted: photo of models
And again the “Braids” pattern, but the set is already crocheted in beige. Classics always decorate and add originality to the image.

Set in beige color - hat, snood and knitted mittens: photo of models
Knit things with your own hands. Make your family and friends happy. If you knit a set, it can be an excellent gift, for example, for the New Year.
Video: KNOWN MITTENS. CHILDREN'S MITTENS FOR 2 YEARS OF AGE. HOW TO KNIT MITTENS OF ANY SIZE?
Everyone needs mittens in winter! To knit mittens on knitting needles, cast on: for children up to 32 loops, for women 36-40 loops, for men 48 loops. We will knit on 5 needles.
We select the yarn and knitting needles ourselves. I like to knit women's ones from goat down on the thinnest knitting needles. They turn out thin and fit tightly to the hand. One skein of yarn is enough for any size. It is better to knit mittens on thin knitting needles to keep them warmer. We knit the mittens in the top photo using needles No. 2 from NAKO Tweed yarn.
Description of knitting women's mittens. If you need child size, knit the same way, leave 5 loops on the finger, if for men - 8-10. The main thing is to understand the principle of knitting, and you can adjust the number of loops!
We cast on 41 loops, distribute them onto 4 knitting needles, and close them into a circle. . There are 40 loops left, 10 on each knitting needle. We knit 2 knit stitches, 2 purl stitches with an elastic band (you can knit 1 knit stitch, 1 purl stitch with an elastic band) to the required length.
In the next row we begin to knit a finger. To do this, remove 6 loops on a pin in the place where the thumb is planned. I take the middle loops on the second or third needle. And instead of them, in the same row I cast on 6 loops on a knitting needle. We continue to knit in stockinette stitch to the desired length. If I knit mittens for myself, I put them on my hand and knit until my little finger is hidden.
We begin to decrease the loops in each row. This can be done in different ways. Or we decrease the loops evenly in 4 places, then the mitten can be worn on either the right hand or the left. On each knitting needle, first knit 2 stitches together behind the front wall. (So connected in the top photo). Or knit the last 2 stitches together behind the back wall. This is how I launch men's and children's mittens.
Or we decrease it on both sides, then when knitting we determine exactly where the right is and where the left is. On the first knitting needle we knit 2 penultimate loops together behind the back wall, the last knit stitch, on the second knitting needle 1 knit, 2 together behind the front, on the third knitting needle 2 penultimate loops together, the last knit, on the fourth knitting needle 1 knit, 2 together behind the front wall.
We knit this way until there are 4 loops left. We knit two together, pull the last loop through the penultimate one, tighten. We cut the thread and pull it to the left side. We fix it.
 gray down mittens after several washes, they started up on both sides, black ones started up evenly
 We knit a finger. Description.
We remove the loops from the pin on one knitting needle. Next we will pick up loops along the edge of the hole. You should get 14-16 loops. If you have more, in the next row we knit the extra 2 together. I also measure the length of the finger by hand: I put on a mitten and knit until the finger is hidden. Then we decrease 2 at a time until one loop remains. Tighten and break the thread. We hide it on the left side and secure it.

Did you see that the gray mittens are without elastic? Just stockinette stitch and when I picked up the stitches, I made a thickened edge. I also liked the mittens, which do not have an elastic band on top, but 2 rows with purl stitches, 4 rows with knit stitches. 3 such purl “waves”.

Another way to knit a finger.

Look how good the mittens with a thickened edge look, knitted from “Winter Comfort” yarn (70% goat down, 30% acrylic, 100 g = 220 m) in green! I was amazed: the yarn did not fade, and after washing the mittens were no longer worn! The length of the cuffs of the mittens can be slightly adjusted: twist the edge (on the left in the photo) or straighten it, as on the right.
In order for the mitten to fit exactly on your hand, we will cast on 6 fewer loops on the knitting needles, because We will add these 6 loops when knitting the finger. Knit the required cuff length. In the diagram these are conditionally rows 1,2,3. (They need to be connected not 3, but 10-30 at your discretion.)

Left mitten. Description
On the first knitting needle we knit 3 knits. loops, yarn over, the remaining loops are knit. The next row is without additions. Do this 5 more times.
Now we remove 6 loops, which are after the increase track, onto a pin. Immediately make 6 yarn overs on the right loop. Now we knit a smooth fabric to the end of the little finger. We will make decreases according to the diagram (there it is indicated as row 20).
We knit the finger, adding 10 loops along the edge of the hole. We knit it exactly to the end of the finger (measure on the hand). Now we knit all the loops 2 together until 1 loop remains. We cut the thread, tighten it well and hide the tail on the left side of the mitten.
Right mitten
On the last knitting needle, without knitting 3 loops, we make a yarn over. And we knit everything the same way, only in a mirror image, i.e. We number the loops in the diagram not from right to left, but from left to right.
How to decorate mittens or see how to knit a finger with an “Indian wedge” is described in
I hope I wrote it clearly! If you have any questions, write a comment and I will answer!
How to knit mittens with a pattern.

We knit mittens with knitting needles in the round. We start with the cuff. We cast on the number of loops, a multiple of 4, + 1 loop. We knit an elastic band * 2 knits, 2 purl* of the required length. Approximately 5-8 cm.
Then we determine where the palm will be on the mitten and where the back side will be. On the back side we will knit a pattern according to the pattern.

How to knit 3 knits out of 3 knits?
Insert the right needle into 3 knit stitches as if we were going to knit them together. Pull out 1 loop (do not drop the loops from the left needle!), yarn over and pull out another knit stitch from the same place. Now we lower the loops from the left knitting needle. The description is not simple, but in fact it is easy to knit.
We knit the finger in any way. The palm is knitted in stockinette stitch. In the photo
Mittens with Indian wedge for thumb

You cast on, say, 44 loops, knit the cuff with an elastic band, or in another way.
After the cuff, you need to knit several rows of even fabric, let it be 5 rows. To do this, on the side of your palm you knit in stockinette stitch, and on the back of your hand you will knit the pattern you like.
All stitches are distributed equally on 4 knitting needles.
Now I will only talk about the palm.
We knit the right mitten.
22 palm loops.
We begin to form a wedge.
16 knit (I’ll explain why 16: the whole finger is 20, but after forming a wedge, you will pick up 4 loops along the edge of the body of the mitten for your finger), knit the next loop (17) behind the front and back walls (two loops are formed instead of 1), the remaining loops facial.
We knit the next and subsequent rows in the same way as the first: knit 16, 17 for the front and back walls, the rest knit. So you increase until you have 16 “extra” loops. after that, separate the right 16 loops onto a thread or pins, as is more convenient for you, connect them under the finger with the back side and knit the mitten to the end, as usual.
Finger.
Where the palm and back side, cast on 4 loops from the edge, slip the finger loops onto the knitting needles and knit the finger as usual.
Left glove.
Palm.
Knit 5, knit the next one behind the front and back walls (I turn this loop to face me, then the left and right mittens will look the same in the wedge area), knit 16.
Second row. K6, next to the front and back wall, k16.
If you need to widen your palm, then in the area “under the finger”, you will make the wedge 2-3 loops wider, but then for the finger you will cast on 2-3 more loops along the edge. But then gradually shorten these loops. My husband has a wide palm, so I add loops. Then I turn it down.
Mittens with bullfinches

You will need:
yarn “Pechorka merino” -100 g; NAZAR-RUS “Crystal” -50 g; VITA COCO - 50 g (100% mercerized cotton);
red, gray, black, white threads for finishing;
beads or small black beads - 10 pcs.;
black, red, white beads with a diameter of 10-12 mm;
silver sew-on snowflake sequins;
silver beads with a diameter of 0.3-0.4 mm for sewing snowflakes to mittens;
filling: for berries - holofiber, for bullfinches - padding polyester.
Tools:
stocking needles No. 3.0-3.5;
hook No. 1 (for apples);
hook No. 2 (for bullfinches, ties to mittens);
additional knitting needle (pin or marking rings for knitting);
device for making pompoms;
sewing needle.
How to knit MITTENS. Description
Cuffs:
1st row: We start knitting by using NAZAR-RUS “Crystal” yarn gray. We cast on 44 loops on stocking needles No. 3 and distribute them into 11 loops on each knitting needle. We knit in a circle with purl loops.
1st - 3rd row: purl.
4th - 5th row: knit.
6th - 8th row: purl.
9th - 10th row: knit.
11th - 13th row: purl.
14th - 15th row: knit.
16th - 18th row: purl.
19th - 20th row: knit.
21st - 23rd row: purl.
24th - 25th row: knit.
26th - 28th row: purl.
29th - 30th row: knit.
31st - 33rd row: purl.
34th - 35th row: knit.
36th row: knit in a circle *2 loops together with a knit stitch, 1 yarn over*. Repeat from * to * until the end of row 44 loops.
From the 37th to the 56th row: knit with facial loops in a circle.
Row 57: knit 2 stitches on the 1st needle, slip 7 stitches onto an additional needle (pin). We cast on an additional 7 loops to replace those removed, 2 knit ones. It turns out 11 loops, knitted with facial loops on the 1st knitting needle. Next we knit in a circle with knit stitches from the 2nd to the 4th needles.
From the 58th to the 84th row we knit with facial loops in a circle.
85th row: fold the 1st knitting needle with the 4th; The 2nd knitting needle with the 3rd and start knitting the rounded mittens. We knit 2 stitches from the 1st needle with a knit stitch behind the back wall, 9 knit stitches. 2nd knitting needle: knit 9 knit stitches, knit 2 knit stitches together behind the front wall from left to right; 3rd needle: 2 knit stitches behind the back wall, 9 knit stitches. 4th knitting needle: knit 9 knit stitches, knit 2 knit stitches together behind the front wall from left to right;
The 86th row and subsequent rows until the end of knitting: we knit according to the description of knitting the 85th row.
Thumb knitting
1st row: knit 7 loops from an auxiliary knitting needle, cast on 9 more loops in a circle on 2 knitting needles, for a total of 16 loops on 4 knitting needles in a circle, distributing them evenly, 4 loops on each knitting needle for ease of knitting.
From the 2nd to the 18th row: knit with facial loops in a circle.
From the 19th to the last row: we begin to decrease on 4 knitting needles, knitting 2 stitches each behind the back walls.
When there are 3 loops left on the knitting needle, knit them together with one knit stitch, break the thread and hide the tip.
We knit the second mitten in the same way as given in the description, only in a mirror image (direction).
BULLFINCH
We start knitting from the bullfinch's head with black yarn.
1st row: we collect a chain of 5 vp, close it into a ring. We tie the ring 10 tbsp. 6/n.
2nd row: knit 2 tbsp in each column. s/n. The total is 20 tbsp. s/n in the second row.
3rd row: knit 5 tbsp. s/n in 1 tbsp. s/n of the previous row, 1 tbsp. s/n, 2 tbsp. s/n in one loop, 1 tbsp. s/1n, 2 tbsp. s/n in one loop, 5 tbsp. s/n. in one column s/n of the previous row, * 2 tbsp. s/n. in one loop, 1 tbsp. s/n*. Alternate from * to * Knit to the end of the row.
Knitting a bullfinch breast
We begin knitting with red yarn.
1st row: insert the hook into the 3rd column of a fan of 5 columns with the “bullfinch’s head”. We knit 2 tbsp. s/n in the 3rd art. fans, 7 tbsp. s/n. In total we knitted 9 stitches. s/n. We continue knitting with gray yarn: 3 tbsp. s/n in each loop, 2 tbsp. s/n in one loop. Total - 5 tbsp. s/n. Turn the knitting.
2nd row: knit 5 tbsp with gray yarn. s/n in each base loop, knit 8 tbsp with red yarn. s/n, 2 tbsp. s/n in one loop. Turn the knitting.
3rd row: knit 10 stitches. s/n red yarn, gray yarn - 4 tbsp. s/n in each loop, 2 tbsp. s/n in one loop. Turn the knitting.
4th row: knit 6 tbsp. s/n gray yarn, red yarn - 9 tbsp. s/n in each loop, 2 tbsp. s/n in one loop. Turn the knitting.
5th row: red yarn 2 tbsp. knit s/n together, 9 tbsp, s/n, gray yarn - 6 tbsp. s/n. Turn the knitting.
6th row: gray yarn - 6 tbsp. s/n, red yarn - 10 tbsp. s/n. Turn the knitting.
7th row: red yarn 2 tbsp. knit s/n together, 8 tbsp, s/n, gray yarn - 5 tbsp. s/n, 2 tbsp. s/n in the first stitch of the previous row. Turn the knitting.
8th row: gray yarn - 7 tbsp. s/n, red yarn - 5 tbsp. s/n, *2 tbsp. knit s/n together* From * to * repeat 2 times. We break the thread.
Knitting a bullfinch tail
The tail is knitted with black yarn.
From 1st to 3rd row: 6 tbsp. s/n.
4th row: from the breast side we start decreasing. 2 tbsp. knit s/n together, 4 tbsp. s/n.
5th row: 5 tbsp. s/n.
6th row: 2 tbsp. knit s/n together, 3 tbsp. s/n.
7th row: 3 tbsp. s/n. We tie the bird along the contour with black yarn, st. 6/n., tie a beak on the head, art. s/n in 1 base loop.
Knitting a bullfinch wing
1st row: using gray yarn we cast on a chain of 5 vp, close it into a ring. We tie the ring 10 tbsp. b/n.
2nd row: knit in each st. b/n 2 tbsp. s/n. The total is 20 tbsp. s/n in the second row. 3rd row: 3 in. lifting item, *2 tbsp. s/n, 1 tbsp. s/n* repeat from * to *6 times, *2 tbsp. s/2n, 1 tbsp. s/2n* Repeat from * to * 3 times, 2 tbsp. s/2n. We break the thread.
We knit with black yarn: 3 tbsp. s/n, 3 tbsp. we knit s/n together. 4 tbsp. we knit s/n together, we tie the wing along the contour of st. non-woven black yarn. We sew the wing with threads to match the body of the bullfinch. We sew a black bead into the middle of the bird's head.
KNITTING BERRIES
1st row: with hook No. 1 we make a chain of 4 sts. p., tie the ring 6 tbsp. b/n (we use red yarn of a different shade).
2nd row: 12 tbsp. 6/n (2 items of art. b/n in each item)
3rd and 4th row: 12 tbsp. 6/n.
5th and 6th row: * 1 tbsp. 6/n, dec.* From * to * repeat 6 times.
7th row: stuff the berry with holofiber so that it is dense. Finish by making decreases. Using black VITA COCO yarn, sew a bead with a diameter of 0.3-0.4 mm crosswise to the base of the berry. On the other side of the base we knit from the 10th century. n. twig. We connect 5 pieces. berries between each other - 1 connecting loop 5 vp. twigs. We knit 3-4 ch. We cut the thread. We sew the twig from the wrong side to the bullfinch.
DESIGN
We sew bullfinches with apples with fishing line to the surface of the mittens. To add volume, we lay padding polyester under the bullfinches. We decorate the mittens with snowflake sequins using beads. We knit ties from 140 chain stitches and thread them into the mittens. Decorate with beads and attach pom-poms to the tips of the mittens.
Crochet mittens.
I knit mittens only with knitting needles. For those who want to crochet, I offer a pattern.

Anatomical mittens knitted.

These mittens fit tightly on the hand and never get lost. Knitted from thick country sheep wool.
How to knit mittens for different sizes.
Here the elastic is 48 loops, the pattern is 60 loops. Some mittens are knitted with knitting needles No. 2.5, the second with knitting needles No. 3.5.

You might be interested.
Nowadays, knitting as a type of needlework is coming back into fashion among craftswomen. On store shelves, just like 10-15 years ago, you can find colorful magazines with patterns, video tutorials on CDs, threads and knitting needles. Women most often knit warm clothes for their loved ones, children, parents and friends. It’s so nice to warm your loved ones in severe frosts. Each thing made with your own hands carries special energy and a positive charge. Therefore, it is recommended to knit only in good mood and peace. This master class will help you learn how to knit warm openwork mittens. To make openwork mittens with knitting needles, diagrams with descriptions must be used during work.
Your hands get cold very quickly in the cold, which brings discomfort and dry skin in the future.


To work you will need:
- stocking needles (No. 3.5);
- pins;
- Yarn “Favorit” (100 g), you can choose any color, MK shows an example with white color.
This master class with diagrams is shown using the example of working on a size seven product.
As expected, mittens for adults are knitted on four needles. The live creation process looks the same as in the photo:

Knitting of this product begins with an “elastic band”, which consists of two knit stitches and two purl stitches replacing each other.
For example, to create the left mitten, you need to cast on about 44 stitches. This means that at the beginning of work there should be 11 loops on the knitting needles.
The loops from the first and second knitting needles should be knitted strictly according to the pattern, and the loops for the cuffs, which are on the 3rd and 4th knitting needles, should be knitted with an elastic band:

Basic stages of knitting
Make 11 stitches from the first and second needles. Start knitting with four purl loops and finish with the same ones. When forming the sixth row, combine the loops on the first two needles and transfer them to one. This will make the work much easier and speed it up.
Work in row 6: purl four and knit five, then knit one on one pin and purl two on the other. Knit a knit stitch, purl two, then knit five and purl four.

Finish this row and start the next one. The second row is woven in the same way as the previous one. Having knitted 6 centimeters of mittens, finish working on the cuff and begin knitting the front elements from the second and third knitting needles.
After making 7 turns of the pattern, begin to form the hole for the thumb. To do this, knit 3 stitches, transfer seven stitches to a pin, cast on 7 stitches again and knit the last one. After this, knit circular rows to the required length, without changing the patterns of the design.
Once the little finger is completely closed, proceed to creating the toe of the openwork mitten, distributing the loops for this. Then knit three rows of knit stitches and decrease stitches on the first knitting needle: one knit stitch tilted to the left, knit the remaining two together. Next, make them knit with a slant to the left and tie the remaining links.

Reduce the elements until there are only three left. Knit them all with knit stitch. Knit the third knitting needle identically to the first. On the fourth, repeat the same steps as on the second. Knit the toe of the mitten in this way until only two loops remain on the knitting needles. Pull the remaining 8 loops together with a working thread and fasten them on the wrong side.
The knitting of the right openwork mitten should be symmetrical. The hole for the thumb should be made on the second knitting needle from the palm side: knit, slip 7 stitches onto a pin, cast on 7 more stitches and knit the remaining 3 stitches.
Next, as in working with the left mitten, begin creating the thumb. Return the previously removed seven stitches to the knitting needles, and also cast on 7 stitches on the parallel row and 3 stitches on the side rows. Distribute the loops so that there are 5 of them on the knitting needles. Knit in circular rows. Knit the first 2 sts from the needles together. These steps must be repeated until there are 8 loops left on the working tools. They will also need to be pulled together with a thread and secured from the inside out. The mittens are ready!