DIY cup. How to make a cup out of paper? How to make a cup out of paper - description with photos How to make a UEFA Cup out of paper
For competitions in kindergarten or school, you can make medals from cardboard on satin ribbons, and for the winner - a beautiful paper cup. We will tell you later in the article how to make different versions of such crafts. It is recommended to prepare such prizes for children's parties to present to the winners of fun competitions. The kids will definitely like this gift, and its availability must be announced in advance to provide a greater incentive to win.
How to make a cup out of paper with your own hands? It's not difficult. There are several original ways to assemble a voluminous craft. A reliable and durable cup will be made using the papier-mâché technique; a craft made from individual elements looks great.
The cup consists of 4 parts. This is a stand, a thin leg, the actual container of the cup and curved handles on both sides. It is not the flat drawn prize that looks beautiful, but the voluminous one, which is solemnly handed over to the winner.
Material for work
To convey the required shape of the craft, use two disposable paper cups of different sizes. You can buy a shot glass for the bottom stand, and a large 200 gram glass for the goblet itself.
Between them is a thin support made from a toilet paper roll. It can be installed on a tight circle or square. Carved curved handles are first drawn on cardboard and then cut along the contours with scissors. Connect the structural parts with PVA glue or transparent tape.
Cup decoration
The finished craft can be painted from a spray can or with a gouache brush. You can decorate the cup with stickers in the shape of stars or hearts, place flowers or geometric shapes. The design depends on the purpose of the prize.

If it is given for sports achievements, then you can draw balls, shuttlecocks or rackets, skis or other equipment. If an artist is awarded, they depict a brush and paints, a palette, or put multi-colored blots.
Papier-mâché version
A cup glued together from cardboard can be wrapped in cling film and pasted over with pieces of paper in several layers. The first layer is not spread with paste, but the paper is simply dipped in water and applied to the polyethylene. The remaining 5 or 6 layers are glued alternately. It is more convenient to use different types of paper, for example, newspaper and white sheet. Then it will be clearly visible whether the surface of the craft is completely covered or whether there are voids left.
Papier-mâché takes several days to dry, so you need to make the craft in advance. When all the layers have dried, cut one side of the cup and take out the base on which it was assembled. The cut is sealed with a layer of paper, and the surface is decorated as desired.
Now you know how to make a paper cup in a simple way and can complete the craft yourself. Good luck!
In any competition there are always winners, which means they must be awarded with medals and cups. However, it is not always possible to purchase ready-made cups to reward competition participants. And then creativity and the desire to make things with your own hands come to the rescue.
In this article we have prepared for you an excellent master class on making a paper cup. Such a voluminous craft can be not only an excellent option for awarding the winners of absolutely any competition, but also, for example, original packaging for sweets and other small gifts.

To make a cup with your own hands, you will need the following materials: cup parts templates (attached below), glue, thick double-sided paper or soft cardboard, ruler, pencil and scissors.
Cup template

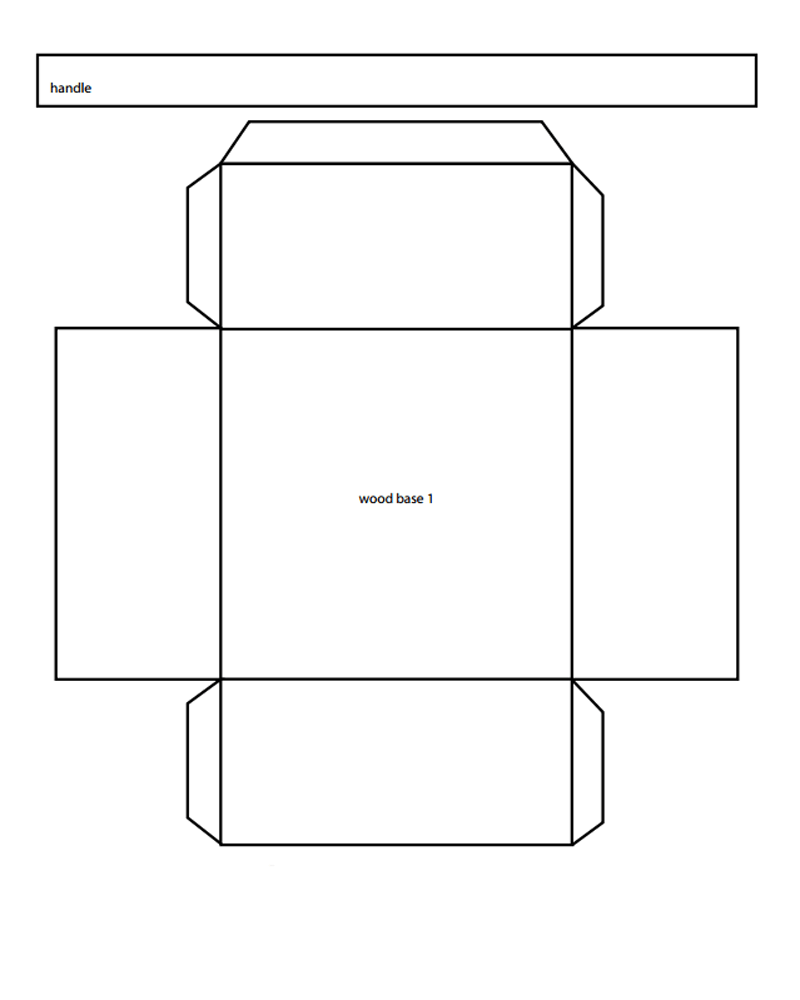

First of all, print out ready-made templates of the necessary parts to create a paper cup. Then transfer the templates onto colored decorative paper or soft cardboard. Carefully cut and glue together.
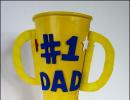
Write the required information on the cup. This could be a congratulation, the name and surname of the winner, or 1st, 2nd or 3rd place.
Video master class:
Why buy a ready-made, factory-made cup when it would be more fun to make your own? The basis of a homemade cup can be a paper cup or even a glass goblet with a stem. This cup is perfect for celebrating an event or giving someone an interesting gift. Making your own unique cup would be a great DIY project. At the same time, for work you can take those available materials that you already have at home.
Steps
Making a cup from a paper cup
- The cardboard can be taken from a cardboard box or from a package of breakfast cereals or other products.
-
Draw the outline of the cup handle on paper. Take a piece of paper and draw a cup handle on it. Make sure that the height is approximately the same as the height of the paper cup. The specific shape of the handle can be whatever you want. The decision is up to you.
Cut out the handle and base of the goblet. Take scissors and cut out a cup handle from paper. You will also need a base for the cup, so draw a square or circle on paper and cut that out too.
- The size of the base is up to you, but remember that it should be slightly larger than the diameter of the top of the paper cup. This way the cup can rest securely on the base and not fall.
-
Transfer the outlines of the paper parts of the handle and base onto the cardboard, and then cut them out. Taking the paper blanks for the handle and base that you just made, transfer their outlines onto the cardboard. You will need to trace the handle blank on cardboard twice to make two of these cardboard pieces. Next, take your scissors and cut out both cardboard arms and the base.
Paint the details of the cup. Prepare the paint. You will need to paint the outside of the toilet paper tube and also paint the paper cup inside and out (you don't have to paint the bottom). The handles and base of the cup should also be painted.
- The choice of paint is up to you, the main thing is that all parts are the same color.
-
Decorate a paper cup and toilet paper tube. At your discretion, use crayons, paints, or otherwise decorate the previously painted paper cup and toilet paper tube. Here you can draw stars or sign the name of the cup itself with a marker.
- You can also decorate the cup in other ways, including adding glitter or plastic stars to it. Give free rein to your imagination and enjoy creative work.
-
Glue the handles to the goblet. Tuck a small section of paper under each end of both handles. Do this in such a way that with these folds the handles can be glued to the paper cup. Then glue the handles to the sides of the glass.
- If the ends of the handles do not correspond to the angle of inclination of the walls of the paper cup, they can be pre-trimmed.
-
Glue the remaining parts of the cup together. Glue one end of a toilet paper tube to the base of the cup. Then glue the other end to the bottom of the paper cup.
To make a cup from a paper cup, you need to take paper, a pencil or pen, cardboard, a paper cup, a toilet paper roll tube, paints and a brush, a marker, PVA glue and scissors.
Making a cup from a glass
- You can take any brand of plasticine. The main thing is that it hardens in the air.
-
Make the handles of the cup from hardening plasticine. Make two handles for the cup from plasticine. Place the handles on top of each other to check that they are the same size and shape. If necessary, shorten and correct the parts to make them exactly the same.
Wait for the plasticine handles to dry. It will take about 24 hours for the plasticine to completely harden. Therefore, wait one day before proceeding.
Glue the handles to the glass. Use a glue gun to glue the handles to your wine or champagne glass. Let the hot glue set for a few minutes before continuing.
Paint the cup first with primer and then with paint. Prepare the cup for painting by applying a spray primer. Then spray paint the cup.
Decorate the cup. Once the paint is dry, you can decorate the cup the way you like. Use a permanent marker or acrylic paint to label the name of the goblet, or add small embellishments to the goblet.
Gather the necessary materials. To transform a glass into a goblet, you will need a stemmed wine or champagne glass, some hardening clay, a hot glue gun, spray paint, and a spray paint primer.
Updating the old cup
-
Find an old cup. If you have an old cup lying around somewhere, try to find it. An old cup that is lying around somewhere useless and takes up extra space can be given a second life if you paint it and put skillful hands to work.
- Before you do anything with the old cup, make sure no one in the family objects to it.
Gather the necessary materials. You will need spray paint, craft decorations, spray glue (optional), plain glue, scissors, markers and paper.
Cups are made from various materials - metal, glass, wood, etc. But you can make them from what you always have on hand. For example, using a plastic bottle and the papier-mâché technique familiar from childhood.
You will need
- plastic bottle
- cardboard
- paper or newspaper
- PVA glue
- acrylic paint
Instructions
- Take a plastic bottle and cut off about a third of the top.
Cut a circle with a diameter of 6-7 cm from ordinary cardboard and attach it to the neck of the bottle using masking tape. - Apply pieces of paper or newspapers to the workpiece in several layers, lubricating them with PVA glue or some other glue options (approx. Their recipes, as well as other papier-mâché techniques, can be found on the Internet). To prevent the mixture from sticking to your hands, periodically moisten them with water.
Wait until the mixture dries completely. - Level the product by carefully trimming the edges and sanding it using sandpaper.
Prime the product by applying the primer in thin layers. Wait for each coat to dry before applying the next. - Cover the piece with metallic acrylic paint.
Decorate cup rhinestones, beads or other decorative elements, depending on your imagination. Attach them with super glue.