Easy and simple patterns for dressing gowns: we sew them ourselves. Pattern "children's robe with a hood": various styles and modeling options Sew a robe for a girl from flannel
Every person enjoys wrapping themselves in a warm and cozy robe. You can sew it yourself. This clothing has a large number of varieties, but the general principles of creating patterns and sewing are similar in different cases. By choosing the appropriate option, you can create comfortable and cozy home clothes for yourself or your loved ones.
Requirements for home clothes
Unlike the gowns worn by doctors and nurses, when choosing home clothes, they are usually guided by the following wishes:
- I would like convenience and practicality.
- The preferred materials for manufacturing are natural.
- Choose light home clothes according to your tastes.
- It is desirable that a variety of options be provided.
An important role is played by the fact that it should be suitable in a situation where you have to welcome unexpected guests. There are various styles that are suitable for any age: both a young girl and an old grandfather.
Ready-made patterns
This type of home clothing has many varieties. Below are some of the most popular ones.
Wrap with lace
Such a robe is necessary to emphasize femininity and not leave a man indifferent. There are a large number of styles. Lace can go well with a variety of materials.
The long version is well suited for women of all ages. If the average length is used, then this style emphasizes the dignity of the figure. The short style is more suitable for romantic meetings.
Kimono "Yukata"
Here we are talking about a kimono made of cotton fabric. Such clothes are often used at home or while out of town. To make it, they usually use fabric with a discreet gray or blue pattern on a white background.
 Kimono Yukata
 In these clothes, the cut for women or men is the same. Usually the style is the same for people of different sizes. It’s just that those who are more comfortable this way smell more strongly.
To make this type of clothing, take a piece of natural fabric 150 cm wide and 300 cm long. Before you start sewing, you need to wash the cotton fabric. This is important because it shrinks after washing. By doing this in advance, you can be sure that the dimensions will be kept exactly. A master class on sewing a kimono is outlined below.
The cutting is done in accordance with the given drawing.
 Yukata kimono pattern
 The fabric should be spread on the floor and the necessary lines should be made with chalk or a piece of soap. The length of the belt should be three times the length of your waist.
Sewing occurs as follows:
- First, the sleeves are processed. These parts are folded in half. The sleeves are short. The fold of the fabric is located at the top. Since the opening is wide, the sleeve is sewn up from the bottom and outside. A 15 cm hole is left for the arms. The hemmed lower part of the sleeve is used as a small pocket for small items.
- The wrap is attached to the front, starting from the bottom edge. It should be taken into account that the upper edge is beveled.
- The neckline is being stitched.
- Now all that remains is to fold the parts in the waist part in half and place the front part inward.
The finished kimono must be carefully folded and ironed. The pattern for creating a men's robe of this type is done in a completely similar way.
 Kimono sleeve pattern
 Children's robe with hood
Before you start sewing a children's robe yourself, you need to choose the most suitable style. There is a wide range of options - some of them are simple, while others are very complex.
 Children's robe with hood
 For work, you can purchase terry cloth or use an existing terry towel of a size sufficient for the child. To determine the amount of material needed. You must first prepare a pattern, and then make calculations based on it.
 Children's robe with hood
 If these clothes are being made for a 9 year old girl, then to create the pattern you will need to take the following measurements:
- Chest circumference.
- The circumference of the hips should be measured in accordance with the line of the buttocks.
- The length should be measured from the point where the shoulder line crosses the neck.
- To get a measurement for arm length, you need to spread your arms horizontally to the sides and measure the distance between your hands yourself.
In the simplest version, you can use a terry towel of sufficient size for sewing. This robe is suitable not only for girls, but also for boys. A hole is made in the middle for the head and folded in half lengthwise. The child stands with his arms horizontal. The fabric is cut and hemmed to suit his figure. In this case, the hood is made separately and sewn to the hole made.
How to sew a robe without sleeves and without side seams
To sew such a model of clothing, you need an appropriate pattern. In this case, it is made from one piece of fabric. In this case, the seams in the upper part are made between the back and the shelf.
 Robe without side seams
 When drawing up a pattern, the master must take into account that in this case a rectangle is taken as a basis.
The width is determined by the circumference of the hips, which should be increased by approximately 12 cm. The length is selected based on the taste of the tailor. The depth of the neck and the height of the barrel are determined in accordance with the measurements taken.
 Pattern without side seams
 Sewing is done as follows:
- The sleeve opening is trimmed using a zigzag stitch.
- In order to connect the shelf and the back, you need to sew the top seam.
- The edges of the fabric on the neck and sleeves need to be processed.
- The neck must be decorated using finishing material.
- The bottom must be folded and stitched.
After this, the robe will be ready. You can not only use it at home, but also take it with you on long trips to Russian Railways.
DIY robe with zipper
Before sewing, you need to choose the style you like. In this case, the following must be determined:
- The size of the robe.
- The presence of a hood.
- Will there be sleeves and what length should they be?
- It is necessary to determine whether the collar goes with the robe.
For summer, a fitted style without sleeves or with very short ones is suitable. In colder seasons, it is better to wear clothes with full-length or three-quarter length sleeves. Typically, patch pockets are used for such a robe.
 Robe with zipper
 Since we are talking about a tight-fitting garment with a zipper, it is possible to base this pattern on a tank top. You need to choose one that does not restrict movement.
 Diagram of a robe with a zipper
 To create a pattern, do the following:
- The shirt needs to be ironed and folded in half.
- The T-shirt should be placed on paper, and the edges should be pinned. Next, draw a pattern. In this case, you will need to make allowances so that the clothes fit loosely.
- To pattern the sleeves, you can simply extend the sleeves of the T-shirt to the desired length.
- You need to choose what the fit and collar will be.
- If you plan to have a hood, then its pattern can be made from an old item that has one.
- Pockets can be of any shape; appropriate patterns must be prepared for them.
After the pattern is prepared, sewing is done based on it. In a made-to-measure robe, a woman will look impressive, even if she is wearing curlers.
Bathrobe
A pattern for a women's robe with buttons, size 48, will require the use of a fabric width of 150 cm equal to the sum of the distance from the shoulders to the bottom and the length of the arms. For larger sizes, you will need to use double the length of the robe.
 Bathrobe
 In order to fit a pattern for a women's robe with buttons, you need to clarify your measurements and make the necessary adjustments to the pattern.
The width of the smell should be from 12 to 15 cm.
It is necessary to use a fabric that absorbs water well (for example, waffle fabric).
 Drawing for a bathrobe
 When cutting on terry fabric, it is not possible to use chalk for marking. In this case, it will be convenient to attach paper drawings to the fabric with pins.
Step-by-step sewing instructions look like this:
- First, when sewing, the back and shoulder seams are machined.
- Hem the edges of the pockets and attach them to the main part of the robe.
- It is necessary to stitch the hem, collar and hem on the other side.
- Sew the finishing stitch on the collar and hems.
- Sew the sleeves.
- Sew the bottom of the product and the edges of the sleeves using an overlocker.
- Make a belt. To do this, make a 0.5 cm stitch along the edge of the wrong side. In this case, you need to leave a small hole. Then it is turned right side out and the hole is sutured.
- Try on and determine the full length of the sleeves. After that you need to sew them on.
At the end, belt loops are made through which the belt will be threaded. After this, the production of the terry robe is completed. It's warm and cozy even if it's frosty outside.
Dress robe made of textile fabric
When using textile fabric there are some peculiarities. In this case, it is recommended to make holes for the belt. They must be processed and provided with an adhesive lining inside.
The sundress pattern is made in such a way that there are no side connecting seams. Clothes are made from one piece of fabric. You can comfortably walk around the house or lie in bed in it.
Dress robe made of knitted fabric
This pattern can be made in the following way:
- A piece of fabric is folded in half lengthwise. This way the middle of the back will be marked in accordance with the pattern of the terry robe.
- Fold again widthwise. This will create the middle of the shoulder.
- The resulting lines are marked with chalk.
- Now all that remains is to cut the neckline.
When sewing, all cuts will need to be folded and sewn. It is necessary to install ties at the waist level.
This pattern for a robe will be convenient for soft fabric of medium thickness.
 Children's robe
 Fabric selection
You can use different types of fabric for a robe:
- Synthetics look beautiful, are durable and have a longer service life, while being electrified and poorly breathable.
- Sometimes Yorkie fabrics are used.
- Bamboo fiber works well, but is an expensive material.
- Cotton is also often used to make robes.
- Silk robes are beautiful and practical, but are not suitable for everyday wear.
Terry cloth robes are widely popular.
Calculation of the amount of fabric
The amount of fabric required to sew a robe depends on the style chosen. Once the pattern is prepared, you can determine which cut will be needed for sewing.
How to start sewing
Making a flannel robe using a size 46-48 pattern requires care and attention. It is available not only to experienced craftswomen, but also to those who are just learning.
Taking measurements
Typically, to sew these clothes, you need to take the following measurements:
- neck, chest, waist circumference;
- shoulder girth, sleeves;
- dress length;
- back width.
These measurements are important to ensure that clothing fits your body well. Based on these measurements, patterns are drawn up. For the base, you can take a standard one and make adjustments according to the measurements taken. In this case, the drawings will change slightly.
 Taking measurements
 Cut on fabric
A pattern for sewing a dressing gown can be made using pre-made drawings on paper or directly on fabric.
The basis for the manufacture of this clothing is a standard pattern.
 Standard pattern
 Sewing the product
- The shoulder seams are done first. After they have been stitched, it is necessary to iron the allowances and do this towards the back.
- The sleeve must be sewn taking into account the marks made in advance. The allowances should be ironed towards the sleeves.
- The side seams and those on the sleeves are sewn together with one seam. They need to be ironed towards the shelves.
- Now you need to sew the bindings. At the same time, they are folded in half lengthwise. The fold lines need to be ironed. The trim and the edge of the robe must be folded right sides together and sewn using a hidden seam.
After this, the main part of the robe can be considered ready.
 Wraparound robe
 Design of sleeves and details
The edging for the outer edge of the sleeves can be made using binding
For decoration, you can sew a pocket onto the robe.
To make a belt, you need to stitch it, cutting off the corners, and turn it inside out. The open seam must be done all the way to the edge. In this case, on both sides it is necessary to bend the edge by one centimeter.
How to sew without creating a pattern
To make a dressing gown with your own hands, a simple pattern looks like this.
To do this, just take a rectangular piece of suitable fabric. In this case, the corners must be trimmed to make them rounded.
 Make a robe without cutting
 The dimensions should be as follows. The length of this solid cut should exceed the woman’s height. The width is required so that the fabric can be wrapped around the body with the smell.
For quick sewing, you need to make cuts for the arms. To determine their location, you need:
- Draw a vertical line in the center of a piece of fabric with chalk or a bar of soap.
- The height is measured from the bottom of the robe to the bottom of the armpits.
- A horizontal line is made at this point; it should correspond to the width of the shoulders.
- From the last segment, two vertical segments are laid upward. At this point there will be slits in the fabric for the arms.
After the holes for the arms are made, the part of the fabric that is above the shoulders is folded and falls freely onto the back. Now, in order to wear a robe, you will also need to make a belt. You can look at it before sewing the robe. What this style looks like when you make it for a doll.
 Robe with lace
 A robe is a cozy home garment that emphasizes the style of the housewife. To make it, you can use various styles. Usually, making such clothes is not difficult even for a beginning craftswoman.
Today I’ll show you how to sew a children’s warm terry robe with a hood and set-in sleeves. Sewing is quick and easy. For a robe for a height of 134-140 cm, it took me exactly 1.5 m of fabric with a width of 150 cm. Terry fabric, 100% cotton, color: salad. I will sew the robe on an overlocker and a little on a sewing machine. If you don’t have an overlocker, you can sew on a sewing machine using an overlock foot or special stitches.

We secure the hem detail with a stitch, departing 2 cm from the bottom cut, where it is marked with a dotted line.

Cut off the excess as noted in the photo below.

Then we overlock the bottom edge of the robe (hem). We bend the hem to the wrong side, straighten the corner, bend the bottom edge by 2 cm and make a straight line where it is marked with clips.

Iron the lining and trim of the hood. We lay a finishing stitch along the edge of the lining and facing of the hood, securing them.


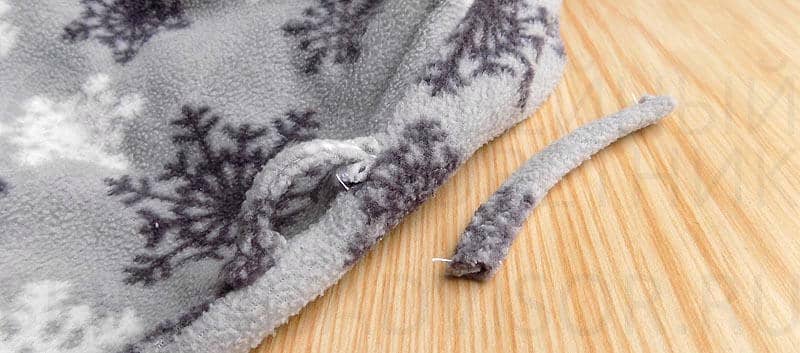
We also sew the cut of the sleeve on the overlocker, bend it (adjusting the length of the sleeve) and lay a straight line.

Let's move on to the detail of the belt.

We bend the belt lengthwise and stitch it down, leaving room for turning it inside out. Turn it right side out.

Sew up the hole and iron it.

From the remaining fabric we cut strips for belt loops of the required size. I have 2 strips 4x14 cm. We overcast the strips on all sides, bend them on both sides and lay a straight stitch along the entire length. On the side seam of the robe we mark the places for the belt loops.

Having folded the edges, we sew on the belt loops, laying the lines where it is marked with a dotted line.

Let's move on to the pockets. We cut out the parts for the pockets of the required size. I have 2 pieces measuring 25x18 cm. We also sew the edges using an overlocker.

Fold the top edge of the pocket to the wrong side and sew a straight line where it is marked with a dotted line.

We mark a place for the pocket. Place the pocket, folding the edges and sew a straight line where marked with a dotted line. We put fasteners for security.


The children's warm terry robe is ready.

This is how it looks on my eldest daughter. Veronica is 8 years old, height 133 cm. I took the pattern a little to allow for a height of 140 cm.
Every mother takes care of her baby's delicate skin. What if not a warm and soft children's very warm terry robe, which we will make with a hood, will warm the baby after bathing and will not damage his delicate skin. How to do it yourself? - Let's figure it out further.
How to make a children's terry robe with a hood: dimensions and corresponding parameters
In this case, only Russian sizes are considered. To these parameters, when making patterns, you need to add one and a half centimeters as an allowance.
- Size eighty-six corresponds to a child aged one and a half years. Parameters (minimum):
chest circumference - fifty-two;
waist circumference - forty-nine;
hip circumference – fifty-two.
- Size ninety-eight corresponds to a child aged three years. Minimum parameters: chest circumference - fifty-four;
waist circumference - fifty-one;
hip circumference – fifty-five.
- Size one hundred and four corresponds to a child aged four years. Minimum parameters:
chest circumference - fifty-five;
waist circumference - fifty-two;
hip circumference – fifty-seven.
- Size one hundred and ten corresponds to a child aged five years. Minimum parameters:
chest circumference - fifty-six;
waist circumference - fifty-three;
hip circumference - fifty-nine;
- Size one hundred sixteen corresponds to a child aged six years. Minimum parameters:
chest circumference - fifty-seven;
waist circumference - fifty-four;
hip coverage - sixty-one;
- Size one hundred and twenty-two corresponds to a child aged seven years. Minimum parameters:
chest circumference - fifty-eight;
waist circumference - fifty-five;
hip circumference – sixty-three.
- Size one hundred and twenty-eight corresponds to a child aged eight years. Minimum parameters:
chest circumference - sixty-one;
waist circumference - fifty-seven;
hip circumference – sixty-six.
- Size one hundred and forty corresponds to a child aged ten years. Minimum parameters:
chest girth – sixty-seven;
waist circumference - fifty-nine;
hip circumference – seventy-two.
To sew a terry robe for a girl you will need:
- Finished pattern on cardboard (in this case, size one hundred and fourth);
- Terry cloth (or large terry towel);
- Sewing machine;
- Scissors;
- Iron;
First you need to do the cutting. To do this, lay out all parts of the pattern on the fabric and outline it with chalk. After which, they are carefully cut out using scissors. On finished parts, it is necessary to retreat an allowance of one and a half centimeters on all sides of the product and outline the resulting internal contour with chalk.
As a result, you should get the following number of parts:
- One back piece (with fold);
- Two front parts;
- Two hood parts;
- Two sleeve parts;
- One belt piece.

Sewing is performed in the following steps:
- Belt. Fold the piece in half and stitch it using a sewing machine on three sides, leaving a small hole in the third side. It is necessary to sew from the wrong side. Through the space left, turn the product right side out. We manually sew up the hole and steam the finished belt with an iron.
- We place the parts of the front and back on top of each other and join them at the shoulders. Double stitch the shoulders and side seams. All resulting seams are carefully steamed with an iron.
- Next, you need to attach the sleeves, sew them at the joints and steam them well using an iron.
- If desired, you can attach several loops under the belt at the waist line.
- We sew the hood and attach the finished product to the robe. The seams are also steamed with an iron.
Before wearing, the robe must be washed and ironed well with a steam iron.
We sew a warm robe model from high-quality material without patterns

You will need:
- Large terry towel;
- A little fabric (about half a meter);
- A sweater or jacket that fits loosely on the child.

The production of a robe takes place in the following steps:
- Fold the towel in four layers;
- Place the sweater or jacket on the towel so that the central corner of the towel meets the middle of the neck;
- We retreat fifteen centimeters from the edges of the clothing and cut out the product, leaving the upper part uncut (shown in the figure);
- Next, you need to open the towel so that a two-layer letter T is formed;
- Cut the front panel in the middle;
- We make a triangular hood from two cut pieces of a towel;
- Sew the hood to the base of the robe;
- Sew the seams of the sleeves and sides of the robe;
- We make a belt from half a meter of loose fabric and use it to decorate the robe as desired.
- Before putting on, the robe must be washed and steamed well with a steam iron.

By following all the rules of cutting and sewing, making a children's robe is very simple. This process will not take much time and will bring a lot of pleasure from the result!
Video on the topic of the article
Many people prefer to sew their own clothes. In order for the product to be of high quality, the craftsman needs a pattern. A children's robe with a hood can be made in several different ways. This will be discussed in this article.
Cutting a robe from a terry towel
There is a model that can be made in literally half an hour. It doesn't even need a pattern. In this case, a children's robe with a hood is made very simply: a neck is cut out in the middle of the towel. The hood is stitched to the neckline. The difficulty in making this model may lie in its cutting.
If the master has imagination and time, you can not just use a towel with a ready-made pattern. Using the appliqué technique, it is easy to create an exclusive and creative outfit, which may become your child’s favorite attire.
To decorate an outfit, you need to take fabric of a different color and even a different texture, for example, satin or silk. Applique details are cut out of it - in this version it is the body of a dolphin and its light belly.
You can purchase a second towel in a light blue color and a smaller size. An animal figure and a hood are cut out of it.
Instructions for sewing a robe from a towel
- The main towel is folded in half crosswise.
- A neckline is cut out in the center.
- A hood and a dolphin figure are cut out of a smaller towel. The proposed pattern will help with this. A children's robe with a hood will turn out beautiful if the applique is not very thick.
- An overlay for the abdomen is cut out of a light, smooth, plain fabric.
- The figure of the dolphin itself is sewn onto the chest so that the hood seems to serve as a continuation - the head of the animal.
- Be sure to process the edge of the hood. It is recommended to do this either with a hem or use bias tape.
- The hood is then sewn to the neckline. A bed stitch should be used.
- The eyes and mouth of a dolphin are embroidered on the hood.
- The light belly is located in the third layer. It is sewn on top of an applique that imitates the body of a dolphin.
- The edge of the neckline without a hood at the front of the product is treated with bias tape.
- If desired, the master can make a belt for the robe. Or you can sew large buttons on the sides and sew loops.
One-piece robe, flared at the bottom
If the span of the baby’s arms between the hands is not so large and fits into the width of the fabric, the pattern proposed below will help make such a model. The children's robe with a hood has no shoulder seams. Only the sidewalls are subject to stitching.

The model with contrasting lapels and large patch pockets looks very nice. But you can also sew a plain children’s robe with a hood. The pattern offered here can be used to sew garments of different sizes. It is only important to take into account the length of the product, the semi-circumference of the chest and the length of the sleeve.
Creating a pattern for a one-piece robe with a straight silhouette
A cool outfit with ears on the hood will delight both the baby and his loved ones. It looks like a fancy dress, so it gives only positive emotions. And it’s so easy to sew this children’s robe with a hood yourself. The pattern for making this outfit is quite simple.

- You need to draw a rectangle with one side equal to half the length of the span between the hands (size B). The second side can be arbitrary - this is the width of the sleeve folded in half at the shoulder (size D). The rectangle is positioned so that the longer side is horizontal.
- The second rectangle is built perpendicular to the first, placing them one on top of the other with the letter “G”. One side of the figure is equal to the length of the robe (size A), the other is half the chest circumference plus 2 centimeters.
- Using an arc, the lateral axillary part is formed at the site of the internal right angle.
- From the top of the connection of two right angles of both rectangles (at the upper left point), 6 cm is laid to the right and 3 cm down. These marks are smoothly connected with an arc. This is the back neckline.
- From the same top, 7 cm is laid down and connected with an arc to the point 6 cm. This will be the front neckline. In the drawing this line is highlighted in red.
- A scent is formed at the front of any size. It is highlighted in the drawing with a red line.
Usually craftsmen make their own patterns for children's dressing gowns. The hood can be a rectangle folded across, stitched together with a “bag”. But you can use the patterns suggested here. Ears are used as decoration.
Robe with yoke and sewn-in sleeves
Older girls already want to emphasize their femininity. Therefore, a model with a yoke will suit them. The shelves are slightly seated during stitching, which creates the effect of some pomp in the chest area.

This model requires some skill. But with enough care and attention, you can get a very decent children's bathrobe with a hood. The back pattern is placed on the fold of the folded fabric.
The shelves are also cut out after the fabric is folded with the right side inward. But in this case you should get 2 parts. The same goes for cutting sleeves and yokes.
Everyone needs a robe with a hood! We suggest you sew a robe with a wide hood, a belt and a patch pocket. Our master class will tell you how to create a simple pattern and show you how to sew a robe with a hood with your own hands.
Robe with a hood: choosing fabric
How to sew a robe with a hood with your own hands? This robe fits freely on the figure, so its cutting and sewing does not require darts or raised seams.Pay special attention to the choice of fabric! A soft, warm fabric is best: cotton terry, flannel, cotton velvet, or cozy fleece. You can also use this pattern to sew a light summer robe from thin knitwear or silk. To accurately calculate the amount of fabric, construct all the pattern pieces and lay them out, taking into account allowances, on a flat surface. Measure the required size, taking into account the width of the fabric.
Depending on the type of fabric, select the method for processing seam allowances. The easiest way is to use an overlocker. Also, if the fabric is thin enough, you can finish the seam allowances with a double French seam, and if the fabric is too thick, use silky bias tape.
Our robe is tied with a belt, its length on average is equal to double the waist circumference plus 20-30 cm. We made one patch pocket on the robe, and you can add another one symmetrically or sew a robe without pockets.
So, let's sew a robe with a hood with your own hands!
Take the following measurements
- Robe length
- Sleeve length
- Hip circumference
- Bust
- Waist circumference
Front and back
You'll need a T-shirt or other piece of clothing that fits loosely. Copy the neckline and armhole, as well as the shoulder line, onto a piece of paper, first for the back, then for the front.

Place the desired length of the robe down from the top of the shoulder. The width of the front and back under the lower point of the armhole should be 1-2 cm greater than 1/4 of the chest circumference. Compare the circumferences of the chest, waist and hips. If the waist and hip circumference is larger than the chest circumference, expand the width of the back and front by the required number of centimeters.

Add 7-10 cm in the center of the front and draw a new vertical line.
Sleeve
Measure the length of the armhole on the robe pattern. Calculate the height of the edging OO1 by dividing the length of the armhole by 3 and minus 5 cm, as well as the length of the auxiliary lines OP and OP1: half the length of the armhole according to the pattern.
From point O, set the height of the edge down and place point O1. Through O1 draw a horizontal line PP1.
From point O to the left and right, set aside the length of the auxiliary line of the sleeve edge OP and OP1. Divide the OP in half and set aside 1.5 cm from the division point upward. Divide OP1 into 3 equal parts and set it up from the first division point 1 cm down from the third division point - 0.5 cm. Draw a smooth line for the sleeve hem.
From point O, move the length of the sleeve down.
Hood
To create a hood pattern, take the following measurements:
- Head circumference
- Head height from shoulder to crown
Place point A in the lower left corner and draw a horizontal line from it to the right and a vertical line up.
Set aside 4 cm from point A and place point A1. To the right of A1, set aside 1 cm and place point A2.
Using the robe pattern, measure the length of the back and front neckline and add the resulting values.
From point A2, set aside the resulting amount + 3 cm in a straight line to a horizontal line from point A and place point C1.
From point A2, set aside the length of the back neck +1.5 cm and place point D. From it, set off the length of the dart at a right angle - 10 cm.
From point D on both sides, set aside 1.5 cm and connect these points with the height of the dart.
Smoothly bend section A2C1 upward.
From point A1, set the height of the head up according to the measurement + 3-5 cm (the more, the longer the edge of the hood will be) and place point B.
From point B, set aside 1/3 of the head circumference to the right according to the measurement + 4-9 cm (the more, the wider the hood will be).
From point C downwards, set aside 1-2 cm and through this point form the upper edge of the hood, as shown in the diagram.
Also connect this point to point C1 with a smooth concave line.
Uncover
The allowance for the bottom of the robe and sleeves is 3-4 cm, for the remaining seams - 1 cm.
- Front part - 2 pieces, mirrored
- Back part - 1 piece with a fold in the center or 2 mirrored
- Hood - 2 pieces, mirrored
- Belt - a strip 6 cm wide and the required length
- Free-form pocket with 3 cm top allowance
- The facing of the robe is 3 cm wide and a length equal to double the length of the front plus double the length of the hood plus 5 cm. If it is not possible to cut out a single facing, sew several strips into one.
- Two belt loops 4x6 cm
Work progress
Fold the waistband piece in half lengthwise, right sides facing in. Sew along all sides, leaving an opening of about 5cm along the long side of the waistband. Turn the entire belt through the hole.


Fold the top edge of the pocket 5 mm, then 2 cm to the wrong side and baste. Stitch.

Fold the edges of the pocket 5 mm inward and baste. Baste onto the front half at the desired height.


Sew the hood, placing the pieces right sides together. Process the allowances.

Sew the shoulder seams, placing the back and front pieces right sides together. Process the allowances.

Sew the hood to the neck line. Wrap the seam allowance with bias tape from a matching fabric or scrap of the main fabric and baste. Stitch.

Sew the sleeves into the armholes, matching the top of the sleeve cap and the shoulder seam. Process the allowances

Sew the side seam of the robe and the side seam of the sleeve, aligning the armhole points. Process the allowances.

Fold the bottom of the robe twice and stitch. Sew the facing along the entire edge of the front halves of the robe and hood. Fold the edge of the facing, covering the folded bottom of the robe, and baste.

Fold the edge along the entire length of the facing, fold it in half and baste the seam allowances onto the edge.


Fold the belt loop pieces inward toward the middle and in half again. Sew the belt loops to the side seams at waist level, folding the edges at the top and bottom.