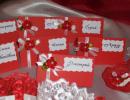
DIY winter house of Santa Claus. DIY tabletop New Year's composition. Master class with step-by-step photos. DIY cardboard house: gnome's home
Kupina Tatyana
It's been raining for more than a week, you can't go outside. So we have to come up with something to entertain the children.
Today's mine master-the class will be devoted to how to make something like this house.
Before I start, let me tell you that this is easy to do in one evening. (and if they help you, then even faster).
I needed:
Cardboard box;
Colored paper;
Disposable wipes (white);
I found a completely suitable box, it can be of any shape and size. I cut out a window and covered it with blue paper. Then I made shutters from napkins. I glued the roof, a triangle, and two napkins on top.


What the Santa Claus's house, without Santa Claus?


And now. legend. what to tell the children?
We said we did house for Santa Claus, who will arrive on the night of December 31 to January 1 and will live in our house all New Year holidays. For every day that he lives with us, in gratitude, he will give us a small gift.
Publications on the topic:
Hello, dear Maamites! Congratulations to everyone on National Unity Day! November 18th is the birthday of Father Frost. I suggest we make it together.
Soon New Year! According to tradition, in our group, every year we open Santa Claus’s workshop and replenish it with new ideas and crafts made.
Master class with step-by-step photos "Father Frost's felt boot": making it yourself. I bring to your attention a master class on making.
Hello, Dear friends! Today, Santa Claus came to our children! True, he is still small, but not for long - before the New Year.
It doesn’t seem like it’s close to the New Year yet (but it actually only seems so, but it’s the birthday of the main New Year’s character, Santa Claus.
I was very lucky! I work with children from 2.5-3 years old. We still have no doubt that Santa Claus exists! He will definitely come with his granddaughter.
This is the kind of Santa Claus hut I got). She divided sheets of xerox paper (landscape paper very thick) into rectangles. Then they screwed it up.
Natalia Kirpicheva

Dear colleagues! The holiday that they love is coming soon All: both children and adults! This holiday is called New Year! My parents helped us decorate the group, and I decided manufacture New Year's craft . And this is what came of it.
For we will need crafts: box, scissors, stationery knife, double-sided tape, cloth, cotton buds, foam ceiling tiles, glue for ceiling tiles and cotton wool (in my case, padding polyester, fabric, sequins.
Carefully cut off the side of the box.

Then we cover the inside of the box with fabric. I glued stars - sequins - onto the fabric.

We lay it down and glue the padding polyester to the bottom of the box using double-sided tape. (you can use cotton wool).

House Santa Claus I made it from ceiling tiles. The parts were glued together with tile adhesive.

Glue the halves to the roof cotton pads. Then we cut off the cotton swabs and use them to make railings for the balcony on which Grandfather will stand Freezing.

Santa Claus I printed it out on a printer, and glued a skewer to the back of it, which I stuck into the tile with a sharp edge. It holds up very well and is invisible to others.
This is the kind of house I ended up with.


Here's how craft looks in our group.
Publications on the topic:
 Well, preparations for the new year have begun. We were tasked with making a craft for the New Year. As before, I did not stand aside and decided to participate.
 Master class on making Christmas decorations“Santa Claus's House” Size: 14.5 cm by 10 cm Materials: 1. Barney cookie box 2. Colored.
 New Year is a magical holiday! At this time, many ideas, desires and the strength to fulfill them appear! To please your kids.
 To make such a Santa Claus you will need: 5l plastic bottle, plastic spoons (about 40 pcs., red tape, not big.
 I offer a master class on making Father Frost and Snow Maiden from plastic yogurt bottles. For designing New Year's ones.
 Good Grandfather Frost has a full beard. He is in too much of a hurry today, Together with his granddaughter, to the children. To make a figure of Santa Claus for us.
 Dear colleagues, friends, guests of my blog, I offer you another master class on creating three-dimensional forms for painting from plaster. In shops.
Printable templates will help you make a house out of paper, making the whole process much easier. If you make a New Year's house out of cardboard for a child, and even together with the child, then such a craft will add magic and surprise the child, allowing him to create his own fairy world where to place your loved ones New Year's characters. Interestingly, the schemes for creating such a house are simple, this will be confirmed by a master class made from this material. Moreover, such a do-it-yourself cardboard house is made from completely ordinary materials, but it turns out beautiful, magical and mysterious. Everyone can use their maximum imagination to make their home special.
A child may happily cut out, for example, New Year's vytynanki. This beautiful view creativity, but New Year's houses are much more interesting and the kids themselves confirm this. Because I hung the New Year's decorations on the window and what can I do but admire them. But a cardboard house for children is a new functional toy that does not
It just stands in one place, you can play with it.
Advice! Such a house can be made with lighting, then it will look incredibly impressive and magical. For lighting, you can simply use small old Christmas tree garlands.


To make a house out of paper, you will definitely need printable templates. They can be found in this material. To download the template you like, you just need to right-click and save the photo to your computer. After this, open the photo, enlarge it to the required size of what the house will ultimately be, and then simply print it or carefully transfer it directly from the screen, making it as bright as possible.
Everyone's favorite fairy-tale character, whom we look forward to with the arrival of winter, is called Santa Claus. This grandfather with a white beard and cheerful eyes lives in Veliky Ustyug. And we offer a master class on making a house for Santa Claus from cardboard - it will bring you and your kids a lot of fun. An ordinary cardboard box is used as the main material for the craft (as a rule, one side of the box will be enough). The master class will cover the detailed stages of making a New Year's house for Santa Claus. Use your imagination and add your own ideas as you complete the craft.
Materials for DIY crafts “House for Grandfather Frost”:
- one side of the cardboard box;
- colored gouache;
- scissors and a stationery knife;
- ruler, pencil and brush;
- glue;
- new Year decoration.
Progress
Using a ruler and a pencil, draw four sides for the house on the cardboard. You can choose your own size (according to the height of the toy Santa Claus). Make two sides at once with triangles under the roof. Mark the space for windows and doors. Cut out the pieces.
By the way, you can hang it or place it near such a house - it will look very beautiful.

When the details of the New Year's house for Santa Claus made of cardboard are prepared, start gluing them together. Since we are working with cardboard, ordinary PVA or silicate glue is quite suitable for making the product. Try to glue the parts as carefully as possible so that appearance the crafts were attractive. 
The sides of the house are ready, you can make a roof for Santa Claus's New Year's house with your own hands. It is also made from cardboard.

We paint the sides of the house blue or light blue. Of course, if you wish, you can choose another shade that you like best.

Remove the top paper layer from a small piece of cardboard to create a corrugated side. We will need it to decorate the corners of the craft. Its length is equal to the height of the house.

We bend the corrugated strip into White color. This will create a contrast with the main color of the walls of the house.

We decorate the corners of the house with corrugated stripes.

We connect the roof to the sides of the house and paint it orange.

Decorating an almost finished cardboard house for Santa Claus. You can use tinsel, snowflakes, beads. Decorating a craft is not limited by anything except your imagination and the availability of the necessary materials.

The fairytale house for Grandfather Frost is ready!

But our house cannot be empty; according to our master class, they will happily live in it.
We are sure that children will happily take part in making this wonderful craft with their own hands.
You can independently make the same bright and interesting house as we did in the master class. However, at your own request, having understood the exact scheme for creating such a craft, the houses can be different and special. For example, why not decorate the Snow Maiden’s home with lots of sparkles? Why not make an amazing and unique scarf for the snowman’s house? Use your imagination and be sure to involve the kids in the process!
You will need:
White cardboard
Sequins
Ruler
Latex primer (optional)
Glue stick
Scissors
Stationery knife
Decorations (tinsel, bells, balls).

1. To get started, download the template from THIS link or you can draw a house of similar dimensions yourself.
2. Cut out all the parts from paper and glue them to white cardboard using a glue stick or double-sided tape.
3. Cut out the pieces from cardboard. Use a utility knife to cut out doors, windows and other details.

4. Fold all the elements along the fold lines and glue everything together.
5. If desired, you can apply a primer to the paper house to prevent it from deforming.
6. Paint your house and after the paint has dried, start decorating it.
The house can be hung on the Christmas tree using a thread attached to the roof so that it hangs level, or you can simply place it on a flat surface to decorate the house.
DIY craft "House made of paper tubes"

You will need:
Thin paper (regular printed paper is fine)
Scissors
Pencil
Decorations.

1. Roll each sheet (or identical pieces of sheets) into a tube. It's better to use a pencil - it's easier to twist.
2. Draw windows and a door on paper or cardboard and cut them out.
3. Glue the tubes together as shown in the image (to make a hut).
4. Glue the windows and door to the hut.
5. Decorate the house to your liking.
Another option:


DIY Santa Claus house (master class)

You will need:
Cardboard box or
Scissors
Sandpaper
Stationery knife
Tassels
Polyurethane foam and gun (optional).
1. Prepare cardboard box and make a house out of it. You will need to cut the pieces and glue them together.
2. Use a utility knife to cut out the windows and door. You can draw them in advance with a simple pencil.

3. Paint the house or you can decorate it polyurethane foam. To do this, you need to apply foam in strips so that each strip is 1.5 cm wide. As it dries, the foam will swell, so it is better to leave 3-4 mm between the strips.
4. After you have covered the house with foam, leave it for 30 minutes to allow the foam to dry.


Making a stand for the house.
Cut out a rectangle from cardboard that should be larger than the base of the house.
Glue the house to the stand and decorate the perimeter of the stand with foam.

*Use of foam is optional. To imitate snow, you can use cotton wool, which should be glued with PVA glue.
* You can also cut out snow slides, snowdrifts, a snowman or a Christmas tree from paper or white cardboard and glue them to the base, bending the bottom part and applying glue to it.

If you used foam, then after it dries, cut off the excess parts with a stationery knife and sand it with sandpaper.

Paint all the desired parts.

DIY cardboard house: gnome's home

You will need:
Cardboard cylinders from toilet paper
White paper
Colored paper
Black felt-tip pen
Glue stick
Hot glue or PVA glue
Sequins different colors(including white).
1. Cut one toilet paper cardboard cylinder in half, and the second and third so that you have two long and two short pieces. This way you will have houses of different sizes.

2. Cut white paper into strips 15 cm long and 2-3 cm wider than the height of the cylinder that you will wrap with this strip.

3. Cut out windows and doors from colored paper. Use a marker to draw door handles and window details.
4. Using a glue stick, glue the windows and doors to the white stripes.
5. Wrap the strips around the corresponding cylinders and secure them with glue. Fold the excess paper into the cylinder.

6. Make several cones of different colors from colored paper, glue the ends of the cones, and glue the cones themselves with PVA glue to the house cylinders.
*You can add a little glue to each roof of the house and sprinkle glitter on it to imitate fallen snow.


DIY paper house: paper New Year's village

You will need:
Corrugated cardboard (cardboard from regular packaging)
Stationery knife
Scissors
Ruler
Pencil
White acrylic paint and a brush
LED garland.

1. Prepare cardboard and use a pencil to draw several houses connected to each other on it. You can use a ruler. You will end up with a small village. Cut out a village from cardboard.


2. Bend the cut out piece like an accordion along the lines that connect the houses. To make even folds, place a ruler on the fold line and bend the cardboard.


3. Draw and cut out a Christmas tree on cardboard. Trace the tree onto another piece of cardboard and cut out a second tree. Make a cut on one tree from the top to halfway, and on the other from the bottom to halfway and connect both parts to get a 3-D tree.


4.Apply white paint on the roofs of houses and Christmas trees to imitate snow.
5. Place the village and Christmas tree on a white cloth or felt and place an LED garland next to it.
DIY house (photo)

Paper or white cardstock that you can print on.
*You can draw a similar drawing yourself and cut it out.
Scissors
Stationery knife
Glue stick
Battery operated candles.
1. Print and cut out the house drawing. Cut out windows and doors with a utility knife.
2. To make the roof, cut a rectangle measuring 15x9 cm. Bend it in the middle.
3. Assemble and glue the house and glue the roof to it.
* You can make several houses to make a small village.
* You can also cut out Christmas trees from green cardboard.
4. Place a candle with batteries inside the house.
*You can decorate the house to your liking. Use markers, glitter with glue, cotton wool (snow), etc.
DIY box house

You will need:
Box (of cereal, pasta, for example)
Ruler
Pencil
Scissors
PVA glue
Clothespin or masking tape (if necessary).

1. Open the box completely and place it on the table.

2. Draw a straight line along the unfolded box 2.5 cm below the middle.

3. Make cuts from the original fold lines of the box to the line you drew (see image). The white dots indicate the places where the cuts need to be made.

4. Cut off those parts of the box where the X is written.

5. Turn the box over and apply glue to a small bend (see image).

6. Fold the box with the pattern facing inward and secure with glue.


7. Fold the opposite narrow sides to form a roof. Each part needs to be bent in half (see image).

8. Cut the wide sides so that they can be glued to the part of the roof that was formed in step 7. You need to cut with a margin so that this margin can be bent and glued.


Having done this work, I will say that if it weren’t for the soil, the result would have been much worse, so I still recommend purchasing it if you don’t have one. Or you can use white gouache... a lot of white gouache. But it must be dried well, otherwise when you apply a layer of already colored paint, it may mix.
Be sure to use a sharp knife so that the cuts are even and not ragged. I didn't have a very sharp knife and the result was ragged edges that I had to sand down to improve the look.
To do everything quickly, don’t lose everything, while the house is drying in glue and soil, make a stuff!
Before you start doing it, rummage through your resources =) to understand what and how you can make from what you have =)
The number of cells can be any, you can do it like I did, you can do it like a calendar, the numbers don’t have to be from the 16th to the 31st
(2 weeks before New Year's Eve), this could be, for example, from 31 to 10, in general, these could be any numbers that you want to make a holiday for your child (or whoever you will celebrate there))))
And... the legend... what should I tell the child?
We said that we made a house for Santa Claus, who will arrive on the night of December 15-16 and will live in our house until the new year. For every day that he lives with us, in gratitude, he gives us a small gift. Once a day you can come up and open the door, taking a gift.
That's all! I hope you find it useful and... Happy New Year;)