Crafts with sticky tape. How to make decorative tape with your own hands? Decorations for glasses
Decorative tape is an indispensable item for decorating gifts and creative crafts. But the colored adhesive tape itself can become a craft project. Now the market is overflowing with all kinds of decorative adhesive tapes, and to make greeting card or homemade gift without them it turns out not so interesting and impressive. And why? After all, they were created specifically to make our holidays more beautiful and fun.
Many believe that its manufacture requires special production technologies. This is not entirely true. There is a fairly simple way to make decorative tape at home. The manufacturing process itself will take just over an hour.
What is needed to make decorative tape
The following materials will be required:
- glossy magazines;
- regular tape (choose the width depending on what size you want the decorative tape);
- warm water;
- plastic card or regular ruler.
How to easily make decorative tape yourself
When everything you need is prepared, you can begin the creative process.
- Cut strips from a glossy magazine so that their width matches the width of the tape. The paper base can be made a little wider, since it can be trimmed later.
- All cut out pieces must be attached to adhesive tape. paper strips. Trim the edges by trimming off any excess along the edges.
- To avoid any pimples, smooth the adhesive tape with a card or ruler, displacing any trapped air. Remember how, as a child, you smoothed out the foil from a chocolate bar with your fingernail. The principle of operation is the same.
- Next, immerse the strip in warm water and leave for about an hour. The water should not be hot.
- When paper pellets appear on the tape, you can pull the craft out of the water. Peel off the paper layer. You can use a sponge or do it by hand.
- Apply tape to any clean surface, from where it can be easily removed.
- Leave it to dry.

Here's how to make decorative tape quickly and easily. This method is suitable for older children, as it requires patience and accuracy.
How to make tape at home without using water
But there is an easier way to make decorative tape. Last time, water was required, and the technology resembled more professional than amateur. This time you will only need colored clippings or purchased stickers, as well as wide transparent adhesive tape and scissors.
So, instructions on how to make decorative tape without water:

Even small children using this method, learn how to make decorative tape yourself and decorate a notebook, personal diary or anything else. IN children's creativity Such a beautiful adhesive element is simply necessary.
Are you irritated by nasty crumbs under the keys that you can’t get out with anything? Scotch tape will help you. Fold the adhesive tape, sticky side out, and run it along the thin gaps between the keys and the keyboard body. The debris will stick and the keyboard will become clean.
2. Clean your clothes
Sticky rollers for cleaning clothes run out at the most inopportune moment. But there is wide tape that is no worse.
3. Collect broken glass
If you accidentally (or intentionally) break a plate or glass, small crumbs will remain on the floor or table. Collect them with tape so they won't harm your heels.
4. Draw arrows
How many tricks have been invented to, from using a spoon to special stencils. Keep it simple. Place the tape on the eyelid and calmly fill the space from the edge of the eyelid to the tape with eyeliner. Then remove the tape. You will get arrows with perfectly smooth edges.
5. Design your nails
Anna Norman / blog.birchbox.comAn adhesive tape stencil can be used not only on eyelids, but also on nails to create patterns of varying complexity.
6. Collect mercury
When the mercury scatters across the floor in hundreds of tiny droplet balls. And all of them must be carefully collected for disposal so as not to breathe toxic fumes. Scotch tape does this job well.
7. Wrap the laces
If the laces are frayed at the ends or the fasteners have fallen off, wrap them with tape. This will make the laces look neater and make them easier to lace.
8. Cover calluses
A temporary measure that will save your legs new shoes, if you don’t have a band-aid at hand, you have tape. Just use it to protect areas that your shoes rub.
9. Remove traces of glue
You removed the sticker from the item, but the glue remains. Take the tape, press its sticky surface onto the glue and tear it off sharply. The glue will stick to the tape.
10. Protect your plastic card
If you have a card with magnetic tape, and you use it often, then there is a risk of damaging this very tape. Carefully seal it with tape so that there are no bubbles or wrinkles. The tape will be protected, and devices will read it.
11. Make an elf ear

Halloween is not coming soon, but you just have time to train to make it happen real suit elf. Take thin, clear tape, place the end on the back of your ear, and gently roll the tape over to sharpen the tip of your ear. Then you can mask the tape foundation and powder so that no one would doubt who the real Galadriel is.
12. Make a hiding place
Use tape to tape valuables to the inside of your bed or countertop. But in a place where it will not be noticeable and where the hiding place is difficult to get.
13. Use tape instead of a bandage
In case of injury, tape will serve as a temporary replacement for a bandage, especially if you need to apply a splint and tape an arm or leg to a stick.
14. Organize your wires
Fold the wires that stretch from your table to one into one bundle and wrap them with tape. Now, instead of a dozen tangled cords, you will have one.
15. Protect your bag or pocket
If you need to put something with sharp corners (for example, a screwdriver) in your bag or pocket, but you don’t have a case or bag at hand, loosely wrap the dangerous object with tape. This will prevent the lining of your bag or jacket from tearing.
16. Remove the stuck ring
When you can’t remove a ring from a swollen finger and soap doesn’t help, try tape. Take a thin and long (about 30 cm) strip of tape, fold it in half lengthwise, sticky side inward, so that you get a long and smooth strip. Pass one end of this strip under the ring so that it protrudes 2-3 cm. Wrap the long part of the tape tightly around your finger, grabbing the knuckle. Then carefully pull the short end of the tape behind the ring. The ring will gradually move along the tape, and your finger will be freed from the wrapped tape. Usually there is thread instead of tape, but a smooth tape made of tape is no worse.
I told you about what it is and how it differs in the previous article. Now I will show you the most interesting thing :-), what you can do with it. There really are just an impossible number of options. No matter how trivial it may sound, the possibilities of using colored tape are limited solely by your imagination. And so that there is no crisis in the fantasy sense, I offer a description and photo selection of ideas on how to use decorative tape.
So, let's go.
Let's start, probably, with the most unusual options using decorative tape, namely for the design of various things in the room. In this case, colored stripes act as a bright accent in the space. They create the extraordinary character of a particular thing, and it conveys this mood to the entire room.
Colored tape can be used to hide various “ugliness” in the interior.
And if you decorate the nondescript, unimportant switches, you can get a flirty and even funny note in the room.
Or make a full-fledged creative object in the interior from an ordinary white battery.
Old chairs and tables no longer needed by anyone are turned into a designer item, you just need to work a little magic on them.
If you have a chest of drawers lying in the middle of your apartment, or maybe not in the middle, but somewhere in the corner, you can transform it in a matter of hours. In addition, such “storages”, as is often the case with junk, can be adapted to store your handmade treasures.
It is not necessary to cover everything with “solid” tape; you can make several lines, and this will be quite enough to diversify a boring interior.
With children, you can learn the rules like this traffic, without damage to the walls and floor, because the paper tape can be easily washed when the diagrams are no longer needed.
In my opinion, it’s a great idea to find a watch at a flea market and adapt it to your home. It’s so cool to use something old and there’s no need to create something new and so bright and cheerful!
Even if you have no talent for drawing, a couple of pieces of tape with a bright print will help you paint the whole picture.
It’s just a sin not to decorate a boring table lamp:
Add fashion style room, you can place strips of tape in a chaotic position, making some kind of intricate ideological drawing or a motivating inscription.
Jars that are left over from jam or other goodies, decorated with colored paper tapes, can be used as cute vases or, if the twist is preserved, for storing spices.
Just like vases, you can spice up flower pots:
If you have photo frames lying around that just don’t want to fit into the style of your apartment, you can transform them in a wonderful way in a matter of minutes. In addition, photographs that have no frames at all can be placed on the wall using adhesive colored tape, creating an entire art gallery.
Nowadays, decorating a phone or laptop with your own hands is gaining popularity. Scotch tape is ideal in this sense, because when you get tired of the design, it can be easily separated from the gadget.
To match the design of the phone, you can also decorate the charger cord for it.
And also very good idea, label each cord in the outlet with tape so that you can easily figure out which leads to what.
More classic version using decorative tape to decorate office supplies. In this case, they can also be used to create jars for pens and pencils, and also, they are more resistant to friction and are much cheaper ;-).
Decorate your romantic evening Not banal multi-colored candles will help.
In your home routine, colored tape can give even your keys or lock a new look.
Clothes pins have long taken their place not just in the household, but also in creative handicrafts.
There is an impossible number of different things that can be made aesthetically pleasing just by adding color to them.
Have you ever wondered how easy it is to create a festive mood? A little Washi tape ( Japanese paper), this is also the name of this bright adhesive tape, a crumb of imagination, but everything else is pure magic;-)
With the help of this, as numerous examples above have already shown, indispensable in household adhesive tape, you can even create decorations. Thanks to bright and varied prints, the flight of imagination is limitless.
With just one you can create so many color solutions, how many colors of tape do you have.
Bright designs on nails are very popular now, and even if it looks like pampering. But if you decorate only one nail this way, it will look very stylish.
Children, as you know, especially love bright colors, because in early age they can only see extremely saturated shades, and even at a more or less conscious age they prefer everything multi-colored. If you decorate the toys with your child with new colors, the child will begin to play with his already forgotten toys with even greater excitement.
And finally, wrapping gifts beautifully has already become a tradition even in our country. And the impression of the gift itself is sometimes even more important than the item itself. After all, the main thing is not the gift, but the attention. ;-)
Please share your impressions of the proposed options for using decorative tape. Was it interesting for you and did you learn something new? Would you like to see detailed photos and video tips for using this adhesive miracle tape? If enough people gather, we will make a video on this particular topic, and with exactly the tape that is available in our store.
I look forward to your feedback.
Yours sincerely, A. ;-)
Blinds decorated with colored tape to match other interior details will look much more impressive.
2. Desk organizer with drawers

You can see how a simple wooden organizer and other items from IKEA are turned into beautiful home decor items here.
3. Calendar of anticipation of holidays and events

The holiday anticipation calendar is a thing that is still unfamiliar to many, but very interesting. Traditionally, it is done for children a month before the New Year to “brighten up” the anticipation of the holiday. For each day of the calendar, an envelope with candy or other small gift is glued. The envelope can be opened once a day. Of course, you can “wait” with the help of a calendar not only for the New Year, but also for any other joyful event. Decorative tape will help you make and decorate such a calendar.
4. Old chair
 5. Pots for "/>
A little imagination, paint, colored tape - and the old chair is as good as new. Instructions.
5. Flower pots
 6. Under"/>
You can use tape to decorate flower pots, for example, as shown here and here.
6. Candlestick
 7. Frames for f»/>
A few simple steps and wonderful cozy candlesticks are ready. Instructions.
7. Photo frames

With the help of decorative tape, an ordinary white frame turns into a bright piece of furniture. Instructions.
8. Soap dispenser
 9. Tea candles»/>
Read about how to make it here and here.
9. Tea candles

Tea candles in candlesticks decorated with decorative tape are a wonderful decor for your own home and good gift. Photo instructions.
10. Hot stand

In the example, tiles are used, but you can use anything as a basis, say, wood or cardboard.
11. Tin boxes
 12. Plastico»/>
Thanks to the decorative tape, we got very cute boxes for small items.
12. Plastic organizer for small items

13. Notebook page dividers

 «/>
«/>
How to turn a standard notepad into a product self made, shown in simple photo instructions.
15. Gift wrapping
 16. Headphone holder»/>
You can use decorative tape to decorate gift wrapping.
16. Headphone holder

17. Keyboard
 18. Case for tablet»/>
If you're bored with standard keys, the keyboard design is easy to change.
18. Tablet case
 19. Switch "/>
Tired of a plain case? No problem, it can be updated without much effort.
19. Switch
 20. Corner bookmark"/>
The old switch gains new life. Instructions.
20. Corner bookmark
 21. Magnetic bookmark"/>
These are not ordinary bookmarks. You can check here.
21. Magnetic bookmark

A really very convenient thing and a great gift for those who love to read. It's very easy to do according to the instructions.
22. Hot coasters in the form of mini-pallets

 24. Drawing on the door»/>
Great idea for a cottage or balcony.
24. Drawing on the door

A little patience - and the usual white door turns into an attention-grabbing interior detail. More photos of the project and simple photo instructions here.
25. Vase
 26. Gift packaging for wine»/>
A few more options.
26. Gift packaging for wine
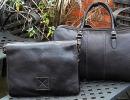
 27. Decorations for "/>
Decorative tape and these instructions will help you decorate a bottle of wine as a gift.
27. Decorations for glasses

28. Napkin rings
 29. Festive dishes»/>
Napkin rings are also part of the atmosphere. Instructions.
29. Festive dishes

Ordinary glassware takes on a completely different look if you apply bright patterns to it. 30. Disposable cups for a party or picnic
 31. Kitchen spatulas»/>
You can even decorate disposable tableware.
31. Kitchen spatulas
 32. Chopsticks»/>
Even more ideas with colored stripes.
32. Chopsticks
 33. Clothespins»/>
Own reusable chopsticks.
33. Clothespins
 34. Mat for hot food on the table"/>
Pretty simple, but you can still look at the instructions.
34. Hot mat on the table
 35. Cake dish»/>
A beautiful, practical and easy-to-use napkin for hot dishes.
35. Cake dish
 36. Screw cap»/>
A simple example of how to decorate a standard cake plate.
36. Screw cap

37. Labels
 38. Candle»/>
Make labels too great idea.
38. Candle
 39. Feces»/>
A worthy replacement for expensive decorative candles. You can see how to make one here.
39. Calendar or diary
 40. Pencil holder»/>
You can decorate your diary with decorative tape.
40. Pencil cup

Instead of a boring stand from the store - an original glass in your favorite colors. The creation process is shown here and here. 41. Folder cover

Binders can also be varied according to your wishes. See instructions with photos here.
42. Gift envelope
 43. R»/>
In such an envelope you can give a handmade card or money. It's very easy to do.
43. Multi-colored buttons

With the help of colored tape, ordinary buttons will become much more attractive. You can see how to make heart buttons here.
44. Desk organizer
 45. Old hole punch"/>
This blog has photos of the stand from different angles.
45. Old hole punch
 46. P»/>
Using decorative tape, you can give an old hole punch a completely new look. attractive appearance.
46. Cork board for notes
 47. Plug and wire dawn"/>
A boring note board can be decorated with a colorful geometric pattern.
47. Charger plug and wire

A bright charger cord not only looks more interesting, but will also be less likely to get lost among other things.
48. Organizer for wires

Simple cardboard covers will help keep all the wires in order. And a colored ribbon will make them different from each other.
49. USB cable markers

Constantly getting tangled cords from devices can irritate even the most calm person. Therefore, making bright markers for them is a great idea.
50. Geometric pattern on a glass door
 51. Multi-colored furniture legs»/>
More options and gluing techniques here.
51. Multi-colored furniture legs
 52. Striped wall»/>
Bright accent will refresh the furniture and add liveliness to the interior.
52. Striped wall
 53. Mirror frame»/>
An idea for those who like stripes.
53. Mirror frame
 54. Drawings on the walls»/>
The creation process in photographs is here.
54. Drawings on the walls
 5″/>
5″/>
The drawing on the walls will look great together with other interior details in the same style.
55. Instead of wallpaper
 56."/>
Decorative tape on plain walls can replace traditional wallpaper. Gluing process.
56. Open shelves
 57. Bright accent on a white door"/>
Edge on open shelves can be made in any color.
57. Bright accent on a white door
 58. Retro armchair for the cottage"/>
The necessary materials and process are described here.
58. Retro armchair for the garden
 59. Picture frames»/>
All you need is thick tape in two colors.
59. Picture frames
 60. Us»/>
Decorative tape is a great idea to transform an old or just boring picture frame.
60. Wall clock
 61. Desk clock»/>
View other colors for inspiration.
61. Desk clock
 62. Boxes for small items"/>
A simple table clock turns into bright and stylish.
62. Boxes for small items
 63. Bracelet»/>
To avoid confusing the boxes, you can use tape with different patterns.
63. Bracelet
 64. Hoop for "/>
You can choose colors and patterns to suit your style. The bracelet itself is quite simple to make.
64. Hair hoop
 65."/>
Wrap a regular metal hoop with decorative tape and you will get an interesting accessory.
65. Earrings
 66. Box for bobby pins from the box “/>
The instructions show you how to make these cute earrings.
66. Box for bobby pins from a Tic Tac box
 67. Brush holder»/>
A simple and cute way to make a convenient bobby pin box.
67. Brush holder
 68. Bags from envelopes»/>
A simple organizer will help you put your makeup bag in order.
68. Bags from envelopes
 69. Under"/>
All you need to make such a bag is a regular envelope and tape. Instructions.
69. Phone stand

Now your phone will always be in a visible place. How to make such a stand, see here. 70. Postcards and photos on the refrigerator


Using colored tape, you can divide the pages of your diary into logical blocks. Looks comfortable and cute. You can take a closer look here.
72. Pencil case
 73. Pencils»/>
Simple step-by-step instructions.
73. Pencils
 74. Paper clips»/>
This is how in five minutes a simple pencil turns into a colored one.
74. Paper clips
 75. Colored patch"/>
Nice and simple. Here are more colors for inspiration.
75. Colored patch
 «/>
«/>
Colored patterns will brighten up the need to wear a patch a little. It will be especially useful for children.
76. Folder-tablet
 77. Vases made from bottles»/>
An easy way to add a little variety to your stationery.
77. Vases made from bottles
 78. Indoor flowers in "/>
Empty glass bottles make great tall flower vases.
78. Indoor flowers in jars
 79. Table lamp from IKEA»/>
But the jars will make wonderful pots.
79. Table lamp from IKEA
 80. Laptop cover"/>
Things from IKEA give unlimited scope for creativity. Here is one example.
80. Laptop cover
 81. Stand for magazines»/>
You can also use decorative tape to cover the lid of your laptop.
81. Magazine stand
 82″/>
82″/>
You can cover a purchased stand with decorative tape or even make it yourself.
82. Old book spines
 83. Postcards»/>
A good idea for the covers of old books or notebooks.
83. Postcards


85. Tabletop
 86. Chest of drawers"/>
Here you can see more photos of the project.
86. Chest of drawers
 87. Play town for the children's room"/>
Another cute way to update old furniture.
87. Play town for the children's room
 88. Drain pipe under the sink"/>
More photos and ideas here.
88. Drain pipe under the sink

It's great when there is order and beauty even in places where we rarely look. This is just such an example.
89. Vertical wall in the restroom
 90. Luggage marking»/>
Instead of a boring white wall - wide vertical stripes.
90. Baggage marking
 91. Stylish paper bags»/>
Now the suitcase will definitely not get lost or mixed up.
91. Stylish paper bags
 92. Lampshade table”/>
These bags are suitable for spices, beads, jewelry or a small gift.
92. Table lamp shade
 93. Decor for the battery"/>
With the help of multi-colored stripes you can refresh the lampshade of a table lamp.
93. Decor for the battery

It's not always possible to hide batteries. But if you don't like them appearance, here is one idea on how to change this.
94. Case for glasses
 95. Photos in the album»/>
Glasses cases often look monotonous, but not like this.
95. Photos in the album

This decor will appeal to those who love printed photographs and paper photo albums, decorated with their own hands.
96. Christmas toys for the New Year

Of course, there is still a lot of time until the new year, but you can start collecting holiday ideas now. How to make such a toy is shown in the instructions.
97. Pumpkin for Halloween
 98. Table edge»/>
Instructions and other ideas for original black and white decor are here.
98. Table edge
 99. Stool from IKEA»/>
An easy way to replace missing or old furniture edges.
99. Stool from IKEA
 100″/>
Again simple thing from IKEA turns into a stylish piece of furniture. Step by step instructions.
100. Refrigerator decor
As promised in the previous article, I’m posting it detailed instructions about how to make empty figures from adhesive tape. There is no point in writing from scratch, because I found an example of the work of Alexander Zhunev in his LiveJournal. (Permian)
I completely forgot that I wrote very detailed instructions in Russian about how to make sculptures from adhesive tape.
I was once asked how to make sculptures from adhesive tape using Mark Jenkis’ technology? I was so carried away by the answer that I wrote everything down point by point in great detail. I decided that I would post it later. I wanted to post it together with Gagarin to support the text with pictures. Even though I'm a little late, I'm posting it anyway. I think this will be useful to many. This is all one sculpture made of adhesive tape:
In fact, it is very difficult to make shapes from tape. I tried making sculptures even before Mark Jenkins arrived - I made purely legs from ordinary adhesive tape. They turned out very flaccid and did not hold their shape well. Moreover, when I cut the tape off my girlfriend’s legs, she screamed because of pain and fear. This resulted in a few shallow scratches because I wrapped the tape around my legs without cutting it into pieces.


When we came to Mark’s workshop, everything turned out to be more difficult.
Here is my post about Mark Jenkins Workshop.I will accompany this post with photographs of the production process of another sculpture that we made for the Creative T-shirt studio.
Firstly, you need to use a special thick tape, which we do not sell. Scotch 3M brands. On the pack it says: scotch premium performance. 20X stronger than acrylic tapes. 1.88 IN x 54.6 YD (48 mm x 50 m) Available in packs of 6 and 8 pieces. After the workshop I had a couple of skeins left and I saved the packaging.
Secondly, it is better to make a sculpture with no less than three people, and better yet, with an even larger number of people. One is the form, the other cuts the tape into pieces, the third sticks it to the body. Because it takes a lot of tape to cut into one sculpture (about 7 skeins of 50 meters each), it takes a long time, and the body, bound with tape, becomes numb. It happens that the body needs to be turned over, or raised for some time, but one cannot cope with this.
Thirdly, first you need to put on clothes that you won’t mind ruining, because they often get cut when cut. Then wrap the body with thin cling film, it will be cut off along with the tape so that it does not stick to clothes. Industrial film in large rolls will not work - it is too thick.
Fourthly, the tape should not just be wrapped around the body and limbs directly from the skein, but first cut into pieces of 15-20 centimeters each and three layers glued together. It is convenient to do this while standing, putting a roll of tape on a stick 30 centimeters long, and holding the stick with your feet: one foot steps on the end of the stick, pressing the other end on top of the second foot, the roll dangles freely on the stick between the two feet. You hold the end of the tape stuck to your left palm, and with your right hand you make a small cut on the tape with a stationery knife, holding the end of the tape below the cut with your right hand, tear off the top piece, glue another layer of tape to it, cut again, again tear off a piece of two layers and you glue the third one to it, cut it, tear off the triple piece and glue it where you need it. It’s convenient to glue these pieces of tape as a garland to long tape that has been pre-stretched horizontally in several rows around the perimeter of the room (to save money, it’s better to use simple tape), and then take it from there right size and stick it to the body. And so on all the time: one cuts it into pieces, the other glues it where needed. This way you won’t get in each other’s way, and the person making the sculpture will know where how much has already been pasted, and where how much more needs to be pasted.
For small parts such as fingers, a length of 10 centimeters is suitable, 2 layers of tape and then cut lengthwise into 2-3 strips.
You can make different parts of the body separately, and then connect them, but, it seems to me, it’s better to do it all at once - this way the proportions will be kept perfectly. If you are making a sitting sculpture, and you don’t know how to get under the butt, because your legs are already constrained and cannot be straightened, you can lift the form (of a person) for a while together, and the third person will slip in a large piece of tape that was put together in advance. Or you can roll your body onto its side. In general, you need to calculate in advance which part of the body to start with, so that it is easier to seal the entire surface, and not struggle later, holding it suspended for a long time. In addition, the shape often becomes deformed when weighed.
If you are making a transparent sculpture, you need to use more tape, because without a frame it will not stick well.We made the head separately, leaving a hole for breathing. By the way, it’s a very unusual feeling when they completely wrap your head. The sound in your ears is as if you are listening to a sea shell, only stronger, and you hear nothing but it, no voices, no music, only the sound of the sea, not outside, but somewhere inside your head - very impressive!
Fifthly, you need to cut the impression with special scissors, in which one blade is bent perpendicularly so as not to injure the person. I don’t know what they are called or what they are actually intended for. But they definitely produce them. It is better to cut not in straight lines, but in a zigzag pattern, so that the direction changes approximately perpendicularly every 5-10 centimeters. This way you will definitely not get lost when gluing without a shape. First, it is cut from the arms from the inside, going out to the back, along the ridge downwards, then the legs. After cutting, the internal sweaty cling film is removed.
Sixthly, in order for a sculpture made of adhesive tape to last longer and not fall apart, you need to make a frame. We carved it out of wood and nailed it together. Then you put the frame into the cast. Someone starts crumpling newspapers - you have to crumple a lot of them, so that your hands turn black. Gradually, from below, from the feet, you seal the sections with the same pieces of tape, three layers at a time, and push newspapers through so that the newspapers are evenly pressed tightly to the tape on all sides, and the wood almost does not touch it. It is convenient to push into narrow places with a stick. If you have stuffed too much so that it sticks out, you can make a cut in this place, take out some of the paper and seal it again. You make the spine of the frame longer to attach the head to it, you also stuff it with paper, and glue it around the neck with tape.
This figure is stuffed on the outside with scraps of flex, a material used to print T-shirts, and on the inside it has a wooden frame and crumpled newspapers.