DIY cardboard hat. DIY hat: step-by-step master class Hat made from scrap materials for a competition
Making a headdress like a hat out of paper is very simple! Making this craft will not take much of your time. In addition, you can involve your child in such a fun process.
To make a paper hat, we will need the following materials and several tools:
- thick colored paper or cardboard (any shade);
- scissors;
- glue stick or ordinary PVA;
- decorative tape;
- rosette made of satin ribbon.
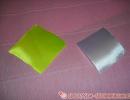
From a sheet of colored cardboard (A4 format), you need to cut out a circle.

A circle can be made using a compass by tracing any round-shaped object, or you can create a freehand sketch, as in this case. Next, the center of the circle needs to be cut out.

The hole size should be small, as in the photo. Leave the cut out part, we will need it to create the top part of the hat.

Make a cut on either side of the workpiece.

Apply glue to the back of the workpiece.

Now glue the cut and wait a bit until the glue dries and the workpiece is securely fixed.

The brim of our hat has acquired the required shape.

While the glue dries, we need to cut out a strip from cardboard (or a different shade).

Make small cuts along its edges.

Then bend them, lift them up on one side and down on the other.


Leave this part until the glue has completely dried. Afterwards, apply glue to the lower part of the workpiece.

Now we pass it through the hole and glue it to the brim of the hat.


This is what should happen.


If necessary, the edges can be trimmed by cutting off excess cardboard. Now you can start decorating the craft. Attach a thin, decorative ribbon to the base of the hat, making several turns.


Attach its tip with glue. In the same way, attach it to the top of the hat.


First, attach a bow to the craft.


Now, in the center of the bow, glue a rose.


That's it, the paper hat is ready!

The final look of the craft. Photo 1.

The final look of the craft. Photo 2.

The final look of the craft. Photo 3.

The final look of the craft. Photo 4.
As you can see, making a paper hat with your own hands is not at all difficult!
In this master class we will tell you how to make a paper hat with your own hands. Our step-by-step instructions with a template and step-by-step photos of the process will help turn your child into the brightest character at a holiday party or children's birthday. You'll see, our paper hat will delight your baby!
Tools and materials Time: 1.5 hours Difficulty: 3/10
For the hat:
- printed templates for hat and mask;
- yellow colored corrugated cardboard 50 x 50 cm;
- colored corrugated cardboard silver-gray 15 x 7.5 cm;
- white cardboard 13 x 7.5 cm;
- strip of black paper 45 x 1.3 cm;
- acrylic paint in brown, black and white;
- brush with a fine tip;
- awl;
- bone shoulder blade;
- universal glue;
- brush with sponge;
- scissors;
- black threads;
- compass and ruler.
For glasses:
- synthetic felt 2 mm thick, 23 x 8 cm;
- white pencil;
- round elastic cord 2-3 mm thick;
- quick-adhesive transparent adhesive.
If holidays are coming up at your kindergarten or school, but you don’t have a suitable costume in stock, don’t worry! With the help of minimal resources that are found in almost every home, you can easily create the image of a minion for your child with your own hands! And our amazing paper hat will help you with this.

Step-by-step instructions with photos
This paper hat took us half a day to design, make templates and photograph the process. We think you will only need an hour and a half to create it using our ready-made templates! As a bonus, we also provide you with a felt Minion face mask. Enjoy!

Step 1: Cut out the pieces
Download the hat and glasses template below and print on suitable construction paper.

Attach the parts from the template onto cardboard of the appropriate shade. Carefully cut out all the cardboard pieces. You can trim the minion's eyes a little around the edges like we did.

Step 2: Draw the Eyes
On the eye parts, paint the irises with dark brown acrylic paint.

Draw in the pupils and outline of the eyes with black acrylic paint.

Add highlights to your eyes using a few dots of white acrylic paint.

Step 3: Glue the Hat
Using a bone spatula, draw a line along the edge of the top hat piece's transition into the jagged seam allowance. Fold all seam allowances up along this line.

Fold all the seam allowances on the hat brim up.

Glue the middle piece into a cylinder. Glue the top hat over the brim of the hat.

Glue the top round part onto the cylinder.

The main part for the hat is ready. Leave the craft for a while until the glue dries.

Step 3: Glue the glasses
Glue a black glasses strap in the middle of the yellow cylinder on the hat.

Assemble the glasses by gluing the previously made eyes into the middle of the silver glasses frame. Glue glasses with eyes into the remaining space between the edges of the hat strap.

Step 4: Make hair
Cut the black yarn into equal lengths and gather the central part into a bun. Make the same number of holes in the central part of the cylinder as you have wool pieces.

Insert the yarn into the cylinder from the inside.

Cover the underside of the yarn with a layer of glue and press it to the base of the hat. This will make the hair look sharper and coarser.

Trim the hairs to a length of 2.5-4 cm. Set the hat aside for at least 2 hours to allow all parts to dry thoroughly.

For many holidays you have to think over a costume: New Year's events, Halloween, Old New Year, themed parties and corporate events.
And workers at the cultural center and kindergarten have to constantly face a similar problem.
There is a simple scheme for making the final element of any costume - a hat. It is easy to make with your own hands at home.
To do this, you need to prepare special devices and materials that you cannot do without. The activity is exciting and requires attentiveness and accuracy. But the result will pleasantly surprise you.
The first stage is preparatory. You need to think about the color and stock up on some accessories.
Materials needed to make a hat:
- Paper glue.
- Cardboard.
- Scissors.
- Fabric tape.
- Scotch.
- Crepe paper.
- Ruler.
- Pencil.
- Quilling paper.
Important! It is good to use special glue in the form of a gun for crafts. Thanks to it, you can apply the composition pointwise without getting your hands dirty. It's convenient and practical.
Select the color of the paper so that your product matches the suit. Remember: the headdress may differ in tone and have stripes of similar colors.
You can combine paper of several colors to create a multi-colored hat for a children's costume.
DIY cylinder hat made of paper: video
For a visual example, watch this video. Here you will see all the nuances of this craft, learn how to correctly fold and secure elements.
After all, it is better to see once than to hear 100 times.
Paper pirate hat: templates
Making a pirate headdress with your own hands is not the easiest task. Angular collar, black color and unchanging pirate symbols - these attributes will have to be taken into account in the execution.
The materials required for the work are indicated above. With their help, we will begin to create magic, creating masterpieces with our own hands.
Step-by-step diagram for making a pirate hat with your own hands:
| № | Actions | Detailed description |
| 1 | Preparing the frame: the base | We cut out a strip of cardboard, the width of which corresponds to the width of the head circumference. We select the height from 10 to 17 cm. We round it and glue it together. We close the space on top with a circle cut to size. It can be traced directly along the contour of the frame. We secure it with tape from the inside, capturing both the sides and the top. |
| 2 | Cut out the side brims of the hat and the back | We leave room for a bend under the frame of the hat, draw two side lines on the cardboard, and one back. The sides should cover more than a third of the circumference of the hat, and the back is cut to a much smaller size. Draw the long part. We try it on and cut out the side fields according to its template. The back of the brim is cut separately |
| 3 | Attaching fields | We bend the frame slightly so that it is elongated. We attach the fields on the sides so that they connect in front, forming an acute angle. At the bottom, the fields are folded and bent downwards, under the circumference of the frame |
| 4 | Glue the tape in the middle | We tie it around the frame. For the pirated version, choose black tape |


Important! This option looks good if all the elements are made of thick fabric. It can be sealed with non-woven fabric. Frame the edges and stitch them using a sewing machine.
The view will be completely different. The cardboard version is good for kindergarten age children. If you are planning a serious costume for schoolchildren or for a corporate event, make the work from fabric.
Musketeer hat: diagram and step-by-step instructions
The musketeers' hat is prepared in a similar way. It has its own feature - round fields.
Making a musketeers hat:
- We cut out the fields: we make a round template with a hole of the same shape in the center, the diameter of which corresponds to the size of the head.
- We cover it with beautiful material.
- We attach the walls: the height of the walls is up to 25 cm. Otherwise, a cylinder will come out.
- The walls are sheathed with the same material.
- It is enough to sew a circle of fabric on top. You can fix the cardboard there and then cover it with fabric.
- We carry out decorative work: insert a feather, sew a ribbon or strip along the rim.
- We bend the fields. The hat is ready!
Paper cowboy hat: pattern
The cowboy hat is made of brown paper. If you use sheathing, the paper can be any color as the base.
And the material is selected to match the suit. Traditionally it is a brown, yellow or reddish tint.
Making a cowboy hat:
- We cut out a circle from paper, following the principle of making a musketeer's hat. But we make the margins twice as small: 5–8 cm is enough.
- We cover it with fabric.
- We make the frame according to the usual scheme. Let's join.
- The cowboy's hat is slightly narrowed at the top: we cut off two narrow triangles from the top of the frame to the middle, and connect the connectors with tape. The top is tapered.
- We cover the frame and make the upper part out of cardboard.
- We bend the top cardboard in the middle to give the product its shape.

Important! To create a real cowboy hat, use brown suede material.
The lining is the main visible part of the product; it is its type that determines how successful your work is.
It's good to use a cowboy star as decoration. Be sure to tie it with ribbon.
The art of making objects from paper is called origami.
You can master the basics and learn how to make different types from simple paper: flip-flops, caps, Dunno, Jack Sparrow, judge or witch headdress.
Products made from simple newspaper work well. Its volume is enough to make a headdress exactly the size of an adult’s head.
Interesting fact! Making a hat with your own hands is not only an interesting process that allows you to hone your skills.
This activity, like origami, helps you concentrate on one thing. You concentrate your attention and disconnect from reality. This allows your psyche to rest. A kind of relaxation.
If you do this regularly, you will notice that you begin to fall asleep better and become less nervous. The beneficial effect on the nervous system is explained by disconnecting from problems and using the hands.
Fine motor skills develop, which contributes to the development of brain activity.
Useful video
A hat made from paper yourself can be an excellent addition to a child’s costume for a party at school or just a favorite hobby for teenagers and adults. This craft does not require any special additional materials, and is also easy to implement, accessible even to someone who has never done origami or making other paper things before.
In addition, there is several types of making a hat out of paper, which allows you to choose the shape and instructions, which is ideal for you. A hat can be folded even from an unnecessary newspaper in a matter of minutes, so you can try yourself in this venture immediately after finishing reading the article.
So, how to make a paper hat correctly and what else is needed for this?
First, let’s look at the option from a newspaper, which absolutely anyone can do and doesn’t take much time.
The advantage of newspaper as a material for a hat is that It is quite large in size and also folds easily, unlike other thick papers. More often they make a paper hat for boys; it is needed for fishing or a picnic (see diagram below).
 The first thing you need to do is lay out a whole sheet of newspaper (two pages) on the table. Then roll it along the existing fold, and then fold it in half so that you get a rectangle. This is necessary so that another even fold appears in the middle of the page.
 It will come in handy later when you need to bend one corner exactly to the middle to form an unfinished triangle. The second upper corner is folded in the same way.
Here are 2 options for how to fold a newspaper:
 So we have two diagonal cuts. Now you can bend the bottom edge by 5-7 centimeters.
Important! Please note that only one edge is folded at this stage, that is, the end of one of the two folded pages. If you make a mistake at this stage, the whole craft will be ruined and you will have to waste time and a new sheet of newspaper to redo everything from the very beginning.
The second end is bent in the same way, but from the opposite side. It is important to ensure that they are bent at the same distance, otherwise the hat will turn out disproportionate and ugly.
 When these manipulations are completed, you can tuck the lower ends from the edges, also by 5-7 centimeters. It is best to secure them with tape so that the hat does not fall apart immediately after you unroll it.
At this point the work is completed, the hat can be unfolded and put on the head. The original thing is ready!
From paper
If you want the craft to be more durable and also more believable, then you can make a hat with a paper brim. Children will surely like it, and they will want to quickly go for a walk in it.
 Despite the fact that the technology here is a little more complex, it does not require additional materials and is quite doable if you strictly follow all the instructions.
 You need to fold a regular square from a sheet of paper. Then it is folded diagonally and in half twice to apply the necessary markings that will be needed for further actions.
 After this, you need to return the paper to the state of a square folded in half. The edges are folded inward without connecting the folds along the edges. After this, the folds are opened and pressed for the most satisfactory result.
 All that remains is to turn the craft over and bend the edges, and then the sides towards you, using the markings that were prepared in advance.
Important! Such a hat can be made from newspaper, the material does not matter. Even cardboard will do, but keep in mind that it is more difficult to fold.
With visor
Surely many will be interested in how to make a hat with a visor, that is, a real cap. It will come in handy on a hot day, when there is nothing else at hand that could protect your eyes and head from the sun, and it will not take much time to complete.
 A sheet of paper or newspaper needs to be folded along the “closed” corners, turning the bottom edge out twice. On the other side, special corners are made that will fix the current position of the paper, after which the planes should be bent towards you, taking into account the size of the future cap.
Important! When making any hat, you need to be careful with the dimensions - of course, if it’s just a hobby, then nothing bad will happen if the product is too small or large. When a hat is made for a child to play with, he can be extremely upset by the fact that the cap does not fit on his head. Instead of redoing the thing, you can immediately calculate the parameters, at least by eye.
 The lower end now needs to be bent along the edges, and from it to form peculiar double corners, which are subsequently wrapped inside the craft. Turn the future hat over and bend the larger corner to the bottom edge, tucking it behind the “side”, like the side corners.
 After this, you can straighten the original hat with a visor and put it on your head, forgetting about the harmful sunlight.
From cardboard
Cardboard is a very dense material, so you can make a real top hat out of it, which will not lose its shape and will be an excellent gift for a child.
 For this model you will need several additional tools: wire, glue, scissors and, if desired, decorative elements - beads, ribbons or something else.
It will be very important to measure your head circumference in advance, because cardboard will not be able to stretch like newspaper.
 On the cardboard you need to draw a circle equal to the diameter of the head circumference, and also cut the wire of the same size. Stepping back a few centimeters from the circle, draw the brim for the future hat. A rectangle of cardboard is made according to the size of the smaller circle, which is then bent into a circle and secured with glue or a glue gun.
A small circle needs to be glued to the top of this resulting circle.
 A unique frame for the hat is ready, you can leave it just like that or cover it with fabric and add a few decorative details.
 This hat looks believable and beautiful, so it will be useful not only for children's games, but also for various masquerades or even crafts competitions.
Corrugated paper
Another fancy option - This is a sports hat made of corrugated paper. First, the sheet of paper is folded in half, and then smoothed out again, after which a strip of non-liquid glue is applied under the fold. Place a strip of cardboard or any thick paper on it so that a little corrugated paper remains at the edges. These edges need to be folded over the sides of the tape and glued to it.
 Next, you will need to cut a small strip from another sheet of crepe paper and apply another bead of glue to the edge. It is glued to the first sheet so that the edge of the base coincides with the edge of the tape on which there is no glue. The bottom edge of the first sheet is folded over and another strip of paper is glued to it. Then a kind of fringe is formed with scissors.
 Now A fold is made along the bottom edge of the product - the edge is folded up. In the area of this fold, it is carefully glued or fastened with a stapler. After this, you need to put the hat on your head, and gather the upper part into a bun and secure it - grab it with a cord, and fluff the fringe. Decorating elements can be added upon request. The hat is ready!
Now you know many ways to make a paper hat to suit every taste and skill level.
For summer, a relevant topic is how to make a hat from a newspaper, sew a Panama hat. It is very interesting to watch how to make a hat from newspaper tubes, plastic cups, wire and even branches.
How to sew a cap with your own hands?
This product is reusable; once you create it, you can use this headdress for several years. On the eve of the coming summer, this topic is very relevant. But you can sew a cap for cooler seasons. Then you will need to take a denser and warmer fabric.
The following master class with step-by-step photos will teach you this interesting activity.

This cap is eight-piece. You must first calculate the size of one wedge, and then create the rest from it. This baseball cap is of the gavroche type.

As you can see, a pattern is given for one of the wedges, a visor and a band for it. For convenience, these parts are laid out on a ruler so that you have an idea of their sizes. The arrows show the direction of the lobar. Print these blanks in full size and attach them to the fabric from which you will sew. It is necessary to cut with seam allowances not only from this fabric, but also from the lining fabric. You can wear this cap in spring, autumn or cool summer evenings.

If you do not need a warm cap, then you can sew it from thick fabric with a thin lining material.
If you have soft fabric, then make it more dense by attaching an adhesive backing. Then the product will keep its shape well. Apply the adhesive pad with a hot iron. If you are sewing a cap with a lining, then you need to fold these two parts, and then connect them with the same two. Sew the wedges together to create half a gavroche cap.

Using the same principle, create the second half of the headdress. Trim off the corners of the seam allowance at the top of the cap so there is no thickening there. Now smooth the seams, press them.

Here's how to sew an eight-piece cap next. Place the two parts of the visor right sides together, after attaching the adhesive fabric here. Topstitch to the edge and trim off the excess to create a 5mm seam.

Press the seam and place the sealant inside the visor. You can buy it at a sewing store, they sell special visors for caps. You can also cut this part out of plastic or from a stationery folder. Now you need to cut out the band and sew it. Place this part as it is located in the following photo.

You see that you need to place the seam at the back, and in front, I focus on it, make markings. You also need to find the middle of the visor. Match these parts and stitch them together. Fold the band over to fold it in half.

Secure it in this position by sewing large stitches by hand. Here's how to further sew the eight-piece, the pattern of which is located above. Sew the band up to the top of the headdress.
Place the button inside and secure the edges of the fabric on the inside. Do not remove the threads from the needle, but sew this decorative fabric into the center of the headdress.

The lining for the cap must be sewn separately and connected to the main part. Now sew the cap with the lining and band, but leave a small space unsewn through which you turn the product inside out. Do this and sew up the resulting drawstring on your hands.

All that remains is to make a decorative button. To do this, cut a circle of fabric twice as large as it and assemble it with a thread and a needle.

This is how an eight-piece cap is created, which is very fashionable. The main thing is to do everything carefully and slowly.
The following master class is suitable for true fashionistas.
How to sew a hat - master class

The pattern of a women's hat will help you make this headdress as accurate as possible.

These drawings already have 1 cm seam allowances, so you won't need to make them. The sides must be stitched together and the seams ironed.

Place the outer and inner edges right sides together and topstitch the outer edges. Turn the hat blank right side out, grind the edge, and then iron it. Make parallel lines 1cm apart.
Now you need to sew up the back section of the crown and sew down the section of the lining, leaving a space of 7 cm unsewn. Through this you will turn the panama inside out.

Next you need to sew the bottom to the crown, and stitch the bottom lining to the crown lining. Press the seams, place all the pieces right sides together and place the margins between them, aligning the edges.
Now you need to turn the headdress through the hole and hem the folds by hand using a blind seam. All that remains is to make decorative stitches, and the beautiful brimmed hat is ready.
If you need a fashionable ladies' hat, then the following master class will help.

Download the pattern.

To get accurate dimensions, it is better to draw it using cells.

Each side of such a cell is 5 cm. Redraw the pattern and cut out a blank from the main fabric along it. If the fabric is thin, then it will be necessary to cut out the same parts from the adhesive fabric and lining material. Use a hot iron to attach the adhesive dublerin to the wrong side of the main fabric. Now fold this double blank with the lining so that these materials are in contact with the right sides. Topstitch to the edge, leaving a small unstitched space at the back through which you will need to turn the hat right side out. You will then sew it up by machine as you stitch the brim of the hat along the edge.

Such a women's hat is put on the head, then you need to thread each strap into the opposite hole and tighten it.
To process the holes, you need to place a square of thick fabric on the wrong side and sew on a machine, as when you overcast buttonholes.
How to make a hat from newspaper tubes?
Even from this material you can create a chic hat for the summer. See how it's done. First you need to prepare the following:
- newspapers;
- knitting needle;
- scissors;
- clothespins;
- glue;
- a vessel of suitable shape;
- cardboard circle;
- paint;
- headdress decorations.

Now you need to wind each one onto a knitting needle. The thinner the knitting needle, the more elegant the final product will be. But it is usually difficult for beginners to use a thin knitting needle right away, so it is better to practice first.
Attach this tool to the corner of the newspaper tube and begin to wrap the paper around the metal.

You will need to glue the remaining corner with PVA glue and begin making the second newspaper tube. Now you can move on to weaving.
Place the newspaper tubes on a circle of cardboard, placing four of them perpendicular to each other in the form of a simple pattern like this.

Secure the newspaper tubes by attaching them to the cardboard base with clothespins. Now start weaving the hat. To do this, you need to insert one tube between the main ones, fix it in the same way and braid it in a circle.

When the working tube is almost finished, then insert the thin end into its thick end. This way you will attach other tubes.
Having made a small round bottom, spread the newspaper tubes in different directions so that they resemble the rays of the sun.

Take a semicircular bowl as a shape and place it as shown in the photo. Braid this piece to make a round hat.

Now you need to remove the bowl and re-attach the ends of the newspaper tubes to the cardboard blank.

To make the hat further, weave the brim of this piece.

When they are the right size, you need to cut off the excess length of the tubes and glue the scraps of tubes to the base on the back side. The hat can be decorated with varnish. When it's dry, tie a satin bow here. You can also make flowers from ribbons and glue them to your hat as a decoration. This is how you make a hat from newspaper tubes with your own hands.

And if you need to quickly make a headdress, then you can use the same material.
How to make a hat from a newspaper?
You can make a cap with a visor to protect yourself from the sun. This product will also come in handy during repairs.

- Fold a sheet of newspaper in half. Now fold the right and left corners down so that rectangular stripes form at the bottom.
- In the second stage, you will wrap them up, but in different directions. Fold the corners of these strips as shown in photos 3 and 4.
- Turn over the corner of the resulting workpiece, bend two small corners at the bottom. They need to be threaded into the resulting drawstring. Fold the top corner down.
- All you have to do is peel back the visor and rejoice at what a wonderful newspaper hat it turned out to be.

Also take a piece of newspaper paper and fold it in half. At the place of the folds, you need to bend the opposite corners down, and pull the lower strips slightly upward and bend the corners of each here.
You will end up with a triangular piece. Connect the opposite corners at the bottom and turn this semi-finished product with an angle towards you. Now you need to bend the corner closest and farthest from you upward and turn the workpiece again 90 degrees. Fold the corners again, turn the cap 90 degrees and you can try it on.
The paper samurai helmet also looks interesting. What it looks like is shown in the following photo.

The origami technique will help you create it. Cut a regular square with equal sides from the newspaper. Fold it diagonally, bend the corners towards the top so that you get a small square from this triangle.
Take the bottom corners of the front side and pull them towards the opposite corner. And the upper corners need to be bent outward to form “ears” that will protrude beyond the boundaries of this base.

A step-by-step diagram of this work will simplify the process of understanding. You can make such a hat not only from newspaper, but also from paper. Children will have fun playing samurai while wearing this headdress.

If such a hat made from newspaper seemed complicated to you, make an ordinary cap from this material. To do this, take a rectangular sheet of newspaper and fold it in half.
Now you need to bend the top corners and bring the corners to the corners. In this case, the parties will also fall on top of each other. The resulting side must be folded up twice.
Turn the future cap over and bend the strips on one side and the other towards you. The bottom edge needs to be turned towards you, unfolded and the corners of this part should be folded according to the basting.
Bend the bottom plane towards the top twice and close the folds you made earlier. All that remains is to turn your cap over and bend the top to the bottom and straighten it. Tuck this folded section in. All that remains is to straighten the product.

In conclusion, we suggest getting a dose of positivity and seeing how to make unusual headdresses.
Original hats

Looking at such hats, you can’t help but smile. Some of them can also be protected from the sun, while others will become participants in the competition. If you are expecting such an event, we suggest making an original hat with your own hands.

This one is made from:
- felt;
- fleece;
- padding polyester;
- hat elastic.
- Take a round shape, such as a plate, and place it on a piece of felt. Cut out this blank. To make the hat have a slightly concave shape, wet felt with a spray bottle and place it on a concave surface, such as a bowl.
- Let the workpiece lie in this form overnight or for a day. It will dry and take the desired shape.
- Cloth food is also quite easy to make. Cut two rectangles from brown fleece, sew the ends of each, giving them a semicircular shape. On the other hand, leave these ovals unsewn for now in order to stuff padding polyester here. Now close the space on both sausages using freehand stitches.
- Fabric scrambled eggs are created from yellow and white fleece or drape. Make ham slices from pieces of felt of the same color. To give them the appropriate shape, also moisten them with water from a spray bottle and put them in a warm place overnight, after placing them on blanks of this shape.
- To make the beans in the sauce, take tan fleece and cut it into jagged circles of equal size. Roll small ovals from pieces of cotton wool or padding polyester that will turn into beans. Place the pieces between two rough circles of fleece and secure with a glue gun. This hot silicone will also help attach the bean to the hat. All that remains is to glue a hat elastic to it and surprise the audience with such an original headdress.

To make the following type of hat, you will need wire.

Roll a frame out of it, making letters from this material. You need to sew black ribbons onto a strip of white thick fabric so that they turn into the keys of a musical instrument.
The next original hat can also be made on the basis of wire or take ordinary branches for it. Attach them to a plastic hoop using wire. Now you need to sew a crow or rook from dark fabric and attach it to the branch in the same way.

You can also make another interesting headdress based on the hoop. Glue to it a lot of butterflies cut out of colored paper or printed on a color printer.

And if you need to hide from the sun on a warm summer day, then make one butterfly, but use cardboard or plastic for its base. These materials are covered with fabric or glued to it. Glue pieces of fur or feathers into the center of the butterfly to create a fluffy body.

If you have a straw hat that is out of fashion, you can decorate it. Glue artificial moss, twigs, and fabric berries here. Decorate this picturesque picture with scraps of burlap.

And if you know how to make flowers from fabric, then make these, connect them and glue leaves of the same material next to them.
A hat made from plastic cups is no less original. They are glued together, and artificial flowers, such as daisies, are also attached inside with glue.

An artificial feather flower can decorate the following composition. For it you need to cut a wide strip of fabric and fold the 1st and 2nd large edges so that you can then insert the wire here. This flexible material will allow you to give the ribbon the desired shape of the cap. Glue or sew fabric butterflies here, and the flower will become a decoration for such a hat.

If you still want to make a familiar headdress, then watch a short master class that will teach you how to do this.
You need to take:
- cardboard;
- textile;
- lace or satin braid;
- filler;
- scissors;
- decoration items.

Place the filler of the required size on the top of the hat and glue a circle of cardboard to it, framing this blank with fabric.

You can use regular foam rubber as a filler. It will create the desired shape.
Cover the brim of the hat with fabric on both sides, and glue the top you just made on top. Using a glue gun, attach ribbons and fabric flowers to decorate the hat and hide where the two pieces meet.
Here's how to sew a hat, make a hat from newspaper, make original headdresses.
For the summer, the child will definitely need a Panama hat. The presented video tutorial will help you quickly cope with this task. See how to quickly sew a Panama hat for a baby.
The second video shows how to make a cap from newspaper. After watching it, it will be easier for you to understand such needlework.