Crochet hats for beginners. Crochet baby hat for beginners, step by step. How to crochet an easy spring hat for beginners
Love to create and wear exclusive items? A women's crocheted hat is just what will highlight your individuality during the seasonal cold. Believe me, autumn and winter are simply created for stylish transformations and exclusive outfits. And for accessories here you have complete freedom of choice.
What can I say, even a child’s hat today can become a real work of art. And the child will not only refuse to wear it, he will be delighted if a cute one appears in his wardrobe hat with ears, funny owl hat, stylish earflaps or a helmet hat. So mothers have no choice but to master knitting and make unprecedented accessories for themselves and the whole family. Fortunately, today this can be done with the help of video lessons, photo instructions and tips. experienced craftswomen. Almost every day they appear online new models of hats, which you can simply copy for yourself in the fall or winter, and you are guaranteed warmth and beauty.
To back up your words with real action, we suggest you take a hook and thread and open the video for beginners to watch. Also, especially for you on this page there is a detailed master class on knitting a women's hat. Watch and enjoy the creativity!
How to crochet a women's hat: photo instructions
- Prepare 100 grams of yarn (50% wool, 50% acrylic).
 2. Wind the thread around your finger.
 3. Remove and make a loop by threading the thread into the middle of the circle.
 4. Cast on loops (their number depends on the thickness of the thread). With a thread of this width, 5 loops are enough.
 5. We weave the chain, return to the first loop and pick it up.
 6. We weave a loop, and then tighten the thread located in the middle. Thus, we close the hole on the top of the head.
 7. We knit in a circle, weaving through the sides and connecting the ends together.
 8. Add loops by knitting two loops in one. First we expand through 3 loops, and then through 5-10-15.
 9. Weave with a double crochet stitch.
 10. Knitting a circle required size.
 11. The width of the product can be measured using an old hat.
 12. When the width is already sufficient, we begin to knit with the same pattern, but without adding loops.
 13. The last 2 rows are knitted with one yarn over.
 14. We finish with a regular single crochet loop.
 15. We knit the decor. To do this, find the middle of the side and make a loop with one crochet.
 16. We weave the pattern according to the following pattern: one loop with one yarn over, the second with three loops and two yarn overs. We alternate loops.
 17. Knit with a snake in a circle.
 18. If you want a more fluffy knitting, then after the first row you can unroll the thread and knit the second row with a double crochet.

 19. This is what happens!
 Watch the video on how to tie women's hat crochet
Crochet men's hat
It is also important for all needlewomen to know how to knit men's hat crochet After all, not only women, but also men like to wear warm hats, if they are beautiful and stylish. And if you also make such beauty with your own hands, then yours close person will wear it with pleasure.
Here's a hat with simple pattern you can relate very fast and easy. First, we make a ring, make 2 chain stitches and knit 12 double crochets in a circle. We tighten the thread that is in the middle, and then we knit a connecting post into the second air loop. Next up is the second row - 2 air loops lifting and knitting embossed front column, pulling the hook into the second column. At the end of the row we knit a regular stitch at the base of the first relief column. And in the second air loop we knit a connecting post. We continue knitting according to the instructions, as shown in the video.
There are other video tutorials on how to crochet a hat. For example, this hat, knitted half double crochet, suitable not only for men. First, we knit 8 half double crochets, tighten the sliding loop and join the first knitted stitch. Here we will knit rows without air rise.
Crochet hats patterns and descriptions for women
You have already reviewed the master class and studied the video step by step. However, that's not all. We have prepared something else interesting for you. In this section you will find crochet hats: patterns and descriptions for women. And also one knitting pattern for a hat for a man. Watch and learn with us - the patterns are simply wonderful.
First, practice knitting in a spiral.

 Like this interesting scheme may become your favorite.

 Another interesting hat knitting pattern

 Incredibly beautiful summer option.

 And this is a crochet hat for men.


Dear accomplices! This is not cheating. These hats are actually crocheted and not knitted. And this online one was created to introduce you to the technique of knitting such hats.
https://img-fotki.yandex.ru/get/15541/124053456.26/0_11c80d_b43d6b9a_orig.jpg
UPD 08/24/2016 New video
The first few rows are the hardest, then knitting is easier. 
https://img-fotki.yandex.ru/get/6604/124053456.b/0_82837_981c628c_orig.jpg
Be careful.
Insert the hook exactly into the back/far loop of the loop, otherwise the pattern will turn out different, not a 1x1 elastic band.
Periodically count the number of stitches in a row so as not to lose stitches or add extra ones.
Try to knit all the loops and stitches evenly, especially along the edges, so that there are no stretched areas or sagging threads in the fabric.
Watch which way you turn your knitting when moving from row to row, it depends on appearance edges.
Since the connecting column is the lowest in height of all the columns, the increment of the fabric is slower than with regular knitting. In addition, the speed is slowed by the habit of knitting the connecting stitch in two steps. To increase speed, you need to choose the optimal position of your hands and learn how to knit a connecting stitch in one step. About hand placement when crocheting here You can also find recommendations for left-handed knitters at the link.
Partial knitting
The hats are knitted crosswise in sectors/wedges. The crown is formed according to the principle of partial knitting, i.e. knitting in short rows.
The first method of partial knitting
https://img-fotki.yandex.ru/get/6408/124053456.b/0_8351c_edbdf8c7_orig.jpg
Formation of the “ladder” of the first sector and knitting initial row next sector.
1 - the first sector is connected, it turns out to be a “ladder”
2 - start knitting the first row of the next sector
3, 4, 5 - we knit the cloves sequentially, here you need to work extremely carefully to knit the same number of loops as in the first row of the sector
6 - the first row of the second sector is knitted
7, 8, 9 - turn the work and knit the next row of the second sector, then we knit in exactly the same way as we knitted the first sector, according to the same pattern, so that we get exactly the same “ladder”
10 - again we do not knit the row to the end in order to get the first step of the “ladder” of the second sector
11 - all steps of the second sector are knitted
12 - repeating steps 2-6, close the steps of the second sector and get the first row of the third sector
Second method of partial knitting
https://img-fotki.yandex.ru/get/4509/124053456.2a/0_13e816_779b45c1_orig.jpg
Recommendations for choosing yarn and selecting a hook.
The yarn is selected depending on the season. For winter and autumn/spring, wool, acrylic or mixed fiber yarn are suitable. 
https://img-fotki.yandex.ru/get/6709/124053456.2a/0_13e819_e195d3aa_orig.jpg
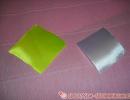
In the photo from left to right
YarnArt Wool (80% wool 30% polyamide, 100g 340m) hook 2.5mm
Alize Baby Wool (40% wool 40% acrylic 20% bamboo, 50g 175m) hook 3mm
YarnArt Crazy Color (35% wool 65% acrylic, 100g 260m) hook 3.5mm

https://img-fotki.yandex.ru/get/4133/124053456.2a/0_13e614_c2885ea7_XL.jpg
And this is a sample made from double thread Alize Baby Wool Batik Design (40% wool 40% acrylic 20% bamboo, 50g 175m) 4mm hook
In addition, you will need scissors, a tapestry needle (with a blunt end), and a measuring tape. Knitting markers, a notebook, pen, and pencil for calculations may also be useful. 
https://img-fotki.yandex.ru/get/6509/124053456.2a/0_13e815_aa7440e0_orig.jpg
Sample and calculation
For the calculation, you need a head circumference measurement. The height of the hat is dictated by the style. For head-fitting hats, you can use the table data when calculating 
https://img-fotki.yandex.ru/get/5820/124053456.2a/0_13e826_6c2cec9f_L.jpg
Table from here
We knit a sample to determine the knitting density. It is advisable to wash it according to the recommendations on the label, then dry it without stretching it. Then, on a slightly stretched sample, we count the number of loops/stitches horizontally and the number of scars vertically (1 scar = 2 rows).
Let's do the calculation. The direction of knitting the hat is along the circumference of the head. For example, horizontally 5cm=17 stitches, which means for a hat height of 22cm the cast-on chain will be 75 stitches, and vertically 5cm=10 stitches, which means 55cm (head circumference) will be 110 stitches. Since the hat is knitted in sectors/wedges, it is necessary to distribute the resulting number of hems among the sectors. I selected the ratio of 11 sectors of 10 rubles = 110 rubles.
Errors in determining the number of sectors.
The number of sectors can be reduced or increased. The more sectors there are, the easier it is to correct the knitting if an error has crept into the preliminary calculations. It will be enough to tie or loosen one or two sectors so that the hat fits the circumference of the head. 
https://img-fotki.yandex.ru/get/9748/124053456.2a/0_13e817_44021f4e_orig.jpg
Errors in determining the length of the typesetting chain
At first, especially when working with unfamiliar yarn, errors occur in determining the length of the cast-on chain. If the dial chain is short, the height of the hat is insufficient. If the typesetting chain is long, the height, on the contrary, turns out to be excessive. What to do in such cases? If you don’t want to bandage your hat, if the height is not enough, you can tie a strip of the required width at the bottom 
https://img-fotki.yandex.ru/get/6414/124053456.2a/0_13e818_60c7627b_orig.jpg
If there is excess height, you can turn the excess outward or turn it inside out. If these options are not suitable, you will have to undo the hat and bandage it.
Making a seam
https://img-fotki.yandex.ru/get/5504/124053456.8/0_632c8_a620eeae_L.jpg
Just a hat
Suitable for children and adults. Fits well on the head and covers the ears. 
https://img-fotki.yandex.ru/get/6400/124053456.2a/0_13e82d_6da3ebf7_orig.jpg
Hat height is approximately 20-22cm 
https://img-fotki.yandex.ru/get/3211/124053456.2a/0_13e81a_108b53c_L.jpg
Yarn Alize Superwash (75% wool 25% polyamide, 50g 210 m or 100g 420 m) or YarnArt Wool (80% wool 30% polyamide, 100 g 340 m)
Hooks 2.5 or 3mm. 
https://img-fotki.yandex.ru/get/4614/124053456.2a/0_13e33f_232a9b39_L.jpg
Video of the process of knitting a hat (no sound, all explanations are included in the credits).
We collect a chain of 75 air. loops + 1 air. lifting loop and knit the “ladder” of the first wedge using partial knitting using the first method according to the algorithm
1 rib – leave 1 loop undone
2-7 scars – leave 2 loops unknitted
8 rib – leave 4 loops undone
9 rib – leave 5 loops unknitted
10 rib – leave 6 loops unknitted
In total, 11 such wedges/sectors need to be connected.
At the end of knitting, carefully pull the loops at the top of the head, sew the edges and tuck the tails into the fabric.
The yarn consumption is about 2/3 of a 100g skein. 
https://img-fotki.yandex.ru/get/3110/124053456.2a/0_13e81b_e533266_XXL.jpg
To knit from other yarns, you need to make your own calculations.
Examples of hats
Using the same principle, you can knit a variety of hats.
Classic Stocking Cap design Nancy Nehring 
For the lapel it is necessary to increase the number of loops of the cast-on chain. You can choose a different pattern for the lapel.
Rib Stitch Cap design Nancy Nehring 
Corkscrew Tassel Cap design Nancy Nehring 
Spiral diagram 
https://img-fotki.yandex.ru/get/4607/124053456.2a/0_13e81d_f41a820f_orig.jpg
Hats covering ears
These hats differ from simple ones only in the figured bottom and the presence of ears. The technique of knitting with connecting stitches allows you to create a figured edge. 
https://img-fotki.yandex.ru/get/4605/124053456.2a/0_13e81e_5818fd43_orig.jpg
To form the bottom line of our knitted hats with ears, you can use patterns for sewing fleece hats.
For example, this is what a pattern for sewing a hat looks like 
Source blog http://igoletti-and-strocilli.blogspot.com/2012/12/blog-post_24.html
The author compiled it using a free pattern from Ottobre magazine. You can download patterns for sizes 50-52-54-56 cm here
http://www.ottobredesign.com/fi/kaavat/pdf/nallelakki_fi.pdf
Scarves will complement the hats.
The process of knitting a hat with a lapel
patterned after Rib Stitch Cap design Nancy Nehring
No description. I knit according to the picture.
YarnArt Crazy Color (35% wool, 65% acrylic, 100g 260m). Hook 3.5mm.
I knitted a sample and determined the density, approximately 5cm - 13 loops. Cast-on chain 78 ch (10 loops - crown decoration, 50 loops - hat, 18 loops - lapel) + 1 ch rise. I didn’t count the number of sectors in advance. I will knit and try on.
In this hat, I decided to do partial knitting in the 2nd way https://img-fotki.yandex.ru/get/4509/124053456.2a/0_13e816_779b45c1_orig.jpg
The sector is five hems, but decreases are knitted in only four hems. The last, 5th scar is knitted completely without decreases (i.e. the entire row to the end), this will be a decoration for the crown.
Cast-on chain 78 ch + 1 ch rise. Markers mark the 10th, 15th, 20th, 25th loops 


To ensure that there are no holes in the fabric on the line where the wedges meet, you need to insert the hook into the step loop and the back wall of the loop of the previous row and knit them together.


We knit three steps of the ladder by picking up the loops, and we knit the last 4th step in reverse, without picking up the loop. The holes that are created there will be useful to us in order to tighten the decoration on the top of the head.


The wedge is knitted. The last row of the wedge should have 78 stitches, just like in the cast-on chain. You can remove the markers and mark the 10th, 15th, 20th, 25th loops again.

Knit the remaining wedges in the same way as the first.

Knit as many wedges as needed so that the hat fits the circumference of your head.
UPD-2 10/07/2015
There are 18 wedges in total in this hat.

Making a seam


A correctly executed seam can only be determined by a small scar on one side. When the hat is on the head and the elastic is stretched, this scar is very difficult to see.

The finished hat is like the original with a turn up...

But you can wear it as a beanie.

I wish everyone to wear more hats, good and different!
Easy loops for us!
Photos of hats can be added to Album for finished works
The lesson is based on my daughter Varya’s hat. She is 2 years 3 months old. But, knowing the technique, you can knit this classic hat to any size.
Yarn COCO 100% cotton. In 50g. 240 m. It took about 35 grams of green yarn. And for the flower - a little milk. Hooks No. 2.25 and No. 1.75.

Photos enlarge when clicked, so you can see everything in detail!

Before you start knitting, you need to take measurements from your head:
1.
Head circumference. We draw a measuring tape horizontally above the eyebrows and along the level of the most protruding part of the back of the head. In our case, the head circumference is 48 centimeters.
2.
Depth. If we want a cap in depth to the beginning of the eyebrows, then we draw the tape from the middle of the lobe of one ear to the middle of the lobe of the other ear through the center of the crown. In our case, this measurement is 36 centimeters.

If we need a hat to the middle of the eyebrows, then we measure the depth not from the middle, but from the end of the lobe of one ear through the center of the crown to the end of the lobe of the other ear.
Crochet hats are most often crocheted:
1. From the bottom to the crown. The advantage of this method is that if we take a straight fabric pattern for a hat, it will not be turned “upside down”, but will remain as is, since straight fabric patterns are read from bottom to top, and the hat is knitted from bottom to top. This is where the advantages end. Disadvantages: you need to knit a sample in order to calculate the loops at the beginning of knitting. You can, of course, make a “cunning move”: cast on a chain of chain stitches, wrap it around your head and knit according to this “calculation”, but then the evening will be wasted, because we are unlikely to get the size right. Only a full-fledged sample and calculations based on it! Another disadvantage of knitting from the bottom is that we will not get such a perfect crown, unlike knitting a hat from the top. Although this does not apply to all patterns.
2. From the top of the head - from top to bottom. This method is chosen probably in 90% of cases, primarily because it gives the perfect crown and makes it easy to adjust the size while knitting. I myself crochet hats from the top of the head, and I recommend the same to you.
Today we will knit a hat with double crochets.

How to knit the crown of a hat?
The crown of the hat is knitted in the round. The main part and the rim are a pipe. There are certain rules for forming a circle.
For a circle of double crochets they are:
Row 1 - knit 12 dc;
2nd row - 24 CCHs: 2 CCHs are knitted into each column of the previous row;
3rd row - 36 Dcs: 2 Dcs are knitted through a post;
4th row - 48 Dcs: 2 Dcs are knitted through two columns;
5th row - 60 Dcs: 2 Dcs are knitted through three columns;
Row 6 - 72 Dcs: 2 Dcs are knitted through four stitches, etc.
Thus, to increase the diameter of the circle, 12 stitches are added evenly in each row by knitting two stitches into one loop in each wedge. There are a total of 12 wedges in this circle of double crochets. Options for distribution of increases:

Choose the method of increase that you like best. I use the second method - I add an increase at the end of each wedge.
If we tie 13 wedges instead of 12, then before moving to the pipe, the circle will look neat:

But, when we move on to knitting the main part, it turns out that the top of the head is folded, which is why it doesn’t look quite neat, and to give the hat a neat look, you’ll have to work hard with an iron and steam:

The diameter of the circle up to which you need to knit the crown is calculated using the formula:
Divide the head circumference by 3.14 (Pi).
48 cm: 3.14 = 15.3 cm. This is also the diameter of the widest part of the hat.
In order for the hat to fit your head beautifully, the transition from the top of the head to the main part of the hat must be made smooth. To do this, subtract 3 -3.5 cm from the calculated diameter of the circle.

After that, we knit these remaining 3-3.5 cm to the required diameter with increases through a row: a row with increases, a row without increases, a row with increases, a row without increases, a row with increases. As a result, the crown will gradually and neatly round, like a dome.


Some beginners have a problem - noticeable gaps in the places where the row closes.

The reason is that when knitting a connecting loop, the hook is inserted between the lifting loops and the post that follows them. In the photo above it is marked with a black circle. The hook must be inserted into the third air loop under the top and middle threads (blue arrow in the photo), and the connecting loop must be knitted tightly. Then there will be no gaps.
Having knitted the top of the head, we move on to the main part of the hat, which we will knit with a pipe.
I think this knitting is an excellent choice, problem solving seams!
Is there another way to solve the seam problem without resorting to spiral knitting?
There is such a way.
We start the row with two lifting chain stitches and at the same point where the chain stitches are knitted, we knit a double crochet. We knit a row. Tied up. We close it not into the second lifting air loop, as we would have done before, closing the row by knitting a connecting stitch into the top lifting ch, but into the base loop of the next double crochet. In the photo, the place where the hook is inserted when closing a row is shown with a red triangle. This will move the row a little to the left.

Even this method will not give a completely perfect seam, and it will still be a little askew. But after ironing with steam and a little leveling with hands, we get a good result.


The diameter of the cap should be: head circumference: 3.14 = 15.3 cm.

The headband of the hat in our example is tight-fitting, so I took a hook that was full size smaller. Knitted in a spiral with single crochets. We determine the height of the rim as desired: 2-4 cm. The last row was knitted like this: single crochet, 2 chain stitches, skip a loop of a stitch at the bottom, and a single crochet in the loop of the next one. The edge turned out to be in the form of a small picot.
How to determine without trying on whether the depth of the cap is accurate?
To do this, fold the cap in half and measure it from the top of the head to the edge. You should get a number: a measurement from the lobe of one ear to the lobe of the other ear, divided in half. In our case, 36 cm: 2 = 18 cm.

I tried to take model shots. But first, my Varya rushed off somewhere through the windfall.


Then on the site she saw a nest of firefighter beetles. And in general there was no time for photographs. My daughter studied them with such curiosity that I gave up and covered the camera.

I thought about taking pictures at home, but she found the book about the chicken more interesting
I didn’t bother to distract.

I tied a flower to the hat: something between a chamomile and a water lily. Daisies give joy, and the water lily is a magical flower.
I knitted it without a pattern, just as the crochet went. And only after sewing the flower to the hat did I remember that I had not written a description for it. Suitable like this:

Adjust the number and height of the petals as desired.
We knit a ring of air loops. A row or two - single crochets. Then the petals, and the last row - we tie all the petals with single crochets.
Such a hat can be decorated with any knitted flowers and entire flower beds, knitted butterflies, and various appliqués. You can knit a hat with multi-colored stripes. Instead of the proposed headband, you can knit a beautiful openwork border...
In short, there are a million options. The main thing is technique, love of knitting and imagination.
I also like these hooked hats because they fit perfectly on the head and do not ride up, unlike many store-bought knitted hats without ties, in which the child turns his head twice and his ears are bare.
If you are planning to crochet a hat but don't know where to start? Take advantage detailed description, tips and recommendations that are set out in the article. Stock up on threads, a little patience and get to work.
Before you begin, prepare everything required material. You will need:- header diagram;
- yarn;
- hook;
- scissors.

- Head circumference or maximum circumference is measured from the front through the brow ridges, and from the back along the most prominent part of the back of the head.
- The height of the hat (depth) is from the crown to the earlobe.
- For a regular hat, you will need one more measurement - the radius of a flat circle, which will become the beginning of the hat. Divide the head circumference by Pi (3.14).


Before finishing the piece, think about how you can decorate the hat. Perhaps it will be a cute knitted flower, pompom or brooch.