DIY pincushion with buttons from a jar. Master class craft product modeling design chair - pincushion from a tin can metal fabric. Simple DIY needle beds
Agree, it is very convenient when there is a convenient little thing in the closet, on the table, on the drawer on which you can collect all the needles. It can be not just foam rubber or a rag, but an excellent decorative item that will become a multifunctional product - beautiful decoration interior for the accumulation of needles on it. Let's talk about how you can create beautiful do-it-yourself needle beds from various materials.
The pincushion was invented a long time ago; our great-great-grandmothers used this wonderful and practical invention. Don’t think that only needlewomen who regularly do sewing should have such a thing. Every housewife who has held a needle in her hands at least once in her life should have this attribute. Today, pincushions are not only a product for storing needles in order, but can also be a decoration for any interior.
You don’t need to be a professional seamstress or decorator or designer to create an exclusive, interesting, beautiful pincushion yourself. The material that can be used to create this thing can be anything:
- foam rubber
- scraps of various fabrics
- beads
You don’t need to purchase any special tools; for manufacturing you will need:
- scissors
- threads
Pincushions can be different forms, sizes, design. It all depends on the desire and imagination of the creator; here there is room for the imagination to run wild. For those who cannot come up with anything of their own, we suggest looking through photo of do-it-yourself pincushions:


The main qualities that a person who wants to make a pincushion on his own must have are painstakingness, hard work, patience, and perseverance. First, let's look at felt and how it can make a beautiful pincushion.
DIY felt pincushions
Felt today is a popular and widespread material for a wide variety of fakes, and pincushions are no exception. It is not surprising that this particular material is chosen by needlewomen, because it is easy to work with, and products made from it are original, bright and soft.
First of all, I would like to say that for the do-it-yourself felt pincushion in question, you will definitely need patterns so that, in the end, you get not just a product, but a real work of your art. Let's take a closer look at the stages of making a cute spring pincushion.

Materials you will need to create a felt pincushion:
- felt in different colors
- threads chosen to match the felt
- foam rubber
- padding polyester
- needles
- scissors
- cardboard
Sequence of actions:
- We start with patterns. We cut out a circle with a diameter of 6 cm from paper, apply it to the felt, trace it with a self-disappearing marker, or, as in the old fashioned way, pin it to the material and cut it out. It is necessary to make two such circles, and of the same color, one will be the bottom, the second, respectively, will be the top of the needle bed.
- Threads for sewing parts must be selected to match the felt that was chosen. The felt can be any color according to the craftswoman's wishes.
- In order for the seam to be perfectly even, for beginners, let us reveal a secret - you need to make two strokes on index finger, and make each loop in accordance with the distance between these strokes.
- We take felt of a different color and cut out a rectangle that would correspond in length to the volume of the cut out circles; this will be the side part of the needle bed.
- We sew all three patterns together, leaving a small hole for the filler.

- We cut out a similar part from foam rubber and cardboard according to the circle template.
- We put a foam circle in the lower part and start filling the needle bed with padding polyester. We stuff it tightly enough so that the side of the pincushion is smooth and neat, leaving room for the cardboard.
- After the work has been done, sew up the needle bed to the end.
- To decorate the pincushion you will need templates of flowers, the shape of which can be any, as well as size, at the discretion of the master.
- Using the same principle, we cut out flowers from felt and sew them to the side and top of the needle bed. The centers of the flowers can be made from beads or buttons.
DIY mannequin pincushion
Pincushion in the form of a mannequin - another one original version needle products. Let's look at how to make a needle bed with your own hands in the master class below.
Materials and tools required for a mannequin pincushion:
- scissors
- pins
- threads
- pencil
- lid
- padding polyester as a filler
- two types of multi-colored fabric
- mannequin template

Sequence of actions:
- Attach the template to one of the selected fabrics with pins, cut out 2 patterns
- We sew them together with the colored sides facing in, and turn them inside out.
- Using a pencil, fill the stitched parts with filler, leaving a small hole in the bottom middle.
- Insert a pen, pencil or other object of a similar shape into this hole.
- We apply the lid to the selected fabric from which the patterns were made, and to the cutouts along the contour
- Make a hole in the lid in the middle, glue a cut out circle of fabric on top
- We insert a mannequin on a “leg” into the manufactured stand.
- From a fabric of a different, preferably monochromatic color, we cut out a skirt for the mannequin and put it on it.
- You can decorate the mannequin-pincushion with beads, flowers, buttons, etc.

Agree, easy do-it-yourself pincushion – fast, simple and original.
DIY pincushion from a jar
To make a needle bed, you can take any available tools, objects and materials that you have at home. Let's consider an original pincushion, the basis for which will be an ordinary glass jar.
Materials:
- foam rubber
- textile
- cardboard
- small glass jar
- ribbons to decorate the finished pincushion
- scissors
- pencil
- threads
- needle
It is better to take a very small jar so that the pincushion turns out nice and neat.

Subsequence:
- Cut a circle out of hard cardboard in accordance with the diameter of the lid on the jar.
- We cut out 2 circles from foam rubber: the first is slightly larger than the lid, the second is slightly smaller.
- Cut out a circle from the selected fabric, the size of which is twice the size of the lid.
- We sew along the diameter with stitches.
- We put a larger diameter foam rubber circle in the fabric, a smaller circle of foam rubber on top and cover it with a cardboard circle.
- We secure the fabric with stitches. The pillow is ready.
- Glue the resulting pad to the lid.
- We cover the side of the lid with a beautiful ribbon.
- Glue a bow at the joint.

You can store any crayons, buttons, beads, etc. inside the jar.
Video: DIY pincushion from a jar master class
DIY hat pincushion
In fact, sew a pincushion with your own hands very simple, and this can be seen in the example of making a hat pincushion. For this you will need:
- textile
- scissors
- cardboard
- needle
- threads
- padding polyester
Stages of making an original pincushion in the form of a hat:
- Cut out a circle from cardboard, choose the diameter yourself.
- We cut out two circles from the fabric, one circle should be three times larger than the cardboard circle, the second should be equal to the diameter of the cardboard circle.
- We place the cardboard circle on a large circle of fabric, and, wrapping the fabric in a circle, making folds, we fix the fabric with stitches.
- We put some padding polyester in a small circle, gather the fabric around the filler, and sew it together. We get a soft circle.
- We place the soft pad on the fabric-covered cardboard and sew it on.
- We put a beautiful ribbon around the soft pad. You can trim it with buttons, beads, beads and secure it.

The result will please needlewomen, simple do-it-yourself pincushion original, delicate and beautiful.
DIY book pincushion
In order to make a pincushion in the form of a small book, you will need basic items and materials, namely:
- scissors
- needle
- threads
- pencil
- felt (3 colors)
- buttons
Manufacturing sequence:
- Take felt, folded four times, cut in half
- Place the resulting rectangles on top of each other and fold them in half again.
- We sew them in the middle - this will be the spine of our book
- We place the finished pages on felt of a different color, the size of which should be a few millimeters larger on each side
- We sew the “pages” to the “cover” in the middle, where we have the spine of the book
- Decorate the cover with beads, felt flowers, and buttons
- Sew a loop to the back cover, and sew a button to the front cover so that the book closes.

Each page of such a book is a place to place needles, so all the needles will be collected in one place and will not get lost.
By making a pincushion with your own hands, you create something of your own, unique, one might even say, designer. It is interesting, instructive and, most importantly, useful. Do not forget to place the pincushion in places inaccessible to small children.
Video: Vintage pincushion made from a cup
For the convenience of storing tailor's needles and sewing pins, a wonderful thing has long been invented - a needle case. Of course, in craft stores you can find many ready-made copies of this organizer, but in fact it is very easy to make it yourself, from various scrap materials. In this review, we are going to show you how to make a needle bed with your own hands. And a small spoiler, not just one idea for creating a pincushion will be presented, but more than 10 of the most interesting options!
DIY pincushion ideas.
How to make a pincushion with your own hands (master classes)
Pincushion in the shape of a pineapple
WHAT YOU WILL NEED FOR WORK:
- Yellow felt;
- Green felt different undertones;
- Scissors – yellow and green;
- Threads;
- Sintepon;
- Decorative cord;
- Soap and ruler.
In fact, felt can be used to make very beautiful organizers for storing needles and pins. And pineapple is a prime example of this. First, you need to cut out a rectangle and a circle from yellow felt. Next, leaves of different sizes are cut out from green felt. The leaves are sewn together. Then, using soap and a ruler, a yellow rectangle of felt is drawn into cells. The cells are stitched with cord. This rectangle is stitched at the bottom with a dotted seam and pulled together a little. Then it is sewn from the wrong side to the bottom, and stitched on the side. Turn the glass inside out, pour rice inside, and place padding polyester on top. All that remains is to sew on the foliage, and you can stick in needles or pins.


Pincushion in the shape of a tomato
WHAT YOU WILL NEED FOR WORK:
- Red cloth;
- Scissors;
- Threads;
- Needle;
- Sintepon;
- Green felt.
A rectangle is cut out of red fabric, folded in the center, stitched on the side and bottom. The product is turned right side out. A padding polyester is placed inside and stitched on top. The thread creates loops along the tomato, visually dividing it into slices. And foliage cut from green felt is sewn on top.

Pincushion from a jar
WHAT YOU WILL NEED FOR WORK:
- Jar with lid;
- Cardboard;
- Textile;
- Sintepon;
- Scissors;
- Glue.
We cut out a circle from cardboard, as well as a circle from fabric a few centimeters larger than the cardboard blank. We take a lid with a hole on top, put fabric inside, then padding polyester, and then cardboard. We push this sandwich outward, and from the inside we glue the fabric to the cardboard. Close the jar with a lid.

Pincushion from a mug
WHAT YOU WILL NEED FOR WORK:
- Tea mug;
- Acrylic red paint;
- Brush;
- Textile;
- Sintepon;
- Scissors;
- Glue gun;
- Thread and needle.
Draw a red border along the side of the mug acrylic paint. From the fabric we cut out a circle larger than the circumference of the tea mug. We lay the padding polyester in the center of the circle, stitch it along the edge with a dotted seam and tighten the workpiece. Glue the pillow into the mug.

Pincushion finger ring
WHAT YOU WILL NEED FOR WORK:
- Felt ball;
- Ring base;
- Glue;
- Scissors.
Cut a piece from the felt ball and glue it into the base for the ring. As you can see, it couldn’t be easier to do, and it’s a very convenient thing to use.


Pincushion donut
WHAT YOU WILL NEED FOR WORK:
- Scissors;
- Pink felt;
- Brown felt;
- Threads;
- Needle;
- Sintepon.
You need to cut out 2 donut-shaped blanks from brown felt, and one donut from pink felt. We cut the pink bagel around the perimeter, simulating dripping icing. The pink blank is sewn on top of the brown blank. Next, using different threads on top, you can create an imitation of culinary topping. After which this part is sewn to the remaining brown blank. When part of the part is sewn, do not forget to fill the donut with padding polyester, after which you can sew the product until the end.


Pincushion pumpkin
WHAT YOU WILL NEED FOR WORK:
- Orange fabric with different prints;
- Threads;
- Scissors;
- Needle;
- Green fabric;
- Brown braid.
We cut out two identical circles from orange fabrics, cut each of them into 4 parts. On one side of the pumpkin we place pieces with a mix of prints. We sew the pieces together by machine or by hand. Then we sew both sides together, leaving a hole for turning and stuffing the product with padding polyester. After these manipulations, we sew up this hole. And we sew the product with threads, dividing the pumpkin into visual slices. You can sew a leaf and a brown ribbon on top.

Pincushion cactus
WHAT YOU WILL NEED FOR WORK:
- Green felt;
- Scissors;
- Threads;
- Needle;
- Pins;
- Stationery clips;
- Flower pot - mini version.
For children this is the most cool idea pincushions. Everyone who sees her is indescribably delighted. From green felt we cut out 6 identical parts (see below). We grab them in pairs with pins and stitch them around the perimeter. We place the resulting three blanks on top of each other, pressing them along the edges with clamps. We sew them in the center. We remove the clamps and fill each division of the cactus with padding poly. We sew the cactus from the bottom and place it in a miniature flower pot.

Sponge pincushion for washing dishes
This is the most the simplest way creating a storage room for needles, you don’t need to do anything. Life hack: just take a dishwashing sponge and stick needles into it. Fast, simple, budget-friendly!

8 more cool ideas for pincushions (video)
How to make a pincushion in the shape of a hat (video)
In the form of a book (video)
More photos of different needle beds
The presented pictures increase in size when clicked.
Any housewife loves to have order and comfort everywhere in her house. Despite the fact that many useful inventions have appeared recently (pen stands, pincushions, caskets and others), still various products, made with your own hands, create an extraordinary, homely atmosphere. Any little thing made with your own hands will please not only the eye, but will also give the interior some zest. Even the simplest pincushion can decorate a needlewoman’s corner and turn out to be a very useful and convenient thing. Types of pincushions - master classes and photos in our selection.
The simplest and most convenient version of a pincushion for those who sew is a pad with an elastic band that is comfortable to put on your hand. How to sew easy options, watch this video:

On the Internet you can find a lot of options for homemade needle beds. They can be made of felt, foam rubber, embroidered on canvas and stuffed with synthetic padding or regular cotton wool. Making a beautiful pincushion is a creative process for a needlewoman. 
Crocheted pincushions
For those who know how to knit, it will not be difficult to give a gift to yourself or a friend. It can be absolutely any object or character. But of course, the ones most associated with needles are prickly hedgehogs, cacti or fir trees.
For example, a beautiful cactus in a pot turned out in this video:
We also have four knitting workshops:


You can link, for example, this:

Or any flowers:
And this is my pincushion, knitted a long time ago - “Fly Agarics”.


Crochet turtle:
But the most original idea- tie up a little helper for yourself, like in these videos from YouTube:
Felt pincushions
"Fly agarics"
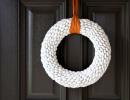
Mom is the dearest and closest person to everyone. I want to please my mother, give her a gift that will pleasantly surprise her. You can go to the store and buy it, or you can make a souvenir with your own hands.
Mom always has a lot to do, including repairs and sewing clothes. Sometimes needles get lost. Our pincushion is very convenient because it can be hung on the wall. Beautiful and practical. Felt is associated with warmth and tenderness.
At all times, the creations of nature were considered beautiful and perfect. Walking through the forest in autumn, you can come across fly agaric mushrooms. Everyone knows very well that they are poisonous, but how bright and beautiful they are. I really want to take them with me. Any mother will be pleased to receive a pincushion “Fly agaric” made of felt as a gift.

Target:
Learn how to make a souvenir pincushion “Amanitas” from felt.
Tasks:
1. Explore technological sequence and techniques for making a pincushion.
2. Develop creativity, spatial imagination.
3. Develop neatness and aesthetic taste.
Materials and tools:
1. felt (red, white green);
2. sewing threads (red, white, green);
3. scissors;
4. needles, pins;
5. paper, pencil, chalk;
6. Synthetic winterizer or synthetic padding.
Job description:
1. Draw patterns in life size and cut them out.

2. Select fabric for the fly agaric hats and outline the templates with chalk. Cut it out. There should be two of each part.
3. Select fabric for the legs. Pin the template to the fabric. We do not outline, because the chalk on the white fabric will not be visible, and dirt will remain from the pencil. Cut it out. There should be two of each part.
4. Cut out circles for the hats.
5. Before we start stitching, let’s assemble our composition and see if we like everything.

6. Let's start sewing from the legs. We fold the corresponding parts and sew them on the sides using a “Needle forward” seam. At the end of each line, be sure to make a knot. Leave the bottom part unsewn. Later we will stuff it with padding polyester. We perform the same operation with the other legs.

7. Now let's take on the hats. We put the lower part aside and work on the upper one.
Sew on the circles. There are two ways to do this. The first one is a “Forward needle” seam, the second one is “Over the edge”. We use the method that we like best. I've used both.

8. Sew together the details of the hat using the needle-forward stitch. We don’t sew it all the way, leaving the bottom part for stuffing with padding polyester. We make a knot, but do not cut the thread. We will continue to sew with the same thread.

9. Insert the corresponding leg piece into the lower part of the cap part. We pin it on the left side with a pin.
10. Fill with padding polyester. Sew up the bottom of the hat.
11. Sew to the end, tie a knot. We stuff the mushroom stem with padding polyester. We repeat the same with other mushrooms.
12. We cut out a clearing.
13. We assemble the composition, pin it together.

14. We stitch the clearing, leaving space at the bottom for padding with padding polyester. We stuff and sew.

15.To prevent the mushrooms from falling apart, we will grab them on the left side at the joints with several stitches.

16. In order for the pincushion to be hung, we make a loop.

Our pincushion “Fly agaric” is ready. We hang it on the wall and stick in needles.
I wish you creative success.
A simple felt pincushion “Cactus” can be done even by children, students in grades 2–5:

Beautiful and functional - 2-in-1 needle case and tool stand for needlewomen:
Pincushion from a jar
Pincushion can be combined with button jar. It's very convenient. By removing the needle cover, you can easily get the desired button. Colored buttons in a transparent jar will serve as an excellent decoration for a dressmaker's workplace.

Pincushion storage for various sewing items, the top opens. Galina Egorova.


Pincushion container for storing small items
A small pincushion is a thing that any housewife needs, and a container for storing all sorts of little things, such as buttons, cabochons, beads or sequins, will also be useful. You can make such a product with your own hands and decorate it with a flower bouquet, then the bright model will become a suitable gift. You can give such a souvenir to your mother or grandmother, and it will definitely find use. Real housewives love that everything is in its place and beautifully decorated. Master class by Elena Nikolaeva.

What you need to prepare to create a needle bed:
a small glass jar with a lid (from caviar or any canned food);
a small piece of fabric (about 10 by 10 cm);
thread and needle;
scissors;
padding polyester or cotton wool;
special gun and glue stick;
lace;
rhinestones on a thread (large, heart-shaped or any other);
various decorative elements for creating a bouquet: green twigs and leaves, decorative stamens, complex stamens, berries and so on.
How to make a decorative pincushion from a glass jar step by step
1. The basis of the product will be an ordinary food jar -. Be sure to wash it and wipe the glass with alcohol so that there are no smudges or fingerprints left. The top tin cover must be decorated. If the side of the cover is appearance If you are not satisfied, for example, inscriptions are visible on it, then additionally use braid or thin ribbon to decorate it.
 2. Remove the cover and start creating a pincushion on it. First, prepare a beautiful lace and glue it around the circumference using a glue gun. Try to distribute the ring pieces evenly. You can either fold the ribbon while gluing, layering small denticles on top, or divide the lace into separate segments and make the ring uniform.
 3. From the prepared fabric (it can be simple chintz), cut out a circle slightly larger than the base lid. Take a thread and a needle and sew stitches at the very edge of the circle.
 4. Sew the edge of the fabric with thread and tighten it, stretching the edges evenly. Place cotton wool or padding polyester inside.
 5. Make a round pillow by tightening the thread. Turn it facing you and level the surface. Glue the upper soft part of the needle bed onto the lid.

6. Decorate the junction of the lace and the pad with rhinestones on the thread. Carefully glue the strip (if there is no such material, then use braid or thin tape of a suitable size and color).  7. Prepare berries, stamens and leaves for decorating the craft. You can use absolutely any materials you have that will make an interesting composition. Glue the prepared decorations to the side while assembling the bouquet.

 8. The beautiful pincushion is ready. All that remains is to place beautiful buttons, buttons, invisible things or other little things that women use in the container and close the lid. Now you can give this craft on March 8th. Delicate flowers look great on the surface of a regular jar.

Oksana Dubrovskaya offers another option - a “reverse” pincushion made from an ordinary glass jar. This can be a great gift for your grandmother or mother, because it is made by yourself. And besides, the needles are securely hidden inside - they won’t prick or get lost.
Reverse pincushion jar
 “The hat is a pincushion.” Kolesnikova Ekaterina Sergeevna, MBOU “ High school No. 17″, Dzerzhinsk. To make a pincushion, I needed the following: a piece of an old robe, a disk for the base, a hairspray cap and a padding polyester.

“The Pincushion Hat.” Turbanova Arina Vadimovna, 9 years old, 3 “B” class MBOU Secondary School No. 20, Voronezh. At the base of the cap is a CD. Filling - cotton wool, fabric and for decoration - a flower from a hairpin.


Send your photos
You do the same beautiful crafts? Send photos of your work. Best photos We will publish and send you a diploma of the competition participant.I would like to present to your attention detailed master class for making decorative (doll) furniture from a tin can
To do this you will need:
1. Tin can
2. Scissors (any large stationery scissors, not necessarily for metal)
3. Round nose pliers
4. Sponge or felt or any other available material
5. Velor (can be velvet) color at your discretion.
6. Glue (I use "Moment Crystal"
7. Spray paint is also at your discretion (I had pink metallic on hand)
Olesya, my beloved sister, at your request for you!
Usually, if I make a chair or table, I use coffee cans; Nescafe is also suitable, since the metal is quite thin, it cuts easily and easily takes the desired shape. Do not use cans of condensed milk or stewed meat - the metal is very hard and when twisting the strips it bends and does not curl into a spiral and, in addition, you will cut all your fingers!!! and one more thing: do not use dull scissors, they will fold the edges of the strips, which can also lead to cuts on your hands. Can height in in this case it doesn’t matter, since you can change the height of the legs of a future table or chair by simply adding elements (cut strips of metal from another can)

This is how it looks like a “sun”)) Now you need to count the number of cut strips and divide them crosswise into 4 parts and determine the location of the future legs. So that the small sharp elements that you will cut off do not bounce in different directions from the table and your relatives do not remember you by stepping on them, spread something, I use a diaper, it is very convenient: I rolled everything up by 4 ends and put it higher away from the children))

After we have decided on the legs and back of the chair, we begin to form the contours of the back. The shape can be any and during the manufacturing process you can change the shape of the back as you like, round, square, heart-shaped.....

Now about the strength of the elements: remember the fairy tale about sons and a broom made of twigs, one by one they bend and break, but together they form a fairly strong structure if you fasten it into a common bundle)) So that the legs do not creep apart when you stick a needle into the chair, all the touching elements are I fasten it with these staples taken. as you can see in the background from another can, also cut into strips or in case I need to lengthen any element, such as the rim of the back. We take a strip of metal, bend it approximately to the width of the strip that we will tighten and cut. This results in a bracket like this. (on scissors)

The arrows show the already installed brackets for extending the back rim. As you can see, so that the strips do not bunch up, I thin them out, one goes to the back, the next to the curls at the bottom, and so on...

As you can see, the elements of the legs are collected into a common bundle and fastened with a bracket, and the curls on the back are simply twisted from a strip of metal and attached to the back using the same bracket. The resulting structure is quite durable.

The first picture shows a chair with a back that is not yet completed. The pattern, shape and position of the curls are at your discretion, as your imagination tells you. As production progresses, I change the original idea up to three or four times)) I never make two identical products...

When you have done everything and at your discretion the work is completed, take an oilcloth or newspaper, a primer (I have a spray), go out into the entrance and cover it with three layers at the intervals indicated on the spray can (drying period of the primer). I cover it with three layers only because there were drips and I hang them where it’s convenient for me))

After priming, we coat our product with any available (to your taste) spray paint, I still have a pink metallic one (I tinted my daughter’s bike after wintering on the balcony) And here I remembered that I didn’t make an insert under the back. We attach a piece of cardboard, you can simply press it with your fingers and cut it out or trace it with a pen... Then we take the remains of the can from which we cut out the brackets for fastening and mark future inserts on it using the cut cardboard, do not forget to leave the brackets for fastening, let them be longer, then fold it around and cut it to size. We use the cardboard from which the inserts were cut out for markings on the lining. You can use thin foam rubber, a piece of felt, in this case I used micropore from packaging, they usually wrap new TVs and other things with it household appliances, sometimes it is found in furniture packaging that contains glass. After the stencils are ready, we cut the velor to size and glue it along the contour. The glue in this case is the crystal.

This is how the insert is secured... In the background, the daughter is busy decorating a gift for her grandmother's birthday)) naturally, after that I had to touch it up again...

Another close-up photo...

We finished almost the same way: I was the chair, and she, under my guidance, did her first decoupage)
Dad's Dotsya))
Just a little bit left...

Glue the finished insert into the back...

And the second insert...

We do the same with the seat of the high chair (a little out of order, sorry, the installation order is not critical here) The same micropore from the packaging (it is also used as a lining, under laminate or parquet. The cut circle should be inserted into the contour of the seat and cut to the same size micropore, I cut out three, but I thought that three was too much, because the seat was too high, and I left two. Needles and pins hold in it no worse than in foam rubber.
Razumova Valentina Nikolaevna, teacher at the Shukhobod kindergarten.
Description of material: I present a master class on making pincushion boxes with children aged 5-7 years as a gift for their mother on March 8th. The material can be useful for both kindergarten teachers, teachers, additional education teachers, and creative people. When making crafts with schoolchildren, the degree of independent completion increases; preschool children need the help of a teacher.
Target: making a pincushion box with the children as a gift for mom.
Tasks:
* teach children how to sew a “needle forward” stitch, and follow safety precautions when working with sharp objects;
* develop the ability to use various materials when making crafts, compositional skills and creativity;
* instill in children a desire to please loved ones, hard work, and patience.
Materials for production:
* cream jar (any suitable in shape);
* fabric of beautiful colors;
* braid, decorative elements;
* synthetic winterizer;
* needle, thread;
* glue (any suitable or available at hand): “Moment”, “Universal polymer”, glue gun;
* scissors;
* cardboard;
* felt-tip pen.

"Surprise" P. Sinyavsky
What a gift for mom
Will we give as a gift on Women's Day?
There is a lot for this
Fantastic ideas.
After all, prepare a surprise for mom -
This is very interesting...
We'll knead the dough in the bathtub
Or wash the chair...
Well, I'm a gift to my mother
I'll paint the closet with flowers,
It would be nice if the ceiling...
It's a pity I'm not tall.
"Gift" L. Smirnov
Somehow late in the evening
I lit the candles,
So that for mommy secretly
Give a holiday gift.
Before that, what to give,
It took me three days to decide.
How can I surprise my mother?
I thought and wondered.
Can sculpt a horse
Or give a picture?
Maybe give her some chocolate
Or weave a basket?
Away with questions and doubts!
Stop being silly!
I'd rather do it without delay
I'll start making a doll.
I quickly took it off the shelf
All I need for business:
Threads, scissors, needles...
Instantly the work began to boil!
I cut the fabric into a pot,
I wove a bow into my braids,
I deftly sewed a dress for the doll,
I let my eyelashes down.
The month of March is a busy time for teachers. It is necessary not only to prepare a holiday for the mothers of the students, but also to come up with and make gifts. You always want to do something new, original, something that hasn’t been done before. I want to surprise and amaze. So I've gone through a lot different options, looked into my favorite Internet in search of ideas. Finally, the concept for the gift came together.
Sequence of work:
To make a pincushion box we will need any jar beautiful shape, both transparent and colored are suitable. Depends on what you have on hand. We select the appropriate fabric. Take a piece of cardboard and trace the lid of the jar with a felt-tip pen on the cardboard first (the cardboard should be thick enough):


Then we place the lid on the fabric from the wrong side, draw a circle with a felt-tip pen so that there is a seam allowance of 2-3 cm. This is the future needle bed.

Cut out:

Next, take a circle of cut fabric and begin to stitch it along the edge with a “forward needle” seam:

Lightly tighten the thread:

We begin to fill the resulting blank with padding polyester.


Stuff it tightly enough. Insert the cut out circle of cardboard and tighten the fabric around it. We tie the threads into a knot. If desired, you can additionally stitch the fabric, tightening the edges.

Glue the resulting pad with glue onto the lid of the jar. I used universal polymer glue, as it has virtually no odor. Therefore, it is more suitable for working with children.

Glue a suitable braid along the edge, masking the seam.

Decorate:

Can be used for its intended purpose. The pincushion box is a universal item. A lid for needles and pins, a jar for storing various small items: buttons, threads, braid and other materials for needlework.

And these are children’s boxes made in joint activity:

I worked with children individually, in small subgroups of 3-4 people. Children in the group are 5-7 years old. Everyone was able to make a craft. Work with a needle and glue is carried out only under the direct supervision of the teacher.
Operations performed by children:
* made a pattern on the fabric and cut it out;
* stitched along the edge of the fabric with a “forward needle” seam;
* pulled the fabric together and stuffed it with synthetic padding;
* selected the design of the box (fabric, braid, suitable decorative elements) and glued it with the help of the teacher.
Before starting to make the craft, we repeated the safety rules with the children.
When working with a needle:
1. When working with a needle, be careful and careful. Do not put the needle in your mouth.
2. Try not to inject yourself or inject other children.
3. Store needles only in the pincushion. When finished, place the needle in the needle bar.
When working with glue:
1. Try not to let glue get into your eyes or mouth.
2. If glue gets on your hands, remove with a napkin and rinse with water.
3. After finishing work, wash your hands with soap.
Some more children's crafts:


This box is additionally decorated using decoupage technique.