How to put covers on skates? How to put covers on skates? What is the name of skate blade protection?
Ice skating season is in full swing! Stores are full of goods for leisure and sports, and every winter the media rip off each other’s advice on how to choose the right skates. You can often see a recommendation to choose skates one and a half sizes larger to accommodate thick socks. Good warm socks are an absolute value in matters of maintaining health, but the matter is controversial for those who like to ride.
In order not to discourage yourself from losing your soft spot and further desire to go out on the ice, let’s immediately figure out what to pull your socks on in your particular case.
If you decide to buy so-called walking skates - with a soft boot or plastic, with fur, with or without small teeth, with an almost straight blade, with a reserve for a thick toe or felt liner - you should not try to master the elements of figure skating on them - this is unsafe! In recreational skates there is a walking step. The worse your body control on ice, the more terrible any mistake is for you.
You can wear socks inside the shoe. And don't be a hero!
If you nevertheless decided to master the technique of figure skating and bought real figure skates in a specialized store, then you probably already know that the correct fit of a figure skate excludes thick socks and other underwear, and the lacing is tight, and therefore after 15 minutes on open ice you You stop feeling your toes. At all. Skating on natural ice turns into endless runs between heat sources and the ice rink, but you want to skate to your heart's content! So for us, those who like to catch the cap after an axel, the restless “swallows in sheepskin coats,” a method has been invented “toes out” - covers for boots!
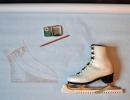
Measurements and drawing.
We put the skate on the socks or tights in which we will skate, lace it up as usual for skating - only now we measure it!
So, put it on, tie it, measure it heel to heel height(you can cover the heel with a cover, but the foot in such a cover will look heavier), distance from toe to tongue, foot length- from the midpoint of the heel to the middle of the toe along the outer part of the “foot” along the sole of the shoe, lifting height- from the starting point of the heel through the highest part of the instep - from the outer to the inner part. The measurements are very similar to those you would take when knitting socks, adjusting for the open rise line.
I have a size 37 with a foot of 24 cm - this is almost a spherical horse among sizes, without any bright features, let's take my thirty-seventh as the base one.
When scaling, increase or decrease not only the length of the foot and side of the cover, but also the central pattern, so the leg will look proportional. The heavy side part will make the skates look like irons or gnome shoes, which is contrary to the aesthetics of figure skating)
We measured it, draw the case in full size, mark where everything will be:

Sample, also known as swatch.
A sample is a small test rag similar to the big rag you want to get in the end. It is necessary to knit a small sample rag so that a large rag designed at random does not end up becoming a full-size sample.

I decided to make my task easier and avoid short rows when knitting the backdrop. I will make the backdrop using garter stitch. The "handkerchief" is plastic - it is elastic in the vertical direction and will tighten the back of the cover, so it will not puff up over the edge of the shoe - that's what you need!
I will make the central part of the case with large “honeycombs” - they have good plasticity when stretched in both directions. The “honeycombs” will be framed by strands in 2 rows (there is only one strand in the sample, and there are clearly few of them).
Elastic cuff. It is not necessary from an aesthetic point of view, but if you have a hard, reinforced skate boot, a flap with a plastic elastic band will save you from chafing, and at the same time keep the cover from slipping if the yarn tends to stretch. The main requirements for the cuff, if you plan to wrap it inside the boot (I will show how this is done below), are an absolutely smooth edge and a good fit; there should be no folds or scars inside the boot.
The knitting direction is top-down, circular and flat.
Yarn Nardi Filati S.p.a. Harrys in 4 folds for the main fabric and 3 folds for the elastic.
Circular needles number 4 for the main fabric and number 3 for the rib.
We knit a sample, make a WTO, count the number of loops in the reference points of the drawing (back height, distance from toe to tongue, foot length, instep height), the number of increases and decreases, distribute increases and decreases according to the pattern.
Schemes of the main patterns:
pattern A

Repeat 1-8
pattern B

Repeat 1-2.
AB pattern
k - facial(face)
p - purl(purl)
2/2 LC - 2/2 persons. cross to the left (knit 2 on the auxiliary needle before work, 2
2/2 RC - 2/2 persons. cross to the right (knit 2 on the auxiliary needle at work, 2
persons., 2 persons. with aux. knitting needles.)
1/1 LPC - 1 persons. leave for later knitting needle before work, purl 1, knit. with aux. knitting needles
1/1 RPC - 1 p. leave for later knitting needle at work, knit 1, purl. with aux. knitting needles
ABD pattern - toe

1. On number 3 knitting needles, using yarn in 3 folds, cast on 46 loops in the Italian cast-on, knit the first row of hollow elastic, close the knitting in a circle, knit the second row of hollow elastic.
2. 1 row of 1x1 elastic (knit, purl).
3. 12 rows of English elastic in a circle.
4. Add a fourth thread, knit 1 row on knitting needles number 4. Then the working thread will be in 4 folds, knitting needles number 4.
5. Rows 1-17 of AB pattern:

Next there will be a section with increases on the heel part.
6. Pattern A, yarn over, 12 loops - pattern B, yarn over.
7. Pattern A, purl. from cross. Yarn over, pattern B, purl. from cross. Yarn over.
8. Pattern A, yarn over, 14 loops - pattern B, yarn over.
10. Pattern A, purl. from cross. Yarn over, 14 p. - pattern B, purl. from cross. Yarn over.
11. Pattern A, yarn over, 16 loops - pattern B, yarn over.
12. Pattern A, purl. from cross. Yarn over, 16 p. - pattern B, purl. from cross. Yarn over.
13. Pattern A, yarn over, 18 loops - pattern B, yarn over.
14. Pattern A, purl. from cross. Yarn over, 18p. - pattern B, purl. from cross. Yarn over.
15. Pattern A, yarn over, 20 loops - pattern B, yarn over.
16. Pattern A, purl. from cross. Yarn over, 20p. - pattern B, purl. from cross. Yarn over.
17. Pattern A, yarn over, 22 loops - pattern B, yarn over.
18. Pattern A, purl. from cross. Yarn over, 22 p. - pattern B, purl. from cross. Yarn over.
19. Pattern A, yarn over, 24 loops - pattern B, yarn over.
20. Pattern A, purl. from cross. Yarn over, 24 p. - pattern B, purl. from cross. Yarn over.
21. Pattern A, 26 faces.

We knit the heel part. We switch to flat knitting with garter stitch. The edge is nodular.
22. Turn knitting, slip 1, purl 25.
23. Turn knitting, remove 1, knit 25.
24 - 41 - Repeat 22, 23.
42. - remove 1, purl 25.


The heel loops can be put aside for additional time. thread or pin, or you can leave it on the knitting needles, marking it with markers. These loops will only be needed for the final binding; we will not knit them in the next block.
43. Using knitting needle number 3, we pick up 11 loops of the knotted edge from the side of the working thread, knit 11 purl loops with a working knitting needle, fig. And, we pick up 11 loops of the knotted edge on knitting needle number 3, knit 11 purl stitches with a working needle.
44. Remove 1, knit 8, decrease 1 with a slant to the right, fig. Ah, decrease 1 with a slant to the left, knit 9.
45. purl row according to the drawing.
46 - 57 - Decrease 1 knit in each knit row before and after fig. A.
58. Remove 1, knit 3, fig. A, 4 persons. Purl rows according to the pattern until you reach the narrowing of the boot nose (6-9cm) to the toe.
Toe(for left and right case mirrored):
1. Decrease the toe according to the ABD pattern - 1 time.
2. 1 slip, knit 3, parallel decrease 4/2 with a tilt to the right (slip 1 on the right needle as a knit, remove 1 before work, slip the next one on the right needle as a knit, pick up the one removed before work with the left needle, return 2 loops from right to left knitting needle, knit 2 together, slanted to the left, knit 2 together, slanted to the left), purl 1. decrease 4/2 with a tilt to the left (1 slip on the right knitting needle as a purl, 1 slip at work, 1 slip as a purl on the right knitting needle, with the left knitting needle pick up the one removed at work, return 2 loops from the right to the left knitting needle, 2 together in tilt to the right, 2 together with tilt to the right), purl 1, knit 4; decrease purl 3/1 (p2 together, return to the left needle, pull through the next one, thread before work), decrease 4/2 with an incl. left, purl 1, decrease 4/2 with incl. right, purl 1, knit 4.
3. Purl row according to the drawing.
4. Slip 1, knit 3.. purl 1, knit 1, knit 2 together with a tilt to the left, knit 1. 2 together with a left tilt, knit 2. 2 persons together with incl. right, purl 1, knit 4.
5-6 according to the picture
7. Slip 1, knit 3, purl 1, decrease 4/2 with a slant to the right, decrease 4/2 with a slant to the left, purl 1, knit 4.
8. Pull the remaining loops onto the thread and fasten.
Decrease 4/2 with a tilt to the right:

Decrease 4/2 with a tilt to the left:

Harness:

1. Remove the loops of the heel part onto a working knitting needle, cast on loops around the perimeter of the cover: 1 - from the edge, 1 - from the edge jumpers. I got 112 loops.
Ice skates, like any other shoes, will last a long time only if they are properly cared for. Don't be scared - caring for skates is not difficult, but it is necessary.
First, the “truth”: under no circumstances should you dry your skates over a stove, on a radiator, etc. Well, the worst enemy of skate blades is rust. If rust appears in at least one place, the skates will never be as good as before. Therefore, skates must be kept dry. As a result, you cannot store skates in bags or cases for a long time. Skates should be stored in such a way that they are well ventilated. Before putting the skates away for long-term storage, it is better to lubricate the leather with Vaseline or shoe polish, stuff the shoes with paper, and lubricate the runners of the skates with machine oil, and only then, wrap them in paper, put them in the closet. By following the above recommendations, you will be able to keep your skates in good condition for a long time and enjoy skating on them for more than one season.
 It is also worth observing some measures to protect the skates: to prevent the runners of the skates from wearing out outside the rink, you need to put special covers on them (they are sold in any sports store). Covers are made of fabric, rubber, plastic or wood. It is best to have several pairs of covers: hard covers will protect the skate blades when moving from the locker room to the rink, soft fabric covers (for blades) absorb moisture and protect the skate blades when carrying them from the rink home.
Cloth covers for boots protect them from abrasions and cuts when carried, and during skating they cover the lacing, preventing untied laces from getting under the blade. In addition, they can be used to insulate legs (when skating on open ice rinks in winter.
Types of skate covers
Conventionally, covers for ice skates are usually divided into three groups: 
- For figure skates
- For speed skating
- For hockey skates
Covers for skate blades prevent them from quickly “stepping” and scratching, and also guarantee safe transportation of “ice” shoes. Accessories for models designed for figure skating are ubiquitous. Most brands today produce universal cases that fit any size. As for the materials used in the production of covers for figure skates, these are modified low-density polyethylene, durable plastic, and rubber.
If we talk about covers for the blades of skates that hockey players wear, there aren’t that many of them. More often, athletes are content with universal accessories that are suitable for figure, hockey, and speed skating products. However, such “pencil cases” are quite easy to make yourself.
We make covers for skates with our own hands
It turned out that the answer to the question of how to make skate covers with your own hands sounds quite simple. Take a plastic tube from an old gymnastics ring and cut a groove in it about two millimeters wide and three hundred and three millimeters long (this size is suitable for size forty skates). The ends of the improvised cover must be plugged with corks. That's it, the “protection” can be put on the blades.
How to put covers on skates?
The most popular models of covers today are with a heel part and sliding ones. They hold the blade better than others and last quite a long time. Correctly putting the cover on the skate should be as follows: first insert the tip of the blade, and only then put on the cover, making sure that the blade fits completely into the slot. Nozzles with a heel part are put on in the same way. You just need to first put the loop over the protruding end of the blade, and only then pull the cover from the toe side. In order to adjust the length of the “protection”, you need to move the loop to another fastener.
 Soft covers for skates
Not only the blades of the skates need protection, but also the shoes themselves. Soft covers for skate boots prevent scratches and dents from forming on the skin while skating or playing. They need to be put on top of the “ice shoes” and laced up. Then the skate is put on its legs. As a result, only the heel should remain open. As an alternative to expensive products, a regular warm sock with a slot in the sole can be used.
Skate storage cases
Fabric covers are used to store skates. If desired, you can make them yourself. To do this you will need a piece of soft fabric, thread, lace and a needle. Having cut out two identical rectangles, stitch them on three sides. Hem the fourth side and insert a lace into it. The shoe bag is ready. It is only important when cutting out to take into account the size of the products that will be stored in the case. It turns out that the answer to the question of how to sew covers for skates is quite simple.
It is not recommended to store skates in plastic cases. Shoes cannot dry completely in them.
Do not neglect accessories for storing and proper use of skates. Replacing the latter costs much more than all types of covers combined. Moreover, they can be made literally in a matter of minutes with your own hands.
You will need
- - plastic covers to protect the blades;
- - soft fleece covers for storing skates;
- - special protective covers for boots.
Instructions
Plastic covers to protect the blades. Skates with unprotected blades cannot be worn off the ice. Even if there is a special rubber-covered road from the locker room to the rink itself, it is better to walk these few steps in covers. Contact with a cement floor, metal thresholds, or snow sprinkled with sand and salt causes jagged marks to appear on the blades. They become dull and stop holding their foot in the correct position on the ice. In addition, with an unprotected skate blade, you can easily injure others and ruin your shoes. In sports stores, two types of plastic covers are more often found: with a heel loop or sliding ones with a spring. To put on the cover, place the loop over the part of the blade protruding from the heel side, then carefully slide cover forward, pull it over the toe of the blade. Align it so that the blade fits into the slot of the cover. When walking in skates, the cover should not dangle or fly off. If this happens, it needs to be adjusted to the length of the blade: just move the loop forward or backward. There are several mounting holes at the base of the case for this purpose. The edge of the cover at the back protrudes more than 2-3 cm beyond the edge of the blade - cut it off with a sharp knife. Covers are put on in the same way. Insert the heel end of the blade into the sheath and then pull it over the toe. If the size of the cover on the spring is correctly selected to match the length of the skate blade, they hold up very well and last a long time. It is best to do the initial fitting at a skate sharpening shop or workshop.
Skate storage cases. The most common mistake is storing skates in protective plastic cases. Under no circumstances should this be done. Once you've removed your skates, dry your boots and blades with a soft cloth - an old towel or other rag will do. Wet blades may become rusty and will need to be replaced with new ones. You can buy such covers in a specialized store for skaters or sew them yourself. Little ones will love the covers in the shape of funny little animals.
Protective covers for boots. Professional ski boots are expensive. They also need protection. You've probably noticed that during performances, skaters' skates match the color of their suit. This does not mean that they have their own pair of skates for each number. Before going on the ice, along with their suit, they put covers on their skates, made from the same material. They not only look great, but also protect the boots from accidental scratches and cuts. The design of such a cover is very simple - in appearance they look like a sock without a sole. First, put on the cover (like an ordinary sock), pull it up so that it does not interfere with putting on the skate. Lace up your skate as usual and pull the cover over the top; it should completely cover the boot, except for the heel. Covers made from a wool sock with a slot in the sole for the blade or sewn from pieces of fur will help insulate your boots if you want to skate longer on an outdoor skating rink in the winter. .
Skate guards are designed to protect skate blades off the ice. Blade protection is necessary so that you can walk in skates from the locker room to the ice without damaging anything. Also, the skates will be safe during transportation.
Blade guard
The plastic skate guard has an adjustable size and is ideal for any skater. The plastic is durable and can withstand pressure; in such protection you can walk from the locker room to the ice and just carry your skates in your bag.
It is better to order such protection for your skates for approximately 250 – 300 rubles.
Svetlana: “The protection is good, the plastic is dense and thick. I’ve been using these covers for over a year now and they still look like new.”
Protection for children's skates

There is a wide range of skate guards for children. They are functional and at the same time very bright and will attract the attention of the child. The protection is best used for skating before the ice, and the blade covers are better suited for carrying sports equipment in a bag.
You will find an excellent catalog of various protections for children's skates. Prices range from 500 to 1200 rubles.
Rita: “They bought protection with a flower for my daughter. It is bright, beautiful, but most importantly durable and high quality. We've been using it for 3 months now. The only drawback is that these covers are difficult to wash.”
Skate covers

Covers are perfect for protecting skates. They are made of thick nylon and absorbent soft fleece and rubber. It is convenient to wear skates in them and even walk while the blade remains intact and sharp. The covers have a universal size.
Skates consist of blades, boots, fasteners, and laces.
Blades are one of the main components of skates. They provide gliding and grip on ice. The success of your skating depends on the quality of the blade.
The most important thing is timely sharpening.
Of course, it is much more pleasant to ride on sharp skates than on dull ones. Timely sharpening of skates is the main path to success. You need to sharpen your skates when you begin to feel the slightest discomfort while riding.
Be sure to keep track of how much time passes from one sharpening to the next. This will help you avoid unpleasant “surprises on the ice”. You will calculate the approximate number of operating hours. But don't be too zealous. Because if you sharpen the blades often, the service life will simply be reduced.
The second point is the reliability of the fact that you are leaving your skates in good professional hands. Remember that figure skates are very different from hockey skates in terms of sharpening.
 There should be a small groove along the entire length of the base of the figure skate blade - it is this that creates two clear edges of the skate - internal and external. If there is no groove, then the blade of the skate will always fall to the side and the correct push cannot be made. Therefore, sharpening skates is not only about sharpening the sides of the blade, but also about restoring the groove, which evens out over time. It is important that when sharpening the groove is set to the required depth, otherwise, if the groove is too deep, it will become impossible to slide on one edge, and if the groove depth is too small, the blade will break off when making turns.
Another indicator of the quality of sharpening is the same level of internal and external ribs throughout the entire length of the skate blade.
Thus, sharpening skates is a complex process that requires high skill and a responsible attitude.
Good attitude
Of course, steel is a very strong material, but even it wears out. The blades are designed to glide across the floor, not to walk on the floor. Therefore, treat them very carefully. As soon as you get off the ice, put hard covers on your skates. If you don't have covers, then go on the rubber surface. Do not step on tile, linoleum, asphalt or wood floors. Be aware that when you step off the ice, the sill may be made of steel, so stepping on it can damage the blade very quickly.
Cross the threshold, don't step on it.
Good off-ice handling
 Rust- one of the most terrible enemies of the blades. Its danger lies in the fact that it is much softer than steel, and if part of the blade is rusted, it will not be possible to restore it to its previous state. A rusty area will never hold a rib well again. Try not to let the blades get to this point!
When you leave the ice, first use your fingers to remove all the snow that has stuck to the blades while skating, and then put on hard covers and go to the locker room. When putting your skates in your bag before heading home, wipe the blades dry with a soft cloth. Make sure there is no moisture left on the blades - this is very important.
The screws that secure the blades to the boots will also rust and become loose if not taken care of. If you are not in a big hurry, it is better to do this: after wiping the skates, put them aside, calmly change your clothes, and then, at the very end, wipe them again, put soft covers on the blades and now put them in your bag. Let’s pay a little attention to the soft drying cases: they are designed to remove remaining moisture and condensation from the blades, and also provide good protection when transporting skates in a bag. Remember: never leave your skates in hard cases - they retain moisture and are guaranteed to rust. One last thing in this section: keep an eye on the condition of your soft and hard cases. Drying covers tend to wear out - after some time, holes appear on them, and they cease to provide reliable protection for the blades. Holes can also appear in hard cases - inspect the bottom of the cases from time to time, and at the slightest suspicion of wear, replace them with new ones. Also, fine dirt often accumulates in the grooves of hard cases - clean them, otherwise it can harm your blades.
Boot care
 The leather of your boots is just as susceptible to moisture damage as the blades. Always dry your boots well and polish them - firstly, this makes them look better, and secondly, and more importantly, smooth leather retains moisture less. Always wipe the soles of your boots after riding. As you ski, snow settles on the soles and quickly turns into water, which can pose a danger to your soles if you are not careful. The soles will simply begin to rot. The screws that secure the blades must be securely fastened into the soleplate, and only a dry soleplate will provide you with a secure fit.
One more thing. Agree that your feet sweat a little while riding. This moisture can sit inside the boots for a very long time, causing them to rot from the inside. To avoid this, when you come home after skating, take your skates out of the bag, unlace them thoroughly and “open” your boots as much as possible - let them “breathe” until they are completely dry. Just never put your skates on a radiator to dry - this will ruin them.
The blades are attached to the boots by a certain number of screws. It is very important that the screws secure the blade correctly. Over time, your weight on your skates causes the screws to become loose. Screws that are not tightened are dangerous for the skater and also cause more wear on the sole. However, you should not over-tighten the screws - by tightening them “tightly”, you risk peeling the skin on the sole. How many cogs should there be on one skate? When purchasing new skates, a good mechanic will most likely make you a “test fastener”: screw two screws onto the front and back of the blade. This type of mounting will help you determine if the blade is positioned correctly in relation to your body and feet, and if adjustments to the mounting are needed, this can be easily done. After riding a couple of times on the “test” fasteners and making sure that you can go straight and rotate completely comfortably without problems, head back to your master for the final fastening of the blades - they will add a couple more screws to each sole of the boot. Don’t worry if you find that the screws weren’t screwed into all the holes—the craftsman can leave a “backlog” for the future, in case some of the holes “loose” and no longer hold the screws.
 Laces are a small but very important part of your skates. Treat them with respect, monitor their condition, and replace them with new ones on time. A broken lace can cause trouble and even injury during training or competition. You should always have a spare pair of laces in your bag - it will give you peace of mind. If the laces become dirty, take them out and clean or wash them.
Remember, care for skates must be timely, otherwise they will deteriorate and their service life will sharply decrease.