Peacock from plastic bottles for the garden. A DIY peacock made from plastic bottles is the highlight of your garden. Step-by-step instructions with illustrations. DIY bird made from plastic bottles: swan
Crafts for the garden have gained immense popularity, because they allow you to transform your garden, making it special, unlike any other. And one of these crafts is the peacock bird. It is quite difficult to make and even professionals may not be able to do it the first time, much less beginners. But one thing is absolutely certain - the peacock will become the main character in your garden collection. In principle, there is nothing difficult in making it, but it will require perseverance and patience. If you think you have these qualities, go for it. So that you have no doubt that you will succeed in this craft from plastic bottles, we will conduct the master class in detail and thoroughly.
Peacock made from plastic bottles: master class
Take a 10-liter canister, this will be the body of a peacock, thick wire, plastic tubes (we will make legs from them), a metal mesh 45x150 cm, polystyrene foam (the head is cut out of it), and a lot of plastic bottles (the shape and size can be very varied) .

Cut a strip from the canister from the top and side and secure it with a self-tapping screw, moving it slightly back.

Bend the wire that serves as the frame, put on the tubes of the future legs and place it all on the stand. When bending the wire, keep in mind that this will be the back of the bird (the top of the canister).

Now let's start shaping the body. Using wire, attach our container - a canister - to the frame. Connect the legs to the body and give the position in which the bird will stand. Attach the legs with wire.

Cut a two-liter bottle into long and short feathers. There should be 8 long pieces, 6 short ones. It is better to cut short feathers from the bottom.

Now attach the feathers to the body in a row in a row. For the upper part of the legs, take milk bottles, cut off the smooth part from them and roll them into a ball. Attach to the body.

The lower and side parts of the body are covered with feathers.

This is roughly what our bird should look like from the front.

Now let's work with the mesh. These are future wings. Round it at the front, giving it a wing shape. At the same stage we work with the tail. Cut it in the shape of a triangle, the length is up to you, but remember that the peacock's is quite long.

This is what the bird looks like from the side.

Now let's start making feathers. Their width should be 5-7 cm, so we take a large thirty-liter cylinder. But if you haven’t found one, then you can get by with a large number of two-liter ones.

Screw each feather one by one along the edge of the frame mesh, while moving each feather in relation to the previous one.

For the next row you need 1.5 liter bottles. Cut out 6 pieces from them. feathers Three or four bottles will be enough.

Screw these feathers in a semicircle.

Feathers for the remaining rows are cut from 0.5 liter bottles. One bottle should yield four feathers. In total you will need about 30 bottles.

We continue to lay out rows of feathers, covering the previous one with each new row.

This is what the finished wing looks like.

The formation of the peacock's head begins. Cut it out of a piece of dense foam with a knife. Glue the eyes. Buttons or eyes from some toy can serve as eyes.

Sand with sandpaper.

As you remember, a peacock has a tuft of feathers on its head. Let's start making them. Feathers can be cut from strips left over from bottles. Bend them to give shape.

Make several holes on the top of the head, pour glue into it and insert the feathers of the tuft.

Glue the eyelids. Also glue a plastic triangle cut from a bottle onto the beak. Instead of glue, you can fix it with self-tapping screws; they will look like nostrils.

The neck consists of two five-liter bottles. Roll the bottles into balls and connect.

Moving in a circle, screw on the feathers.

This is how you need to cut a foot with toes from half-liter bottles.

Our bird is already taking shape. No matter how difficult crafts made from plastic bottles can be, the peacock is one of the most ingenious.

We carefully glue the last rows of feathers to the head.

It's time to color our bird. It is better to do this with enamel paint, it does not leak and gives a uniform color. You can apply spray paint on top; it will give the surface a velvety texture.
In principle, it is not necessary to copy in detail our instructions on how to make a peacock from plastic bottles. Take it as a basis, and then your peacock will be individual and unlike anyone else.

Now let's work on the tail. The feathers will be green, so we take the corresponding bottles. First, cut out a semicircular template, then bend it along the middle and cut the edges with fringe. One bottle should yield two small feathers and one larger one. To make the tail lush and beautiful, you need at least 60 feathers. Draw the eyes on the tips of the feathers with enamel.

Screw the tail feathers to the metal mesh frame, moving in a semicircle from the very bottom. The principle of laying out feathers is the same as on the wings - each row overlaps the previous one.

It’s a good idea if you have a salad-colored bottle, this color will refresh the peacock’s tail.

Photo of a peacock in its natural environment.


This is the whole master class. If you did it and everything worked out, we can congratulate you. If everything was not clear to you, try to find a video master class. To do this, type the phrase “MK peacock made from plastic bottles with your own hands” in the search engine and select the desired one from the proposed options. He will certainly give answers to many questions.
By the way, did you know that there are absolutely different breeds of peacocks? white?

According to the suggested instructions, you can do just that. The white peacock will stand out beautifully against the background blooming garden, and you will save on paint.
Video lessons
In many countries, the peacock was considered a royal bird; it was also popular in Rus'. The peacock has become part of proverbs, sayings and fairy tales; it has been spoken about in many myths and legends, and the beauty of this bird still delights adults and children. Today, every owner of a personal plot strives to decorate the area near the house or reservoirs. In this article you will learn how to make a peacock from plastic bottles, which will emphasize the beauty of your site and give it a noble appearance. Crafts made from plastic bottles can also be used to decorate the interior.
Materials:
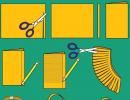
- scissors;
- plastic bottles different colors;
— synthetic foam;
- glue gun;
- wooden post;
- abrasive mesh;
- metal rod.
You will need feather blanks of different sizes and colors. To make it convenient to work, make yourself a blank from cardboard. You should have solid semicircular feathers, the same size, but with small cuts, as well as long ones with cuts. The blanks for the tail should be long; they can be made by cutting the bottle lengthwise and cutting out a strip of the required width.

To make it convenient to work with a large number of feathers, sort them by size into different bags. Now you can start making the peacock model and, if necessary, then cut the plastic feathers.

Take a piece of synthetic foam that is quite convenient to work with. Cut out the pieces and glue the peacock's body, neck and head together with a glue gun. To make the layout as close as possible to the original, download a picture of a peacock from the Internet.

The peacock's body must be secured to a metal rod, which we first recommend inserting into a wooden post. Take a red bottle and cut a circle out of it. After this, make one cut, from the edge to the center, and roll it into a cone. You should get a peacock's beak, which needs to be fixed to the foam.

After this, you can glue the pre-prepared feathers. Start from the bottom, keeping in mind that the feathers are longer at the bottom and short towards the top. Feathers are glued overlapping. When you're done with the breast, start on the back. To make a tuft, you need to cut strips from bottles and glue colored feathers onto them.


DIY peacock made from plastic bottles photo
Cut wings from an abrasive mesh and attach feathers to them. Make the tail in the same way. Don't forget about bright shades, which must be on the peacock’s tail. Attach the tail and remaining parts. ready.
Also watch the video: DIY peacock made from plastic bottles. Master Class
will decorate your site for a long time, because it is not afraid of the sun, rain or wind.
What can decorate a garden? Of course, a large garden figure made with your own hands. Decorate your garden, pond, area near your house with a peacock and the garden will be filled with beauty, happiness and nobility. How to make such a miracle bird? Surprisingly, with the help of plastic bottles you can beautifully decorate your cottage, garden, or interior. A little imagination, soul, attentiveness and your garden will be decorated with a stunning peacock made from bottles, made by yourself.
We make a bright peacock from bottles with our own hands in a master class
For this you will need:
- Plastic bottles of different colors.
- Colored feathers.
- Synthetic foam.
- Scissors.
- Wooden post.
- Abrasive mesh.
- Glue gun.
- Metal rod.
1) Cut out the middle of plastic bottles, cut into 5-7 centimeters and make 7 pieces for each wing.
2) Prepare the second row of the wing from four bottles dark color, cutting into six feathers. Cut all the next rows of wings into 4 feathers. 3) Cut off the top and bottom of the bottle, cut the remaining cylinder into four parts. Give the rectangles the desired shape for the tail and decorate the edges in the form of a fringe, and draw an eye at the top of the feather. Sort feathers by size into bags.

All feathers must be solid, semicircular with small and long cuts.
In order to make a peacock model, select the peacock picture that you like best.

Take a piece of synthetic foam, cut out pieces of the peacock's head, neck, body similar to the picture and glue the body, neck and head of the peacock together using a glue gun.

Then place a wooden post, insert a metal rod into the wooden post and secure the body of the peacock. Cut a circle out of a red bottle, make a cut from the edge to the center, twist it into a beak-shaped cone and secure it to the foam. Next, glue the prepared feathers overlapping onto the breast, from long to short, from bottom to top. Also stick on the back. Cut strips from bottles and glue colored feathers onto them to create a crest.
Make it from brown plastic bottles beautiful eyes and glue it. After the eyes, cut out the middle part of the bottle and divide the resulting cylinder in half. Cut the resulting rectangles from the bottom and shape them into wings. Attach the lower part of the wings to the body. Cut wings from an abrasive mesh and place small feathers on the mesh, securing with teeth. Attach the upper part of the wings to the body.
Make the tail in the same way as the wings, adding bright colors. Attach the tail and feathers that are missing. Do-it-yourself peacock from bottles is ready. It was difficult but excellent work that your neighbors will appreciate.
Plastic bottles are probably what every person has in their home. We constantly buy various drinks in plastic bottles. And having emptied them, we throw them away, without even thinking that this is an excellent material for creating various crafts. Homemade products made from plastic bottles can be very different. For example, you can do something yourself or get an idea from a neighbor. In any case, this method of decorating a personal plot is very original and will certainly appeal to your loved ones.
To make a craft, you need to prepare the following materials: metal mesh, wire (thicker), polystyrene foam, glue, a canister and a certain number of plastic bottles (the number of which depends on the size of the craft). The tools you will need are wire cutters and pliers.

We prepare the base in the form of a circle or rectangle, in the center of which we drill two holes.
We strip the middle of the wire and bend it (keep in mind that the body of the peacock, which will act as a canister, will have to be secured to the bend).
We thread each end of the wire into a hole and secure it under the base.
We divide the side of the canister into three parts. Cut off two thirds of it.
The upper part forms a rectangle, which we move and secure with wire or self-tapping screws.
We attach the body to the legs and give the bird the necessary pose.
We cut out the plumage from two-liter plastic bottles. Feathers need to be cut both long and short.
Cut out rectangles (2 pieces) from white bottles and roll them up to form balls. We secure them with tape and attach them to the upper part of the legs (they will serve as the “legs” of the bird).
Attach feathers to the belly, chest, sides. We carry out this procedure through inner side body using a hole obtained as a result of making the carcass.
A net is attached to the bird's body. We bend it slightly from the sides (later the wings will be located here).
We cut out the feathers for the wings (7 pieces) and attach them to the mesh. At the same time, we move to the side and trim the “feathers”, forming the first and then the second wing.
We cut the feathers smaller and arrange them in the form of a semicircle.
For the neck we need 2 two-liter bottles, the middle parts of which are cut vertically and rolled up into a bag. We fasten them with tape, connect them and attach them to the body.
We make the head from foam plastic, the eyes from buttons or beads.
We make a tuft (this can be thin strips cut from bottles).
We make a longitudinal cut on the top of the head, pour glue there and insert the tuft.
We attach the feathers to the head using glue.
Color the peacock the way you like (or as your imagination allows).
Let's move on to making the tail (it is better to use green bottles). We cut out the feathers and make fringe around the edges.
The feathers are attached to the mesh in the form of a semicircle.
The bird is ready. Now you know exactly how to make a peacock from plastic bottles. We hope that your loved ones will appreciate the masterpiece made by your hands.
From plastic bottles?
Any flower garden can be decorated using available materials.

You just need to bury them with their necks down. We paint each bottle with different colors to create flowers.

And knowing how to make a peacock from plastic bottles, you can also decorate your flowerbed with the help of this gorgeous bird, sitting it between tall flowers.
Funny figures, sculptures, unusually shaped flowerpots, original fences and other bright details help to focus attention on the most beautiful corners of the garden. You can make some of these garden decor elements yourself using various available materials.
If it has already appeared on your site, it’s time to complement the composition with no less than interesting crafts. Today we will talk about how to make a peacock from plastic bottles with your own hands.
To make a fairy bird you will need patience and various materials:
There is a similar article on this topic -
If you plan to place your peacock outdoors, choose materials that are resistant to adverse weather conditions.
All elements ( , , , , and ) are manufactured separately and then assembled into one common structure.
Torso.
The body is the main part on which the remaining parts are fixed. It can be made from various materials:
Video tutorial, peacock made from plastic bottles.
Four parts are cut out of foam plastic (the head, neck and two halves of the body) and glued together with liquid nails or any special glue.
With the right skills and sufficient physical strength, you can make a torso out of a plastic canister. Although it is quite difficult to attach other parts to such a base, the resulting structure will be more stable and durable.
The third way is to make a base from two plastic bottles of 5 and 1.5 liters. The neck of a large bottle is cut at an acute angle, and at the bottom of a small bottle the same cut is made, but in a mirror image. The sections are combined so that the structure resembles the body and neck of a peacock, and secured with tape. The head can be made from scraps (the bottom of a bottle and a cone) or from foam plastic.

Paws.
Video: White peacock made from plastic bottles. Master Class
You can make peacock legs from strong wire, scraps of metal-plastic pipes or from bottles. The latter are the easiest to make: cut off the top of two bottles and attach them to the body with their necks down. Insert metal tubes inside, with the help of which you can easily install the peacock anywhere.

Tail.
Having prepared the base of the future bird, proceed to making the tail. The more time and bottles you spend on this work, the more voluminous the tail will be. It can be made in two versions.
Option 1. Cut a base 100 to 170 cm long from a piece of linoleum. Attach the prepared feathers to it. Place the first row at the lower end of the tail, the next one on top of it so that the feathers of the next row cover the attachment points of the feathers from the previous one. Attach the finished tail with its narrow end to the upper back using nails (liquid or regular).
Option 2. Cut a semicircular piece from a large plastic bottle. After attaching several rows of feathers to it, glue it to the back of the body. At the same time, make sure that the peacock looks good from all sides.

Wings.
The wings consist of two parts. Do the bottom one, with long feathers: cut out the middle part of the bottle, divide the resulting cylinder in half. Cut the resulting rectangles from the bottom so as to give them the shape of wings. Attach the parts to the body. Assemble the upper part of the wing from small feathers cut from the bottoms (they also cover the surface of the neck).


Plumage.
Making feathers is the most labor-intensive process that will require perseverance, patience and large quantity plastic bottles, one or more colors. Transparent plastic can be painted any color acrylic paints for facade work. Moreover, some craftsmen paint blanks, others paint ready-made birds.
The tail feathers are made like this: the top and bottom of the bottle are cut off, the remaining cylinder is cut into three to four parts. The rectangles are given the desired shape and the edges are decorated in the form of fringes or teeth. An “eye” is drawn at the top of the pen.
Video: Plastic bottles
The body is covered with feathers cut from rectangular blanks, the lower edge of which is made in the form of teeth. The upper part of the rectangles is fixed to the base.


Pay attention to this material -
Beak.
To make the beak, cut two triangles from the top of the bottle. One should be slightly larger than the other. Bend a small triangle in the middle and attach it to the head with nails - this will be the lower part of the beak. Make the top part in the same way.
Cut out the tuft details from bottles, decorate with foil or paint and attach to the head, masking the attachment point with feathers. Draw the eyes. Place the miracle bird where your guests can admire it freely.

You might be interested in this article -