How to make curls at home
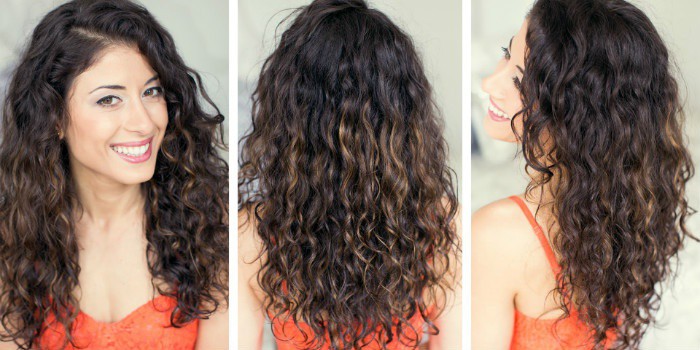
Elastic, neat curls are a hairstyle that for many girls is synonymous with the holiday, although for some it is a common occurrence. They are back in trend, so every fashionista should learn how to make curls herself. Is it possible to do without the services of a beauty salon and curl your hair without a curling iron?
What are the benefits of curls?
Girls try to straighten their curly hair no less often than they try to curl a perfectly smooth hair. However, curls have one important advantage, which hairdressers take advantage of, before most hairstyles, they first curl them. This is the ability to style yourself so that even the simplest hairstyle looks festive. Even an ordinary bun of curls is radically different from a bun made from a straight ponytail. In addition, curls have several more advantages:
- constant natural volume;
- no need to do morning styling;
- the hairstyle will not be attacked by bad weather;
- styling will give the face softness and tenderness.
How to make curls at home without curling irons or curlers
A styler will give you the most beautiful results, but its absence is not an obstacle to a beautiful hairstyle. If you have been wondering how to make curls at home using improvised means, you should consider this section. Below are several original and proven ways to curl hair with curlers, pins, through classic braids and even using scarves. For greater styling stability, it is recommended to apply a small amount of any fixative (foam, mousse) to damp hair.
Using two scarves
If you were looking for a way to make small curls at home, there is no need to consider this block - this technique is focused on large curls that look good on long hair. A salt spray will add a twist to your look, creating a trendy beach styling effect. It's easy to do your hair:
- Wash your hair or just carefully moisturize your combed hair.
- Divide into 2 equal parts. Start braiding each of them into a regular braid, placing a scarf or scarf at the base. The ends of the fabric should lie parallel to the working strands.
- Tie a scarf at the end of the finished braid and let the hair dry on its own.
Curls with braids
A method that is so popular among little girls, but is not very popular with their mothers due to the large amount of time spent on work. The principle of operation is very simple, but the procedure can be very tiring, so it is rarely performed on thick and long hair. How to make curly hair at home by braiding hair? Following this scheme:
- In the evening (“perms” are best done at night), wash your hair and apply a little foam.
- Dry until you can comb your hair without damaging it.
- Separate a thin strand with a knitting needle and braid it into a 3-part braid. The thinner it is, the smaller the curls will be.
- Repeat the previous step until the entire head is braided. Be sure to bend the ponytails, otherwise they will remain straight.
- Finally, you can make 1-2 large braids from small braids and go to bed.
- In the morning, carefully unravel each of them, do not comb.
How to make curls at home from rags
A method that was popular a couple of centuries ago, when hot tongs did not exist or were not as accessible as they are today. Any large rag is suitable as a “tool” for wrapping: you need to cut not too wide ribbons from it. How to quickly make curls at home using these curling irons:
- Wet each piece of fabric and be sure to moisturize your hair.
- Start winding a thin strand onto the curler from the tip. Tie tightly at the root (or below).
- Cover your head with a scarf and dry it with a hairdryer.
- Remove the curls and comb the curls with your fingers. For more volume, you can work the roots with a diffuser.
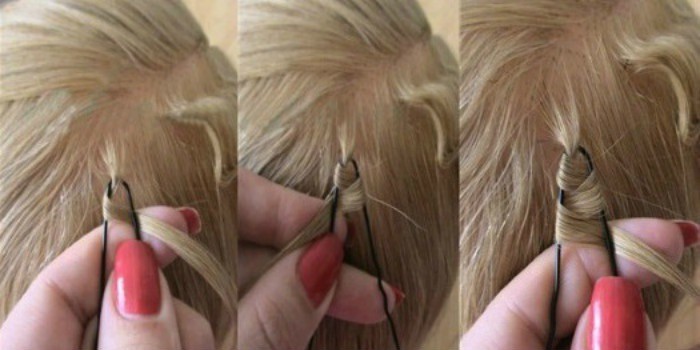
Curls with hairpins
The method is simple and convenient, but it is recommended to use it during the day, because sleeping with such a design is uncomfortable. The attractiveness of this method lies in the results that can be obtained with it: the curls come out elastic and small. To work, you need a lot of durable pins with a length of 70 mm and silicone rubber bands. How to make curls at home using this technology quickly and correctly:
- Separate damp hair following the standard pattern. Choose a very thin strand.
- Make a turn from the root around the parallel axes of the pin with the number “8” so that the turns intersect in the center.
- Secure the curl blank with an elastic band, repeat these steps for a new strand.
- Leave the curled hair for several hours or dry it with a hairdryer.
Curls on foil
The result of this procedure is zigzag curls that look very unusual. To speed up the process, the strand can be heated between the plates of the iron, but even without such an effect, the success of the undertaking is guaranteed. When winding your curls onto foil, keep in mind that the width of the strands should not exceed 2 cm, and work begins from the crown area. Be sure to moisturize your hair before curling.
The action plan is as follows:
- Roll a long, wide strip of foil into a ribbon and bend it in the middle to form a “V”.
- Wind the strand around the ends of the foil, drawing loops. Fix the ends through the fold of the foil.
- Repeat the previous step with all strands, dry your hair with a hairdryer or iron, or let it dry on its own.
- Spray the curls with hairspray and remove the foil.
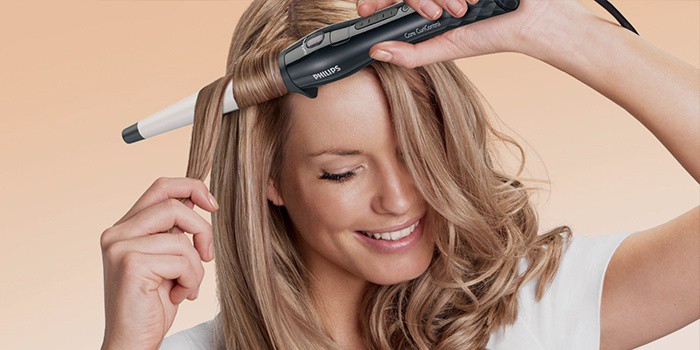
How to make curls at home using a curling iron
When working with hot tools, you need to take into account that the resulting curls should not be thrown away, especially for those with long hair. Each curl removed from the styler is cooled and disassembled, immediately styled as needed. This is how salon professionals achieve long-lasting hairstyles, a beautiful silhouette and natural volume. Besides this, there are a few more rules for neat and long-lasting curls:
- Never try to style your hair with a curling iron - you will injure it.
- Don't forget to use thermal protection.
- It is not recommended to create curls with nail polish - it is better to resort to foam.
- Hair is curled at a temperature of 200 degrees.
- You cannot go over the strand with a styler more than 2 times - it will stop remembering the shape.
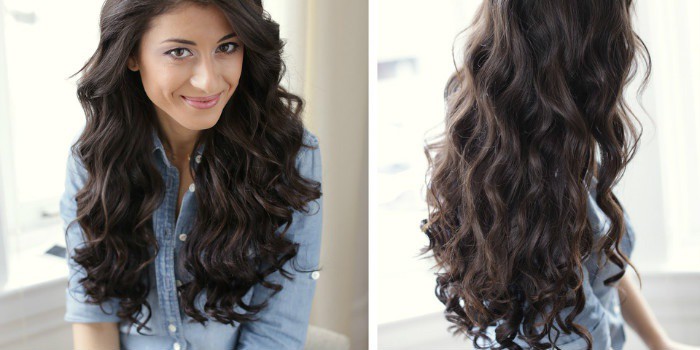
For long and straight hair
The peculiarity of working in such a situation is the need to cool each curl for a long time and fix it one by one, otherwise small curls will quickly turn into barely noticeable soft waves. Professionals warn owners of natural (undyed) hair: any curl will not last long, and the curls will gradually straighten out under their own weight. It is recommended to wind the strands onto curling irons of the smallest diameter, but the curling iron must have a long working surface, otherwise the heating of the hair will be uneven.
The technology for creating curls is as follows:
- Wash your hair with deep cleaning shampoo.
- Treat damp hair with heat protectant and dry with a hairdryer.
- Divide the head into standard zones, starting work from the back of the head.
- Wind a thin strand from the root onto the curling iron, ignoring the clip.
- Hold for no more than 15 seconds, remove with a duck pin or bobby pin.
- When the whole head is curled, release the curls one by one. Spray with varnish.
Small curls for short hair
The size of the curling iron plays an important role here: for elastic African curls, you need curling irons with a diameter of up to 19 mm. Performing this styling is as easy as making curls at home for long hair: the only difficulty can be caused by the back of the head - you may need an additional mirror for it. The essence of the method is as follows:
- Use a transverse line to separate the bottom layer of hair, and collect the top mass with a clip.
- Separate a very thin strand, wind it onto the cylindrical base of the curling iron from the root, placing the turns close to each other.
- After 10 seconds (12 seconds for coarse hair), remove the curl and cool it in your palm, squeezing it.
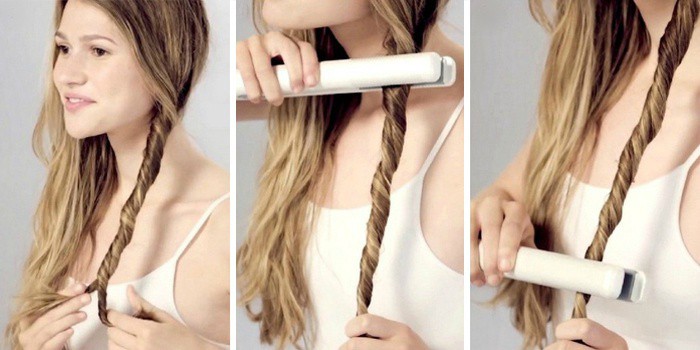
How to make curls at home with an iron
This method of wrapping is suitable for owners of long hair, but has several features:
- the iron must have narrow (up to 21 mm) plates;
- Before creating curls, the strands are not treated with anything other than thermal protection;
- Curling with an iron is difficult on porous hair.
The technique is very simple, but for the first training it is recommended to start working with a cold tool in order to understand how to hold it and make a turn. The work algorithm looks like this:
- Divide clean and perfectly dry hair into thin strands. Start curling at the face.
- Twist the working part of the hair into a not too strong flagellum. While holding the tip, clamp the base with hot plates so that the tool is positioned diagonally to the floor.
- Rotate the iron completely around its axis, i.e. 360 degrees. Slowly pull down the width of the plates.
- Turn the iron again, while simultaneously removing the ring from its tip. Repeat previous step.
- Follow steps 3 and 4 until the strand is completely curled. Screw it onto your finger, cool it and take it apart.
Check out other ways, too.
Curly hair curlers
This device is considered safe and convenient for any hair length and structure. The low cost of some of its varieties is also captivating. How to make beautiful curls at home using curlers? Decide what effect you want to have:
- Soft large waves will be produced by large-diameter Velcro.
- African curls are easy to make with half balls or silicone spirals.
- Boomerangs give unruly curls and incredible volume to hair.
Once the goal is determined, all that remains is to watch a few training videos on YouTube and familiarize yourself with the basic rules:
- With spiral curlers, curling should be done from the roots. With other varieties - from the ends.
- Small curls are combed with your fingers, otherwise they will lose their elasticity.
- After creating Velcro waves, you need to go through your hair with a comb to make it softer.
Video: how to make Hollywood curls at home