Modeling dolls from cold porcelain. DIY articulated doll made of cold porcelain, polymer clay, baked plastic, papier-mâché. Processing of finished parts and installation of hinges
Content
Handmade dolls are highly valued not only among lovers of miniature copies of people, but even among professional collectors. The work skillfully executed in the smallest detail fascinates and evokes a feeling of admiration. A human figurine can be made from a variety of materials, both traditional and relatively new ones that have appeared not so long ago. Performance techniques are also varied. The figurine can be sewn, knitted, woven and even sculpted. In this article you will learn how to make a doll from cold porcelain at home.
Before we begin to consider the process of making dolls from cold porcelain, we will consider their main varieties that can be sculpted.
Main types of dolls
According to the method of manufacturing and fastening parts, they are divided into:
- static;
- articulated dolls.
The first type is characterized by the immobility of parts, the inability to change the posture and position of the body, head and limbs relative to the body.
Representatives of the second type are mobile, easily taking any position of the body, arms, legs and head, thanks to special hinges located in certain anatomical bend locations.
For beginners, it is best to start with sculpting a static doll, and only after a certain period of time, during which the basic skills of making a toy are acquired, can you start sculpting a jointed doll.
Step-by-step master class on making a doll
Before you start making a particular toy model, you should make a sketch finished work on a piece of paper.
Advice! It's best to do more than just sketches with a simple pencil, but a full-fledged sketch in the full color range.
This method will help you decide on the choice of paint and choose the right, most harmonious combination.
For sculpting you will need the following materials and tools:
- cold flesh-colored porcelain;
- knives and stacks for modeling;
- wire;
- PVA and instant glue;
- brushes of different sizes;
- paints for decorating finished parts;
- pliers;
- foil;
- artificial hair or mini wig;
- fabric, thread, needle for sewing a dress or a ready-made outfit for a doll.
Step-by-step master class:
- We begin to create the future doll with a frame - a kind of skeleton. For this we need foil, wire and pliers. We make the frame from wire and carefully wrap it in foil. When creating the base, it is necessary to bring the shape of the workpiece as close as possible to the human body. To maintain proportions, the “skeleton” can be attached to a previously made sketch of the finished work.

- We sculpt the doll's head from cold porcelain.
We start the sculpting process from the head. We take a small piece of the finished mass and carefully place it over the entire area of the face, parietal part and back of the head. After completely filling the skeleton's head with cold porcelain, we begin to give it a human appearance. We do this using a stack.
The process of face sculpting is shown in detail in the photo:


- We give the face the desired shade, close to life. To do this we use brushes and paints.

- We sculpt the ears. In the process of creating the ears, we try to make them as similar as possible to the original, sculpting every detail and fold in detail.

This video master class will help you master all the subtleties of sculpting a doll’s face from cold porcelain:
- Let's start making the neck and torso. We gradually cover the frame with a porcelain layer of the finished modeling mass. In the process of work, do not forget about the anatomical features of the human body. Strict adherence to proportions, bulges and depressions will allow you to create a real masterpiece that will be as close as possible to the original human body.

- The main work is almost complete, all that remains is to sculpt the small details. Using a stack, carefully form the fingers and toes of the doll, mark the places where the bones of the skeleton protrude the most (collarbone, hips, knees), and also sculpt the bulges on the chest of the required size, depending on the gender of the toy.

- We give the doll a human appearance. To do this we use pencil, paints and brushes.

- Using glue we attach the hair to the head.


Our doll is ready, all that remains is to dress her in a dress or any other outfit of your choice.

It is impossible to imagine our life without such a toy as a doll. Modern doll bright, fashionable, beautiful. Dolls are often accompanied by outfits, houses, cars.
But despite all this splendor, rag dolls DIY products are becoming increasingly popular. They are used not only for play; interior dolls and amulets dolls are now in fashion.

When creating dolls, craftswomen put not only their skill, but also their whole soul into their products. A handmade toy will always be a great gift.
How to do beautiful doll with your own hands, you ask? In our article we will talk about this.

History of dolls
The doll has accompanied humanity literally since the beginning of time. Carved from wood or sculpted from clay, dolls accompanied the rituals of shamans and sorcerers; they were animated and deified.

The Slavic peoples made bundles from bundles of straw and scraps of fabric; these were mainly talismans for the home against ailments, evil spirits and misfortunes.
Children's toys, too, of course, have always been there. Animal figures were carved from wood, dolls were sewn from scraps of fabric and stuffed with straw.

Much later, when they began to produce porcelain dolls in luxurious clothes, they were bought only by very wealthy people, children ordinary people played with rag toys.
 Mechanical dolls were first made in the 18th century in China and also cost incredible amounts of money. Nowadays dolls are sewn not to save money, but to have something original and exclusive.

Amulet for home
The easiest doll to make is the fagot amulet, made from bundles of straw, thread and pieces of fabric.
Knitted, because the doll is not sewn together with thread, but its parts are connected to each other. Ideally, even scissors are not used when working on the amulet; the necessary pieces of canvas are torn off by hand, and the doll’s parts are tied together with threads.
The product will be a wonderful amulet if it is sewn from the owner’s used clothes, worn during the best moments in life.

The eyes and mouth are not drawn on the amulet. Externally, amulets may differ, it depends on who they are made for: newborns for intercession, newlyweds for happiness in family life, for the home for abundance and prosperity. Charms for wealth and an excellent harvest are decorated with wheat, seeds, and nuts. For good health they make a herbalist doll, filling it with fragrant herbs.

The amulet must be made in good mood, sing songs, read prayers, talk about pleasant things.

The doll absorbs good emotions and words, and the same goodness will exude in your home.

Work on the amulet cannot be interrupted, so prepare everything in advance, choose a time so that you are not distracted and finish the work to the end.

To make a knitted doll you will need:
- flap white for making a head
- filler (sintepon)
- scraps of colored fabric (10*10 arms, 5*8 apron, 9*16 skirt)
- floss threads for hairstyles and tying
Wrap the filler in white cloth and wrap it tightly with thread, the “tail” of the fabric will be the body.

Pay attention!

Gather the flap of the skirt into folds and tie it to the body, do the same with the apron, without tearing off the thread, wrap it around the doll’s head, making a beautiful body.

Gather a piece of fabric for the arms into an accordion length and wrap it with thread. Wrap your hands to the doll's body in a cross pattern. You can put a scarf on your head, or you can make hair from threads.

Stitched dolls
The world of sewn dolls is diverse, here you can find soft, cozy toys for children, sophisticated elegant interior dolls and wonderful options with irregular proportions.

The Tilda doll, which appeared not so long ago, has become extremely popular. Such a doll has disproportionately long legs and arms, and only eyes and cheeks are depicted on the face.
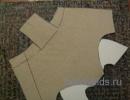
Below is a pattern for a Tilda doll to realize your ideas.

The creative potential of each needlewoman is diverse and each sewn doll turns out to be unique.
Pay attention!


A beginner can start by sewing small dolls from felt; the clothes of these beauties are embroidered from beads and don’t let this scare you, such dolls are always obtained.

For needlework, prepare:
- felt fabric
- hair yarn
- filler
- nylon threads
- beads

You can use ready-made pattern You can draw the template yourself, everything is at your discretion. Transfer the pattern to felt and cut out the blanks. Embroider or draw a face on one of the blanks.

Now you can embroider a dress with beads on each of the blanks. Sew dresses for the doll separately and change outfits regularly. To make a hairstyle, cut the yarn into 15-20 cm pieces and sew it onto both pieces along the forehead line and the nape line.

Pay attention!


The sewing method presented above allows you to create any dolls and change the patterns at your own request.

Nylon dolls
Recently, dolls made from nylon have become popular; nylon allows you to make any expression on the doll’s face.
How to sew such a magnificent doll? To create this type of doll, experience is required, and we will now present a simpler version of sewing from nylon.
You will need:
- nylon tights
- filler
- beads
- threads
- floss threads for hair
- safety pins.

You should start by filling and creating the form. After filling, tie or sew the top tightly. To create a face, use pins, for example, when marking the nose, stick pins in place of the nostrils and stitch between them, as shown in the photo.

- Sew the nostrils and wings of the nose with literally two stitches, stitch each new part faces need new thread.
- The cheeks are pierced with a pin from top to bottom and stitched in the same way.
- The line of the mouth is stitched, also after shaping it with pins.
- The doll's navel is marked with pins and stitched; a running stitch is used to create the legs.
- Sew beads in place of the eyes, and create a hairstyle on the head by sewing in floss threads.
- Eyebrows and eyelashes are easy to draw, the doll can wear any clothes at your discretion.

There are many techniques for sewing dolls and types of toys themselves, don’t be afraid to experiment and you will succeed. We present photos of dolls for inspiration.

Photos of dolls with your own hands


In November 2015, I wrote a topic called “And again I found myself in the puppet kingdom.” Then I accidentally wandered into what seemed to me to be a small doll store, but in fact it turned out to be a school for creating any kind of dolls with your own hands. I am writing this topic as a student of this school and now, step by step, I will tell and show how porcelain dolls are created using molds from famous masters.
Get ready for the topic to be quite voluminous, informative, with the right number of photos, but not at all boring.
In the first lines, I want to introduce you to my guru and write a few lines about her. The teacher's name is Dolores, she is 75 years old. She always liked working with dolls, it was her hobby. She lived in Colorado all her life and opened this studio... you could say that she actually opened her own business in the form of this studio when she was 55 years old. She began teaching people how to make dolls.
A completely simple American granny with a husband, children, grandchildren, dogs... who does what she likes. I would like to point out that I am the youngest “inhabitant” of this school. The next lady after me is 65 years old. They paid tribute to the state and are now enjoying life, so to speak...

How is a doll made? It's very simple :) It all starts with the mold. What is a mold? Mold (from the English word mold - to cast) is a form with which you can make volumetric figures and details, in our case: heads-faces, plates or bodies, arms and legs of dolls.
Here is a photo of the mold of the head and arms to give you an idea of what it looks like.


The doll mold is created by the master himself, the person who invented the doll, in conjunction with some manufacturing company, in our case it will be
Dianna Effner
and Expressions
These words Dianna Effner and Expressions are poured on the mold, respectively, they will be visible on the back of the doll’s head, and the doll’s name is almost always present. This photo is just an example of what it usually looks like on the back of the head under a wig.

That is, we see that the doll's name is Emily; the master who invented the Dianna Effner doll; the company that helped her make the Expressions mold and the mold was created in 1991.
In some cases, we may see another name. This is how we see it on the back in this photo:

That is, on the head it is marked April (this is the name of the doll), Elke Hutchens and IMSCO Molds, and on the back we see the name Sara Finfrock 91. That is, this means that this doll was created by a person named Sara Finfrock and, as we understand it, in 1991 . It is not known who this person is, he may be a well-known professional, or he may be one of the students at Dolores School or some other school in another state. You can, so to speak, scratch, write, or mark your name on the doll when the parts have not yet undergone the first roasting. Well, let's go ahead and do everything in order:
First of all, the person who decided to create a doll chooses the mold of the doll that he really wants. Dolores has more than 500 molds of different dolls.


If you pay attention to the photo just above these lines, then in the middle on the bottom shelf in this photo there is a mold and “Angel eyes” is written on it. This is the doll. Thanks to this base mold, you can create this beauty.

Dolores, of course, has a huge choice. She has two thick catalogs with photographs of dolls. All these dolls are known to most of us, I took out several pictures from the catalog and photographed them for you, and accordingly, I chose which doll I would choose, that is, which one I would make.


>


There were so many dolls from Dianna Effner :) But this is only because I took one gurney for the photo, and it is, accordingly, in alphabetical order. I decided to focus on the baby from the same Dianna Effner, the doll does not have a specific name, it is called Portrait # 10 (Portrait # 10). She has such an adorable face:) She is 18" (46 cm) tall.

Well? Let's go!
This is what jars of porcelain look like, which is poured into the mold; you can also choose the color of the skin.


I chose a mold, porcelain was poured into it, and later my parts were ready, that is, poured and dried. Here I want to draw your attention to the fact that these parts are very fragile, I don’t know what to compare them with... well, imagine a piece of paper burned, leaving ashes in the form of a crumpled sheet and you need to pick it up and try to read what was written there, accordingly, without breaking. This is the attitude towards these parts. They are quite fragile, they are called Greenware.

I was given a large container that needed to be filled with warm water, add a little liquid soap and lower the parts there for 10 minutes. The parts must be lowered into the water very carefully so that there are no gurgles. If Dolores hears a gurgle, you'll get a pretty good reprimand.


Here we took the leg out of the water, you see it is darker, and very carefully and carefully (because the parts were not fired, that is, they are not fried, so to speak, they are only dried, they are VERY fragile) we begin to remove the seams, remove the unevenness , bumpiness, streaks using Scalpel, Cleaning brush, Green Clean.


Then, using the Double ball Stylus, we begin to draw out the nails and finger folds. I confess to you that I'm done art school from the first to the sixth grade, but I’ll be honest that from the moment I graduated, I didn’t hold a pencil or a brush in my hands, but maybe an ink pen with which I wrote out “Long Live MAY 1st!” I really loved painting in watercolors, I simply adored pastels, but most of all I liked modeling. And you know this strange feeling... the brain doesn’t remember, the eyes don’t remember...., but the hands remember and do. That's what mastery means, you really can't drink it. Wonderful feeling.

Here on the legs you see, I have already engraved the toes.

The same thing happens with the head. We wash it, clean it, and so on, and just as carefully. It is much easier to break a head... and under no circumstances should you insert your hand into the hole in the head, it will break instantly. If you want the eyes to be drawn, then we leave them as is...

If you want them to be insertable, glass, for example, then we need to squeeze out the eyes.

They are extruded using Diamond Perfector. You must methodically, carefully, using a diamond tip, with virtually no pressure, do circular movements until the eye falls out.


To remove the internal roughness of the eye, we need special tools.


I forgot what they are called. This stick with a ball is applied to the eye with inside through a hole in the head. And with light, very careful, barely touching movements, we begin to rotate the stick... twist... a little too much... and the eyes roll out :) Each ball corresponds to the size of the doll and, accordingly, the eyes.

This was the hardest and most dangerous part of the job. Why? Because the parts are VERY fragile. One awkward move and the whole job starts all over again... fill the mold again, dry it, clean it... etc.
Now our parts are sent for the first firing, that is, into the oven. Everyone understands that this oven is not simple, not the one we have in our kitchen and the temperatures in it go up to high!

After the first firing, working with the parts is no longer so scary, they are fixed - they have become strong. Now we need to clean our parts so that they become comparable in smoothness to polished parquet. Dolores believes that the doll is perfect; if you run your finger over any part of it, it was like silk. No roughness, roughness, relief. Cleaning again! :)

This time we clean with sandpaper, dry sander, comet cleaner and a regular toothbrush...


And I want to tell you that if Dolores touches something... you will brush until she’s blue in the face... like in the army... with a toothbrush :)

Now let's start drawing! That is, paint... or in other words, hand painting. To do this, we need Painting Medium Water Based; they need to rub almost the entire future doll.

And, of course, paint. The paint comes in dry form, it needs to be diluted, well, just with a drop of the same Painting Medium Water Based and stirred using a tool such as Spatchela or Spatula.


Blush, lips, lower eyelashes and symmetrical shadow threads of eyebrows are applied to the face. (if only you knew how HARD it is to make them symmetrical!). I fluttered for three hours, if not more.


Under no circumstances should you even accidentally scratch your eyelashes or eyebrows; they will immediately be erased and you will need to draw again. To fix the paint applied to the base of the painting, we go for the second firing!
I used regular brushes for painting that Dolores gave me, although maybe they were specialized... somehow I didn’t ask.
Here you see, I applied eyebrow feathers, I’ll tell you too... it’s good that you didn’t hear what my mouth was saying at that time :) and it’s good that no one there understands Russian :) It’s not so difficult to draw the left eyebrow, but the right one... also so that it is in a mirror image... that's SOMETHING!

Here are the sponges:

Now I fired the third one again to fix the paint. This is the last frying, that is, before it, fine painting is already applied, a French coat can be made on the arms and legs... and other things to make the doll more realistic. I'll be honest, I didn't show any initiative... I just walked like a sheep on a leash. Whatever Dolores tells me, I do.
Our parts are fried, now we insert the eyes. First we edge the eye using eye setting wax.


And we attach the eye inside, first one, then the second, respectively, due to the eye setting wax they are held in place. Then we dilute the plaster mixture and fill it with the eyes inside the head.


This is the body of a doll. It looks like chicken :) I didn’t make it myself, I ordered it and bought it. They are made by Dolores' partner, her friend, the same age......, in short, well done ladies!


The next step is to attach the legs and arms to the body using regular glue and adding synthetic padding.


Now we attach the doll's head to the plate: we first need to wrap the hole with adhesive tape so that the porcelain does not rub against each other.


Then we take the holder-mount, pull the wax thread through it, then we carry this whole thing through the head, grabbing the plate and pulling the ring through the inner hole in the plate, quickly insert a pin into the ring and remove the thread. Everything is ready.


Now we will attach the plate with the head to the body. I don’t know if it will be clear from the photo, but I’ll also try to explain. We take a long needle with a large eye and thread the braid.

Then, from the chest side, we stick a needle into the body through the chest hole on the plate, pierce it to the back and pull out the needle under the plate from the back. Then the reverse process will begin, in the same way, from the back we stick a needle into the body through the dorsal hole on the plate, pierce it to the chest and pull out the needle under the plate from the chest side. We tie it with a bow.


Now we attach the blotch.


Glue the eyelashes and clean the eyes.


Well, roughly, this is how we turned out. Here it is still a little crooked, askew - you need to correct it, choose a wig and sew clothes. True, I’m still a seamstress....so don’t judge too harshly. In a couple of photos you will see how it turned out :)


Please love and favor!


I haven’t come up with a name for the button yet..... if you want to suggest something, we will be grateful and happy if we have a godmother :)
I will repeat again and say that I did the girl according to Dolores’ clear instructions, not a step to the right, not a step to the left. Now, after I made the doll myself, I look at it with slightly different eyes and see, as a master, what I should have done differently and, as I see it, it is the girl who was completely created by me.
But still :) For the first time, I think it’s not bad.
I will be glad if I helped someone understand how such dolls are made. They are considered OOAK (“one of a kind”), that is, one of a kind.
Take for example the famous Violet by Cindy Marschner Rolfe. This doll is an original, this is exactly the doll created by Cindy Marschner Rolfe.

This Cindy Marschner Rolfe mold girl was created by the famous company Danbury Mint

And someone created these babies. A master, an amateur, a professional....., a person who sees this Violet from his own perspective, this is exactly the creation process that you just saw. Some photos of dolls were borrowed from the Internet, from sites for public use.


Passed through my hands large number dolls, not just big, but VERY big.
Let's also take, for example, Emily from Dianna Effner. This girl is the original.

But this beauty Emily was created by Ashton Drake in 1996.

But these Emily stars from the Dianna Effner mold, created in a single copy, once upon a time, someone passed through my hands:


Honestly, I liked this thing :) The next girl will also be from Dianna Effner, but 12 or 14 inches high, completely porcelain, will be stretched and the eyes will be drawn on. Something like this plan:


And I’ll also try to make the famous Bru. If you want, I’ll tell you the same thing.
Thank you for your attention
Always yours, Marina - AllforDoll
We will need:
foam ball;
a ball of cold porcelain is about the same size as a foam ball;
ball tool;
cutting tool;
acrylic paints;
varnish
1. Cover the foam ball with a layer of cold porcelain, having previously reserved some of the porcelain for making ears. Also, remember that it is very difficult to match colors when using different batches of material. Try to apply porcelain to the base in such a way that air pockets do not form. This can subsequently lead to the formation of cracks. If the porcelain is a little dry, you can apply a little glue to the ball, this will make the work easier. We begin work by pressing the base into a layer of porcelain and gradually rotating the ball, pressing it against the palm and gradually covering it with a porcelain layer. Once you get to the top, pinch the porcelain on the sides, this will make the coating contact the base more firmly.


2. Form the neck. We roll the workpiece on a flat surface in such a way that it takes the shape of an egg. We find the border of the foam base and make a recess. This will be the back of the head. Then, using a cutting tool (for example, a stack or a plastic knife), we make a depression in the protruding part of the head. This recess should be slightly offset from the center, and the lower part should be smaller than the upper. We form a neck from a smaller piece.


3. Form the face. We use a cutting tool to mark areas for the cheeks, nose, mouth and chin. We round the cheeks with our fingers, forming the nose and chin. We make small indentations above the cheeks, the eyes will be placed in them. Using the same cutting tool, we form an open mouth.


4. We continue to shape the face. Now we take a tool with a small ball at the end or any other suitable object at hand and outline the area around the mouth. Roll the tool along the lower lip, making a notch. We try to bend this notch upward, then our head will be smiling. We press in the corners of the mouth, making small dimples. We make holes in the nostrils and mark a depression in the upper lip.


5. Elimination of defects. In this photo you can see a fairly large crack. These cracks formed on both cheeks as a result of clay being pushed in the wrong direction during the early stages of facial formation. To correct this defect, we wet the entire area around the crack with water and roll the ball back and forth over it. Then use a ball tool to make small movements in the opposite direction of the crack to smooth it out.


6. Add ears. We take a piece of clay, reserved in advance, and roll it in our palm into 2 balls of equal size. Place these balls on a flat surface and roll them into cones. Give the cones a drop shape. We slightly moisten the ear attachment area on the head and attach the ears at eye level. We press a large ball onto the ear to make a depression in it and bend it a little. Then we take a smaller ball and give the ear a more natural shape. You can even sharpen them a little, then they will resemble the ears of an elf.


7. Leave the workpiece for 24-48 hours to dry. The duration of drying depends on the initial state of cold porcelain, the humidity in the room and the thickness of the workpiece. During drying, it is necessary to turn the workpiece over at least once so that its other side dries.


8. After two days, you can inspect our workpiece with a fresh look and correct any shortcomings. One of the advantages of this material is that any imperfections can be easily corrected even after it has hardened. By the way, the cracks in my cheeks have become barely perceptible. Now we remove roughness and other minor defects by sanding, moistening and smoothing.


9. Add details. Let's breathe life into our little elf using acrylic paints. We make the eyes dark blue, after which we add a black pupil, then light blue highlights on the iris and, finally, white highlights. We complete the details with a pencil and marker. To make the blush on the cheeks more realistic, use a cotton swab and various shades pink. To make the lips stand out better, make them reddish-pink.


10. Eliminate defects. While the paint is fresh, it can be easily removed from cold porcelain. To do this you will need a little water, a cotton swab or paper towel. To avoid smearing the paint, we work from the outside. Watch the amount of water, it should not be too much, otherwise you may remove too much porcelain or over-wet it. Then it will have to be dried again.


11. Add hair. Take a small piece of yellow clay and roll it out. We lay out the rolled out layer on the head, make cuts above the ears and place the protruding areas behind the ears. Divide the hairstyle at the back of the head in half and form pigtails.


12. Eliminate hairstyle defects. You can see in the photos what didn't work out. Simply put, cold porcelain dried very quickly. At some point the braids had to be removed.
In childhood, probably all girls loved to play daughter-mother and tinker with any dolls. However, you should not think that the hobby for toys should be left in adulthood, and articulated dolls are a vivid example of this. Unlike ordinary plastic baby dolls, articulated dolls have all their “joints” moving, since their limbs are fastened with special joints, inside of which flexible cords are hidden. Thanks to this, articulated dolls can take a variety of poses. Each such toy is a unique work of art, as it has a unique figure, facial expression and outfit. Collecting such dolls is extremely popular, and designer dolls are especially valued by connoisseurs - all components of such toys must be made by hand, and not in a factory. Of course, this is not at all simple work, because to create such a doll you need to be both a sculptor and an artist. In this article we will look at what materials to make a jointed doll from. step by step lesson with your own hands.
We make a jointed doll with our own hands in a master class
Made of wood and clay.Wood is one of the oldest materials for making articulated dolls. Dolls with wooden mounts were found in Egyptian tombs - they were placed in the burials of little girls. Such dolls, of course, had very primitive joints and were located only in the elbows and knees. In China, jointed dolls were made from clay, connecting their joints with metal hooks.
Made from cold porcelain.Cold porcelain is poured into a special mass for modeling, which is cooked using PVA glue and corn starch. The finished material is very plastic, easy to work with, and does not stick to your hands. In addition, cold porcelain can also be purchased in ready-made form - this is the FLUMO modeling mass. Initially, it is white, because to paint it the color of the skin, you can add a drop of paint immediately before mixing or spray the pigment from a spray can onto the finished product. Articulated dolls made from FLUMO cold porcelain require time to dry completely, about one and a half to two days. However, it can be reduced by placing the pieces in the oven at a very low temperature.
From polymer clay.Those who make their own jewelry may be familiar with polymer clay. This unique material becomes very plastic if you begin to knead it in your hands, and allows you to sculpt any, even the most complex, shape. Polymer clay is a baked type of material, which means that the finished doll will require heat treatment. But don’t be scared; you can bake a polymer clay craft even in an ordinary oven by adjusting the temperature.

Another material that must be dried in the oven is polymer plastic. There are several popular types of such material, and when working with each of them, you need to take into account its own nuances. For example, crafts made from baked plastic Living Doll require a lot of preliminary work with the material (it must be kneaded very carefully in your hands), otherwise the finished doll will turn out brittle. But FIMO plastic may look translucent, so there is a risk of the doll’s internal frame being visible through it.

Papier-mâché is not the most popular material for making articulated dolls, as it is quite difficult to work with. The paper for such toys is soaked in water for several hours, and then mixed with glue until a homogeneous mass is obtained. From this material you can already begin to sculpt the components of the doll. The finished papier-mâché figurine is covered with white acrylic paint and leave until dry.

Hinges for moving parts can be purchased ready-made - they are sold in abundance in specialized craft stores. However, real masters make their dolls entirely on their own, so they sculpt the joints from polymer clay. The number of joints can be any: the arms and legs move in most dolls, but the fingers on them move only in some.
Separately, it is worth considering the head mount. You need to make a hole in it that matches the diameter of the neck. After this, we mold a separate ball, which is smaller than the thickness of the neck, but coincides with its internal diameter, and attach a hook to attach the head to the body. The ball is inserted into the head blank, and the hook is pulled through the hole in the neck.
Video on the topic of the article
For beginners, the following videos will be useful, demonstrating how to make articulated dolls yourself, in the following videos. WITH step by step instructions Experienced puppeteers make it easy to understand incomprehensible elements and easily cope with the production of these graceful beauties.