Knit a blanket using thick threads with your hands. How to knit a blanket, blanket, blanket from thick yarn, alpaca and merino wool, large volumetric crochet, knitting, on hands without knitting needles and a hook: step-by-step instructions. Beautiful rugs, blankets, large bedspreads
It’s hard to say exactly what a blanket is. This is a large shawl, a blanket, a cape, and a bedspread. One thing in common: the blanket should be warm, soft, not heavy and not parkable. Making a blanket with your own hands is a rewarding task in the literal sense of the word - it will be warm and cozy. And figuratively: a really good branded blanket costs somewhere up to $400, and the materials for the most expensive homemade one will cost half or three times less. Or maybe 10-20 times cheaper. Or for nothing - a blanket can be made in various ways.

A classic knitted blanket can be knitted or crocheted. It is difficult to knit a large blanket for the entire double bed (item 1 in the figure) without a machine: you need a lot long knitting needles and it’s easy to get confused when counting a huge number of loops. By hand, on a free evening at home, it is possible to knit a smaller blanket on knitting needles for a chair (item 2) or for shoulders. It’s easier to knit a large blanket from super-thick yarn (item 3): in general, knitting needles are not needed to knit it (see below), and the number of loops with a width of 1-2 is a number that fits in the average mind. But a thick blanket is not a cheap pleasure, although even here resourceful craftswomen come up with unusual options reduction in price.
A large one-piece blanket is more convenient to crochet: with this tool it is easier to switch from motif to knitting motif, which allows you to get large, one-piece, fairly detailed items, pos. 4. And at the same time, it is convenient to crochet small fragments, which are then either tied into a panel with the same crochet (pos. 5), or sewn with threads (pos. 6), or hand-knitted with ties, pos. 7.
The baby blanket is knitted from hypoallergenic yarn (wool is an allergen). It is better to weave a blanket for a baby on a frame (see below) and tie pompoms on it (item 8), there will be both a blanket and a play mat - no matter how you play around, you won’t hurt yourself. A budget option and an easy-to-make blanket for the little ones - hand-knitted from fleece, also see below. Such a blanket will not last long, just until the child grows up.

And, finally, an “extra-budget” version of a blanket that is comfortable, durable, but not for show (say, at the dacha) - sewn from old knitted items, see fig. right. In order for a blanket made from worn rags to serve for a long time, warm well, get dirty a little and warm well, the materials for it need to be prepared, see below.
We knit a blanket...
...knitting needles...
Knitting is not such a complicated science. It’s more difficult to get used to not losing count of loops, which makes the item uneven and can wrinkle. The principles of knitting are simple:
- The loops of the first row (basic loops) are thrown onto the outgoing knitting needle;
- The first basic loop is cast on by hand;
- To cast on the 2nd and subsequent loops, grab a thread of yarn with the end of the knitting needle and pass it into the previous loop until the required number of loops creep onto the emerging knitting needle;
- The second row is knitted by transferring stitches from the outgoing knitting needle to the incoming one;
- When throwing a loop, the end of the outgoing knitting needle grabs the thread, thus forming the loops of the third row;
- Whether the new stitch will be knit or purl depends on which side the outgoing needle goes around the incoming one;
- If the item is large, the second (idle) incoming knitting needle is pushed into the loops of the third row as they are formed;
- When the 2nd row is knitted, the next ones are knitted according to paragraphs. 3-7, only the working and idle outgoing knitting needles change roles from row to row.
To get started, watch a selection of videos, after which (or better yet, during which) you can start knitting:
Video: how to learn to knit
Video: Knitting Basics
Video: types of loops for knitting
Plaid patterns
On the one hand, knitting a blanket is easier than knitting a sweater - you knit a simple rectangle. On the other hand, it’s more difficult: there are a lot of loops, it’s easy to lose count. In addition, the blanket should be larger (to make it warmer) and weigh less. It is also highly desirable to reduce yarn consumption. AND last condition: Oddly enough, a blanket should be stronger than a sweater or mittens and have less stretch. Who remembers the times of shortage bed linen, also remembers that over the summer the sheet with which one covers oneself in the heat instead of a blanket wore out faster than the same one on which one lies. And if the blanket stretches, it will provide less warmth and will wear out more quickly. Therefore, not every knitting pattern is suitable for a blanket.
For beginners, it’s better to knit your first blanket with a bias (see picture):

Bias knitting satisfies all the above requirements, and its motif is simple:
- 6 purl loops - a path between the strands of the braid;
- 3 knit loops – one strand of braid;
- 3 more knit loops - another strand of braid;
- interweaving of strands - single and working needles, the outgoing knitting needles change places through the loop (see the figure on the right), i.e., while the weave is being knitted, the loops on the incoming knitting needle A are dropped alternately, one at a time, from knitting needle B, then from knitting needle C.
You get a very good blanket if you knit it all with a Canadian elastic band: the tracks are narrow, it’s easy to count the loops, and if it goes wrong, you can see it right away. In addition, this knitting is called elastic because it is elastic and resistant to wear (cuffs, cuffs, sweater hems, etc. are knitted with it): rib knitted The blanket fits very neatly as a bedspread, and you can wrap yourself in it however you like. True, it will take more yarn for an elastic band than for a braid (approx. 3.5 kg versus 2.5 kg for a blanket for an adult). How to knit with Canadian, see next. video clip:
Video: pattern for knitting a “Canadian elastic” blanket
Patterns and motifs for knitting a blanket can be found in abundance on the Internet. If you choose a suitable option yourself, pay attention to the knitting patterns for hats - the technical requirements for them are the same as for the patterns for blankets. Simply, if you are knitting a blanket, keep the number of loops in all rows the same in accordance with the width of the blanket. One loop of regular yarn is 3-6 mm; from here the number of loops in the row is calculated. For example, how to knit a very beautiful, not very complicated and quite economical in terms of yarn consumption pattern for a hat, which is also quite suitable for a blanket, see next. plot.
Video: beautiful knitting pattern suitable for a blanket
Note: in practice, the number of loops for knitting a blanket is not calculated in advance. Knit and knit the first row, counting the loops, until the desired width is obtained. The next rows are knitted with the same number of stitches.
...crochet...
The principle of crocheting is somewhat different from that of knitting: we make a base loop, pull a thread into it, forming the next one in the row, etc. The finished ligature comes off the tool immediately. Crocheting topologically complex things (clothing, gloves, solid furniture covers) is much more difficult than knitting, or even impossible. But as for flat items (unfolded) or small decorative fragments, crocheting them is much simpler and easier than knitting. For example, a blanket is crocheted in exactly the same way as a scarf - the technical requirements for the motif are the same, you just need to give more loops per row:Video: crochet example
Note: You can start crocheting large things only after mastering knitting to the point of automatism - since there is no incoming needle, it is impossible to get the descending loops the same only through effort and attention, the item will go awry.
It is better for beginner knitters to get used to the crochet hook on small decorative details, which can then be sewn onto the same blanket or somewhere else. For example, how to crochet a heart, see the video below:
Video: crocheted heart for blanket decoration
Or, let’s say, the basis of many decorative knitted elements is a circle. How to crochet it, see another video tutorial.
Video: Crochet a circle
Knowing how to knit a circle, there will be no insurmountable difficulties in crocheting flowers. A baby blanket made of flowers for a girl – what little princess wouldn’t be delighted with it? Even if she is a real Baba Yaga on a potty.
Make a blanket for a child from crocheted flowers are not difficult in principle, but the work ahead is painstaking:
- Prepare a straight (without pattern) knitted base, or buy a ready-made inexpensive thin knitted blanket;
- Knitting flowers;
- When knitting the core, leave yarn tails of 10-15 cm;
- Weave flower tails into the base as a tone (see below).

Another useful knitting operation, which is easy to do with crochet and impossible with knitting, is weaving a tone thread (tone) into the finished knitted item, see fig. below. In addition to decoration, this is a way for literally a “teapot” (sorry, teapot) to perform 2-level knitting (see below), the highest class of knitting skill. More precisely, its imitation: the tone thread is thick, fluffy, but not tenacious - mohair, etc. Diverging after weaving, it will cover the base and create a complete impression chunky knit.

This technique is very useful for knitting a blanket for a newborn's crib and stroller. Square fragments of the base are knitted (you can also crochet them); perhaps not very even. You can use cotton yarn for the base - it is cheap and hypoallergenic. A hypoallergenic tone (mohair, padding polyester, etc.) is also woven into each square of the base, and then the fragments are woven (also crocheted) together, see fig. lower right. In the crib, the child’s body under such a blanket will breathe freely. In the stroller it will easily fold as it should along the seams of the plexuses. At the same time, the seams will overlap with a fluffy tone, and there will be no blowing through them.

The simplest way to weave knitted square fragments into a blanket is as follows:
- Binding threads are prepared from the same yarn from which the warp is made, 5 sides of a square fragment long;
- Bend in half;
- The ends of the first connecting thread crochet into the first adjacent loops of the base of a pair of squares;
- In the next pair of loops, the connecting threads are drawn crosswise, etc., each time crossing the connecting threads;
- The tails of the first connecting thread and the ends of the second are drawn into the loops of the next pair of squares (2 threads per loop until the tails run out;
- The tails of the last connecting thread in the row are bent to the sides and passed into the transverse loops of the outer squares;
- Weave in the next row of squares in the same way;
- Similarly, the squares are woven crosswise.
...and just with your hands...
Hands without knitting needles or a hook usually knit a blanket from super thick yarn, see below. However, with your hands without knitting needles or a hook, you can also knit an openwork blanket from regular yarn. Very openwork: women's shoulders under it, the effect on the stronger half is approximately the same as slender legs in fishnet tights. Keep this in mind. How to knit an openwork blanket with your hands without knitting needles and a hook, see video:
Video: hand knitted blanket - without knitting needles or hooks
...very thick

A thick blanket made from unusually thick natural wool yarn (mostly merino) is a recent development: the first samples went on sale 3-4 years ago. In 2016, the thick blanket reached its peak of popularity, which has now noticeably waned and, speaking in modern terms, the downward trend in demand continues. The reason is that it is very expensive, and there is only one advantage over the usual one: a luxurious, catchy look. $400 for a quality thick blanket is still cheap, and prices for products from leading manufacturers start at approx. from $600.
Merino extra thick yarn on AliExpress costs approx. from $40 per kg; for an adult blanket you will need approx. 3.5 kg. In terms of volume it will be as shown in Fig. on the right, so add delivery to the door of easily damaged and dirty cargo: In this case, it is better to keep Rospochta in mind as a last resort. The total cost is around $200-250 in materials for a thick blanket knitted by hand. Synthetics instead of merino are not an option: it is difficult to knit and creeps in the product.
They knit with super thick yarn by hand using the so-called. giant knitting needles, pos. 1 and 2 in Fig.:
The simplest patterns are possible, for example. braid, see above. How to knit a thick blanket from super thick merino yarn, see video:
Video: knitting a blanket from thick merino yarn
Most often, a thick blanket is knitted smoothly (without a pattern) with your own hands, literally, without knitting needles. The basic loops are thrown over one hand (pos. 3) and transferred to the other (pos. 4 and 5), which serves as an incoming knitting needle. It turns out easier, faster and even smoother than with giant knitting needles. There is only one drawback: suddenly something urgently comes up (the child is crying, the doorbell is ringing) - it will take 3-4 minutes until you get out of these loops yourself. You can watch a visual animation of how a thick blanket is knitted with hands without knitting needles.
Note: Expensive, super thick yarn is the main obstacle to making a thick blanket. This is where it comes to the rescue feminine cunning– how to twist ordinary yarn into a yarn suitable for knitting a thick blanket, see another video:
Video: making thick yarn for a blanket
Blanket made of pompoms for children. And not only
If we talk about such qualities of a blanket as sophistication and elegance, a blanket made of pompoms on a woven base provides much more opportunities for their embodiment in a product than a knitted blanket made from super thick yarn. The advantages of a children's blanket made from pompoms are discussed above. And for an adult blanket they are:
- It’s easier to do - you don’t need to have any complex working skills at all.
- Weighs approx. 1 kg less than a fat one of the same size.
- It warms better.
- Thanks to the openwork base, it ventilates more freely and allows the body to breathe more.
- The cost of materials is at least half that of the cheapest ones for a thick blanket.
There are two disadvantages to a pompom blanket. The first is that it is difficult to wash and clean. Therefore, a blanket made of pompoms is mainly for children for little ones or, for adults, for neat owners. Second, it requires some manufacturing equipment to make it. However, it is simple, inexpensive and more than affordable to make with your own hands.
Pompoms
Let's talk a little further about the supporting base of the blanket with pom-poms. In the meantime, let’s talk about the decorative stuff – the pom-poms themselves. Some homemade ones for a blanket are not necessarily suitable, because... You need a lot of pompoms, more than a hundred or even several hundred.
A well-known method for making a pompom on a disposable, removable cardboard mandrel of 2 rings is shown in the figure:

The outer diameter of the mandrel is equal to the diameter of the pompom; the diameter of the hole in it is half of it. However, you can make a pompom for a hat this way. If you need a lot of pompoms and exactly the same ones, then due to the inevitable errors in marking and cutting out the mandrel rings, this method is unsuitable.
Large pom-poms for a blanket or rug should be made on a permanent frame, see figure:

Moreover, the rings must be cut out of durable sheet plastic with a compass drill, and their edges must be thoroughly sanded so that they do not cling to the threads. So that the pompoms do not need to be trimmed, the initial cut of the winding is made with the tips of scissors until the edges of the rings appear. Cut no more than 3-4 threads at a time. The curling is finally cut with a razor blade or, better, a new sharp mounting knife.
Note: remember the pose highlighted in red. We'll need it soon.
It is quite possible that you will also need small pom-poms for the blanket. For an adult - fill the gaps between large ones and thereby make the blanket warmer and more attractive. For children's blankets for the little ones (for example, for a one-piece blanket for a newborn), large pom-poms are not needed at all.
You won’t be able to screw the base of a small pompom onto the rings - they will be too small. There will also be few turns in the braid, and the pompom will come out sloppy. Small pom-poms, 2-3 cm in diameter, are made instead of a mandrel on a 4-pronged dinner fork, see figure:

Warp and knitting
Using the described method, small pompoms can be prepared all at once. Large ones are made one at a time when the base of the blanket is ready. In general, a blanket of pompoms is made in 5 stages: a) making the machine; b) warp weaving; c) tying the base; d) tying pompoms; e) formation of fringe. The stages are simple, but each has its own subtleties.
Machine
The machine for weaving the base of a blanket with pom-poms is a wooden (plywood) board (pos. 1 in the figure) or frame (pos. 2). The frame will require much less material and is much more convenient to work on, but it needs to be made by someone who has at least basic carpentry skills.
Frame material – timber from 60x60. Corner joints are half-timber reinforced with diagonal pairs of self-tapping screws. Nails 100 or 150 are not driven in completely along the contour of the machine in increments equal to the diameter of the pompom. If pompoms are used in 2 sizes, the larger one is the diameter.

Weaving
The base of the blanket is woven from knitting yarn, usually lengthwise and crosswise (orthogonal weaving), pos. 1, 2, 3 and 5). The number of threads in a longitudinal or transverse row is at least 3. First, all the transverse rows are braided with one thread, then all the longitudinal ones, again the transverse ones, etc. The ends of the threads are tied outside the weave, around the nails. If you use multi-colored yarn (3 and 5), you can get a base (the back of the blanket) with color tints.
The base of orthogonal-diagonal weaving (item 4) will make the blanket much stronger and warmer with little additional material consumption. It will be possible to tie small pompoms onto the crosshairs of the diagonal beams, which will enhance the decorative effect. In this case, first knit all the small pompoms, and then all the large ones.
In orthogonal-diagonal weaving, for 1 diagonal thread there should be 2 orthogonal (longitudinal-transverse) ones. To do this they weave like this:
- Cross thread;
- Longitudinal thread;
- Diagonal thread;
- Cross thread;
- Longitudinal thread;
- Thread of the opposite diagonal;
- Cross thread;
- Longitudinal thread;
- Thread along the initial diagonal (step 3);
- etc.
Warp binding
All intersections of warp beams are tightly tied with strong twisted thread, pos. 5. Pom pom ties alone (see below) will not keep the base from unraveling! Knit crosswise. The tails of the binding threads of at least 3-4 cm should fall on the future front side (on which the pom-poms will be, pos. 6).
Pompom tying
Pom-poms are tied while the base is still on the machine, pos. 7. In order for the pompons to hold firmly, they are knitted while the rings of the mandrel have not yet been completely removed (“red” position in the figure with a diagram for making pompoms!) Knit the pompons onto the base like this:
- When dressing the “waist” of the pompom, leave the ends of the dressing thread (sling) at 20-25 cm;
- The ends of the sling are drawn into the base crosswise from the intersection of its bundles;
- Tighten the sling until the pom-pom fits into place as it should;
- The ends of the sling are tied with a simple straight knot;
- Bring the ends of the sling up (back to the pompom) crosswise from the insertion points into the base;
- Draw the ends of the sling under the “waist” of the pompom crosswise;
- They are brought out over the “waist” and tied tightly;
- Cut the ends of the sling to the length of the pompom threads;
- Remove the mandrel rings from the pompom blank;
- Make the next pompom, etc.
Fringe
Fringing a pompom blanket is very simple. The contours of the machine's nails with warp bundles are cut in the middle, the product is removed - the pom-pom blanket is ready.
Note: For more information on how to make a blanket from pompoms on a frame yourself, see the video below:
Video: example of making a blanket from pompoms
Simple blankets: knit and sew
We connect
At all small child, eg. for a newborn, and the smallest pom-poms on the blanket will seem too big. But soon the baby will grow up and he (she) will need a bigger, thicker, softer and more interesting blanket. In the meantime, mom has no time for complex needlework. In this case, it is better to knit a blanket for a newborn by hand using knots from pieces of fleece - you don’t need any skill, but a little more time and inexpensive material.

The technology is extremely simple (see figure):
- We prepare a template from dense material 10x10 cm with the sides marked by centimeters, pos. 1.
- Cut the fleece into pieces of approx. 20x20 cm each, i.e. with an allowance of approx. 5 cm per side, pos. 2.
- Apply the template, pos. 3.
- We cut the edges of the fringe into ribbons 1x5 cm, pos. 4.
- Remove the corner squares, pos. 5.
- We knit ribbon by ribbon (pos. 6-8) of 2 adjacent squares.
- We tie it square by square in the same way until you get a ribbon as long as the width of the blanket.
- We make the next ribbon (possibly of a different color) and tie it to the first one in the same way.
The ribbons are tied one to the other until the blanket grows as long as needed. You can, of course, tie ribbons from multi-colored squares - it’s a matter of taste and the availability of material. Instead of fleece, flannel, flannel and other fabrics certified for children's wear will be used. You can combine pieces from different materials at random - they will be enough for the natural service life of such a blanket.
Sew
You can sew a blanket that looks unpretentious, but warm, from old knitted items, cutting them into shreds. It is only necessary that later the flaps do not become shaggy and do not crawl under the stitching thread. To do this, things “sentenced” to the blanket need to be prepared - felted. And in order for things to feel, they must be wool with the addition of no more than 10-15% viscose or polyester. Throw things onto blanket material in the washing machine:
- Place in a textile bag for gentle washing. Exactly in textile! If the bag is mesh, fraying can damage the washer. It is quite difficult to repair it yourself, although it is possible.
- The washing machine is set to the longest wash cycle and the items are washed with wool powder. After washing, the fringes are carefully removed from the bag.
- Dry when stretched in a horizontal or slightly inclined position (on a stand, without hanging).
- Shake it out well. On the street, standing with your back to the wind: allergenic dust will fly from the laundry!
Blankets knitted- some of the most cozy and pleasant things that you can create with your own hands. In addition, such a household item, which will warm you up on autumn or winter evenings, can also be incredibly beautiful. Perhaps novice craftswomen will now think that such a luxury as knitted a blanket is not for them, but you shouldn’t deprive yourself and your loved ones of such a wonderful thing because of doubts in your abilities. You just need to choose the appropriate one from several options for knitting simple blankets and go for it!
Patterns and descriptions of knitting a blanket
The choice of blanket models, as well as patterns and methods of knitting them, is huge. It is also worth paying attention to whether the warm blanket is knitted for adults, or for children - after all, this is also an important criterion for selecting yarn and patterns. For the little ones, blankets must be knitted according to certain rules - we will definitely tell you about them. In general, it’s an art to knit a good blanket. Let's try to understand it and consider both the easiest knitting master classes and more intricate options for knitting blankets.
Master class for beginners


Beginning knitters should definitely start by studying the most understandable and simple options knitting blankets. Consider a master class for beginners on knitting a blanket.
This blanket model is perfect for newborns or adult children. The blanket turns out pleasant, tender and soft. And knitting it with knitting needles will not be difficult because of the knitting method taken as a basis: a simple double-sided pattern of knit and purl loops, as well as for the edge of the product.
- What you will need
Yarn:“Svetlana” produced by “Semyonovskaya Yarn”, 250 m / 100 g, 50% wool, 50% acrylic.
Yarn consumption: 350 g.
Tools: circular knitting needles No. 3, knitting needle.
Knitting density: main knitting Pg = 2.25 loops in 1 cm, Pv = 3.2; garter stitch Pg = 2.14 loops per cm, Pv = 4.3 rows per 1 cm.
- Calculating loops
To calculate the number of loops that need to be cast on the knitting needles for knitting a blanket, it is necessary to determine the knitting density of the main and garter stitch. Find out more about how to determine knitting density.
When calculating loops, we must take into account the desired size of the product and pattern repeat. As for the size, the standard size of a baby diaper is 80 x 80 cm, we will focus on it. We need the pattern on the blanket to be symmetrical. Therefore, you need to add loops to whole repeats for symmetry of the pattern. You also need to take into account the width of the slats along the edge of the blanket. We will knit strips 2.5 cm wide, this is 7 loops (including the edge stitch). This means that with the main knitting we need to knit 80 - 6 = 74 cm. One repeat of the main pattern is equal to 18 loops or 8 cm. For symmetry, we need to add half a repeat, i.e. 9 loops or 4 cm. It turns out that for whole repeats there are 74 - 4 = 70 cm. Let's determine the number of whole repeats: 70: 8 = 8.75, round to the nearest whole, we get 9 repeats. So, number of main stitches:
9 (number of whole repeats) x 18 (number of loops in a repeat) + 9 (number of loops for pattern symmetry) +7 (number of loops for one strip) x 2 = 185 loops.
But we know that the knitting density (Pg) of finishing garter stitch is less than the main one. This means that so that the bar along the bottom is not too loose and does not look stretched, we need to recalculate the loops.
Let's clarify the final size of the blanket: 185 (number of loops) x 2.25 (Pg of main knitting) = 82 cm.
Now let's define how many stitches need to be cast on the knitting needles:
82 (piece size) x 2.14 (pg garter stitch) = 175 loops.
- Basic pattern
Double-sided “cage” pattern of knit and purl loops with a relief texture. Pattern repeat: 18 loops wide, 24 rows long. To knit a sample pattern, cast on the knitting needles a multiple of 18 stitches plus 2 edge stitches.
Diagram and description:

- classic knit stitch in the knit row, unless otherwise indicated in the pattern description. In the purl row, this is how the purl loop is indicated.
- classic purl loop in the front row, unless otherwise indicated in the text. In the purl row this is how the front loop is designated.
1st, 3rd, 9th, 11th row: * 9 knit, 9 purl *;
All purl (even) rows are knitted according to the pattern;
5th, 7th row: * 3 knit, 3 purl *;
13th, 15th, 21st, 23rd row: * 9 purl, 9 knit*;
17th, 19th row: * 3 purl, 3 knit *.
The pattern is repeated from the 1st to the 24th row.
- Work progress
We put 175 stitches on the knitting needles using the basic method and knit 11 rows in garter stitch. We will decorate the edge a little differently than usual: we will not remove the first loop in the row, but we will knit the front one behind the back wall.
 Fig. 1: The working thread is wound down and back. Fig. 2: The loop is knitted behind the back wall of the front
 We knit the last loop in the row as usual, using a knit stitch.
In this case, the edge of the edge will stretch more. Considering that the horizontal knitting density (Pg) of the main knit is less than that of the finishing knit, this will allow the bar to stretch and compensate for the difference.
If the knitting density of the main and finishing knits differs significantly, we recommend knitting the bar in shortened rows.
In the 11th row we will make straight yarn overs to add loops. We make additions evenly. We knit 11 loops (including the edge loop), make a straight yarn over, and then make yarn overs through 18 loops (pattern repeat). In total there will be 10 yarn overs along the length of the part. In the next row we move on to the main pattern. At the beginning and end of the row we knit 7 loops in garter stitch and then with the main pattern. We knit the yarn overs behind the back wall, without openwork, so that the increase is unnoticeable.
In order for the blanket to be square in height, we need to knit 11 repeats (264 rows) with the main pattern. In the last row we decrease 10 loops in the same places where we added them, knitting two loops together with a tilt to the left. We tie the bar and close the row in the classic way.


Product for newborns

It is a very important and responsible task to knit a blanket for a newborn. Whether it's a gift to a loved one's family or to yourself for your baby's first birthday, there are a few things you need to consider. important points when knitting the first warm blanket in a baby’s life.
When choosing yarn for knitted children's clothes, you should pay attention to the composition: it is better to choose a yarn that contains wool with some acrylic, or merino wool, or baby alpaca with an admixture of microfiber. Be sure to make sure that the threads do not prick the skin, even if the label says that the yarn is intended for knitting children's clothes.
Let's try to knit another easy-to-make blanket that a beginner can make. And they will help you knit a blanket for a newborn with knitting patterns and a detailed description.
- Knitted blanket for newborns
Knitting density: 14 loops * 21 rows = 10 * 10 cm.
Size: 89x96.5 cm.
- What you will need
Yarn: 4 skeins of RedHeartSoftBabySteps yarn (100% acrylic, 142 g/234 m).
Tools: circular knitting needles 5.0 mm. more than 90 cm long.
- How to knit a blanket
How to knit 2 knits together. left: insert the right knitting needle into the first, then into the second loop of the left knitting needle, knit these two loops together.
How to knit 2 knits together. right: insert the right knitting needle into the second, then into the first loop of the left knitting needle, knit these two loops together with the front one behind the front wall.
- Main work
Cast on 121 stitches on the needles.
- 1st row (front side): knit 8, (p7, knit 7) – 8 times, knit 1.
- 2nd row : 8 p., (7 knits, 7 p.) – 8 times, 1 p.
- 3rd row: Knit 4, yarn over, knit 2 together. to the right, knit 2, (p3, yarn over, purl 2 together, purl 2, knit 3, yarn over, knit 2 together to the right, knit 2) – 8 times, knit 1.
- 4th row: repeat row 2.
- 5th row: 2 persons, 2 persons together. right, yarn over, knit 1, yarn over, knit 2 together, right, knit 1, (p1, purl 2 together, yarn over, purl 1, yarn over, purl 2 together, purl 1, knit 1. , 2 knits together to the right, yarn over, knit 1, yo, knit 2 together to the right, knit 1) – 8 times, knit 1.
- 6th row: repeat row 2.
- 7th row: K3, k2 together. to the right, yarn over, knit 3, (p2, purl 2 together, yarn over, purl 3, knit 2, knit 2 together, yarn over, knit 3) – 8 times, knit 1.
- 8th row: repeat row 2.
- Repeat rows 2-8– 18 times.
- Last row: K8, (p7, k7) – 8 times, k1.
Close the loops.
- Diagram and designations:


- Plaid finishing
1st row (front side): *(pick up 6 knit stitches along the pattern square) – 19 times, (pick up 6 stitches along the pattern square) – 16 times, pick up 5 stitches along the next pattern square, repeat from * = 430 stitches on knitting needles.
Place a marker.
Start knitting in the round.
2nd row: purl loops.
3rd row: K1, *knit 5 stitches in the next row. loop, turn, purl 5, remove trace. loop, turn, k2 together. to the right, ((remove the outer loop from right knitting needle on the left, knit 1) - 2 times, knit 1, throw the previous loop of the right knitting needle over the last knitted one) - 3 times, (slip the outer loop from the right knitting needle to the left, knit 1) - 2 times, knit 2 together. to the right, throw the previous loop of the right needle over the last knitted one, bind off 3 loops, repeat from *
Close all loops. Hide the ends of the threads.
How to knit a baby blanket
Older children will find it more interesting to cover themselves with a bright, unusual blanket. Therefore, you need to base your choice on whether a blanket is knitted for a boy or a girl. We offer to make a plaid in interesting color solutions and voluminous relief motifs that a girl will definitely like.
This blanket model has many interesting elements, patterns and motifs - making it fun to knit experienced craftswomen. Braids, mesh, leaves, Aran weaves - the plaid will be very rich different drawings. And although adults would not refuse such a thing, we will still knit a children’s blanket with knitting needles.


- What you will need
Yarn: 8 skeins of Zealana Kiwi Lace Weight (40% merino wool, 30% cotton, 30% possum wool, 199m/40g);
Tools: Circular knitting needles No. 3.5; 2 auxiliary knitting needles; 6 markers.
Knitting density, sequence of patterns: 27 p. and 30 r. = 10 x 10 cm
Children's blanket knitted - diagram, description


- Patterns:
Right edge: knit according to pattern 1 from 1st to 10th r.
Interior: knit according to pattern 2 from the 1st to the 20th row.
Central part: knit according to pattern 3 from 1st to 20th row.
Left edge: knit according to pattern 4 from 1st to 10th row.
Net: knit 8 sts according to pattern 5:
Each r.: K3, yarn over, 2 stitches together purl, yarn over, 2 stitches together purl, k1.
- Formation of folds
First half of the fold: transfer 10 sts to the first knitting needle, transfer the next 10 sts to the next knitting needles (p5, knit 5) Hold all three knitting needles on the wrong side of the knitting. Place the knitting needles opposite each other, folding to form a fold, and knit 3 sts together. To perform 3 stitches together. Insert the end of the right knitting needle into the first st of the first knitting needle, then into the first st of the second knitting needle and into the first st of the third knitting needle and knit 3 sts together. Repeat 9 more times.
Second half of the fold: transfer 10 stitches to the first knitting needle and place on the right side of the knitting. Transfer the next 10 stitches (knit 5, purl 5) to the next needles. Place the knitting needles opposite each other, folding to form a fold, and knit 3 sts together. To perform 3 stitches together. Insert the end of the right knitting needle into the first st of the first knitting needle, then into the first st of the second knitting needle and into the first st of the third knitting needle and knit 3 sts together. Repeat 9 more times.
Cross 7 sts to the right: leave 4 sts as auxiliary. knitting needle at work, k3, then knit with aux. knitting needles 1 p. and 3 p. persons.
Cross 7 sts to the left: leave 4 sts as auxiliary. knitting needle before work, k3, then knit with aux. knitting needles 1 p. and 3 p. persons.
- Description of knitting


Cast on 547 stitches on the knitting needles and knit the border as follows:
1st day: persons
2nd row: K1, p2tog. behind the back wall, yarn over, knit 270, knit 2 stitches together, knit the last 3 stitches, yarn over, knit 2 stitches together, knit 1. = 546 p.
3rd row: K3, p15, k30, *p30, k30*, repeat from * to *, knit last 18 p. P15, k3.
4th row: K1, p2tog. for the back half-loop, yo, k15, p30, *k30, p30*, repeat from * to *, knit the last 18 sts. K15, yo, 2 sts together purl, k1 .
Repeat the last 2 r. 9 times = 22 rub. edges.
- Making folds
23rd day: K3, make 9 folds, k3. = 186 p.
24th day: K1, p2tog. behind the back wall, yarn over, knit 17. (2 stitches together, knit 16) 8 times, 2 stitches together, knit 17, yarn over, 2 stitches together, knit 1. = 177 p.
25th day: persons
26th day: K1, p2tog. behind the back wall of the p., yarn over, knit 14, place a marker, knit 33, place a marker, knit 8, place a marker, knit 61, place a marker, knit 8, place a marker, knit 33, place a marker, K14, yarn over, 2 stitches together, knit 1.
- The main detail and sequence of patterns
1st day: 17 sts of the right edge according to pattern 1, place a marker from the left knitting needle to the right, 33 sts of the inside according to pattern 2, place a marker from the left knitting needle to the right, 8 sts of the net, place a marker from the left knitting needle to the right, 61 sts. central part according to scheme 3, place a marker from the left knitting needle to the right, 8 sts of the mesh, place a marker from the left knitting needle to the right, 33 sts of the inner part according to scheme 2, place a marker from the left knitting needle to the right, 17 sts of the left edge along scheme 4.
Continue knitting according to the patterns up to 438 rub. (repeat 18 rows of the central and inner parts 21 times, repeat 8 rows of the left and right edges 43 times).
439th r .: complete the 9th r. right edge, place a marker from the left needle to the right, p1, k12, 7 stitches cross to the left, k12, p1, place a marker from the left needle to the right, 8 stitches, place a marker on the left knitting needles on the right, 19th row. central part, place a marker from the left needle to the right, 8 stitches of the mesh, place a marker from the left needle to the right, p1, k12, 7 stitches cross to the left, k12, p1, place a marker on the left knitting needles on the right, 9th row. left edge.
440th rub.: close 4 p., 2 p. together purl. behind the back wall, yarn over, knit. to the last 3 sts, yarn over, 2 sts together purl, k1. = 177 p.
Finish: soak for a few minutes in warm water or wash according to the yarn instructions, gently wring out in a clean towel to remove excess moisture, lay out, stretching to appropriate sizes until dry.


Plaid of squares
It is also successfully used in knitting - for this purpose, pre-knitted motifs with different patterns are sewn or knitted into a single product. This knitting method is very popular, so you should definitely try knitting a blanket from squares with knitting needles. This is not difficult to do.
Options for knitting a blanket of this typequite a lot, as well as design solutions that can be used to “revive” it: make traditional squares of all possible colors, or choose just a few harmonious shades of yarn for a blanket. Some knit blankets from squares in a single color, focusing only on the variety of patterns of connected motifs. The squares themselves can be flat, or they can be decorated with convex elements, which will also add patchwork charm to the finished product.
We have selected an “advanced” version of knitting a blanket with squares, so that it would be interesting for experienced knitters as well. It will take a little more time and effort, but the result is definitely worth it.


- What you will need
Yarn(100% cotton; 120 m/50 g) – 200 g each of mustard yellow, light brown, color. cinnamon and hot pink, as well as 150 g each of light green and color. fuchsia.
Tools: stocking needles No. 4; circular knitting needles No. 4, 60 cm long; hook No. 3.5.
- Plaid with knitting needles - diagram and description of the work progress
Size: 110 x 132 cm.
Pattern “Square with leaves”
Cast on 12 loops on the knitting needles, distribute the loops on 4 knitting needles (= 3 stitches on each knitting needle), close them in a ring and knit according to pattern 1. It shows odd circular rows. In even circular rows, knit loops according to the pattern or as indicated, and also knit yarn overs as indicated.
The diagram shows 1 repeat = ¼ square, which should be knitted a total of 4 times (there is always 1 repeat on 1 knitting needle), and increase as indicated. If necessary, switch to circular knitting needles.
1–38th circle.r. perform 1 time, then knit all 164 stitches.
Multicolored square
Cast on 8 loops on the knitting needles, distribute the loops on 4 knitting needles (= 2 stitches on each knitting needle), close them in a ring and knit according to pattern 2.
The diagram shows all the circular rows and 1 repeat = ¼ square, which should be knitted a total of 4 times (there is always 1 repeat on 1 knitting needle), and increase as indicated. The color of the thread is indicated in the text next to the number of the circular row. If necessary, switch to circular knitting needles.
1st–40th circle.r. perform 1 time, then bind off all 164 sts of the row with the knit thread of the last color.


- Knitting density
41 p. x 36 round. square with “leaves” = 22 x 11 cm;
41 p. x 40 round. multi-colored square = 22 x 11 cm;
each square – approx. 22 x 22 cm.
- Square layout plan


- Work progress
Knit 16 squares with “leaves”, of which 3 squares are bright pink, mustard yellow and color. cinnamon, as well as 2 squares each of light green and light brown.
Link 15 multi-colored squares in accordance with the color data of the thread A–E next to the number of the circular row as follows:
Square B1 (2 parts): A = light brown thread, B = color thread. fuchsia, C = light green thread, D = color thread. cinnamon, E = mustard yellow thread.
Square B2 (3 parts): A = light green thread, B = color thread. cinnamon, C = mustard yellow thread, D = light brown thread, E = hot pink thread.
Square B3 (3 parts): A = hot pink thread, B = color thread. cinnamon, C = mustard yellow thread, D = light green thread, E = light brown thread.
Square B4 (3 parts): A = light brown thread, B = mustard yellow thread, C = color thread. cinnamon, D = hot pink thread, E = color thread. fuchsia.
Square B5 (4 parts): A = thread color. fuchsia, B = hot pink thread, C = light green thread, D = mustard yellow thread, E = color thread. cinnamon.
Square B6 (2 parts): A = mustard yellow thread, B = light brown thread, C = light green thread, D = color thread. fuchsia, E = thread color. cinnamon.
- Assembly
Place the squares according to the layout plan and sew them on the wrong side of the work.
From thick yarn
The fashion for blankets made from thick yarn never goes away, and if you haven’t tried knitting very warm and cozy blankets, then it’s time to do it right now!If you knit a blanket with knitting needles from thick yarn, it is guaranteed that the most favorite thing for each family member will appear in the house, because a feeling of warmth will come even from its mere appearance! A blanket made from thick yarn looks airy and interesting, and it works even for the most simple ornaments.


- What you will need
Yarn: 4 skeins of RED HEART Comfort Chunky yarn (100% acrylic, 360 g/410 m).
Tools: circular knitting needles 15.0 mm. 80 cm long.
- Thick yarn blanket
Size: 124 x 140 cm.
Knitting density: 8 loops * 10 rows = 10 * 10 cm with thread in two folds in a pattern.
- Scheme and description of the pattern
3x3 braid to the right: slip the first 3 stitches onto an additional needle, place them together with the additional needle behind the work, knit 3 knit stitches from the left needle, then knit 3 knit stitches from the additional needle.
Scythe 3x3 left: slip the first 3 stitches onto an additional needle, place them together with an additional needle before work, knit 3 knit stitches from the left needle, then knit 3 knit stitches from an additional needle.
- Scheme and progress of work


Using double yarn, cast on 98 stitches.
1st row (front side): k12, p2, *k6, p2, repeat from * to last 12 stitches, k12.
2nd and all purl rows (wrong side): k6, p6, *k2, p6, repeat from * to last 6 stitches, k6.
3rd row: repeat 1st row.
5th row: K6, braid 3*3 to the right, *p2, k6, p2, braid 3*3 to the right, repeat from * to the last 6 loops, k6.
7th row: knit as 1st row.
9th row: knit as 1st row.
11th row: K12, *P2, braid 3*3 to the left, P2, K6, repeat from * to last 6 loops, K6.
13th row: knit as 1st row.
15th row: knit as 1st row.
16th row: knit as 2nd row.
Repeat rows 5-16 for the pattern until the height is 140 cm.
Finish 9th or 15th row .
Close all loops. Hide the ends.


Video tutorial on knitting a blanket with a pattern
How to knit blankets different types and difficulties we have already learned, but what the process of step-by-step execution looks like is a completely different question, the answer to which can be found in detailed videos with master classes on blanket knitting. IN in this case, we are talking about a beautiful blanket with several patterns.
10.25.2017 23 541 0 Igor
Skillful hands
Plaid is a very popular product, the interest in which increases significantly in the autumn - winter period. Classic “checkered” options are no longer relevant for a long time. Volume, softness and naturalness of the material are in fashion. Therefore, a large knit merino blanket has become a real hit for home comfort and stylish photographs. The main objectives of this product are to decorate the interior and provide its owners with warmth and softness.
Content:
How to choose a blanket?
These blankets do not miss the opportunity to appear on the pages of glossy magazines, and bloggers can no longer imagine their photographs without a “blanket” beautifully thrown on the sofa. And we have no choice but to rush to look for an excellent specimen for our home. So where can you get it?
The founders of this “innovation” were the American company Modern Wool, which still operates today. In addition, they produce hats, scarves, pillows - everything is very thick and merino. The disadvantage of this company for the Russian consumer is the lack of delivery to Russia and significant prices. The situation is approximately the same with a fairly young Ukrainian brand, oriented primarily to the West.
It's good that Russian manufacturers keep up. Reasonable price, good quality and ability different options shopping - here distinctive features domestic seller.
How to knit a chunky knit blanket?
If for some reason you choose suitable model failed, this project can be carried out independently. To do this, you just need to tie it with your hands with a little effort.

Types of thick yarn for knitting a blanket
The material plays the greatest role in this process, because if it is of poor quality, then there will be no pleasure from it. finished product won't be able to get it. Thick blankets are made from merino wool. Its undoubted advantage is the absence of causticity and hypoallergenicity, which makes it an ideal option even for children's things. It is worth considering that this is a fairly expensive material that you will have to spend a lot of money on.
This material is divided into 2 types: raw unspun wool or processed spun wool. Each of them has a number of pros and cons, assessing which you can make the right choice.

Raw Tops or Combed Tape
It is a ribbon formed from wool fibers. Its width can reach 5 cm. This material is suitable for making many things by crochet or knitting: hats, scarves, sweaters, etc.
Among the advantages are:
- The ability to use hands as a tool, instead of knitting needles or a crochet hook. It can be inconvenient to move huge knitting needles, so your own hands are often used instead.
- This material is highly airy and soft;
- Often the effect of raw yarn creates a special chic and piquancy to the product.
But there are also a number of disadvantages:
- Sometimes the top breaks during the process, since it is not finished yarn, but only raw material for it. Therefore, it does not have all the qualities finished product, in this case, strength.
- The following follows from the previous statement: knitting can be accompanied by deformation of the combed tape, its division into individual fibers, and the formation of spools.
- Due to the technical features of the top, it cannot be washed, and it will also be difficult not to damage the product during dry cleaning.
Spun wool
The processed material has the best characteristics in this regard. It is already completely ready for use, and its thickness ranges from 0.5 to 2 cm. The main difference from tops is the special mechanical and thermal treatment, which ensures the thread is twisted and matted. This allows you to achieve many advantages.
Advantages:
- Conducted wet-heat treatment allows the future product to maintain its original shape and not stretch during use.
- It is protected from separation into fibers, thread breaking and other similar situations, both during the knitting process and in the finished product.
- Possible hand wash ready-made items in cool water, if their size allows this.
But it also has some disadvantages:
- Low degree of product stalling.
- Hand washing is not available for all wool products - larger items can only be dry cleaned.
Taking into account all the features of a particular material, you can highlight the important aspects for yourself.
Calculate the amount of yarn needed
Calculating a sufficient volume of yarn is no less important than its selection. Especially considering that this material is far from cheap. The following method is often used for this:
- purchase 1 skein of the material needed for knitting;
- using the selected pattern and tools, a fragment measuring about 7*5 cm is knitted;
- it should be washed and dried;
- Once the sample has reached its final size after drying, the density is calculated, i.e. number of rows and loops in each row;
- Now the knitted sample is unraveled and the length of the used thread is measured.
All necessary data for the calculation have been received.
The footage required for a blanket can be determined by the following formula:
(area of the desired product, expressed in centimeters * length of thread for the sample)/sample area in centimeters.
* - multiply;
/ - divide.
Important! Washing the untied sample is mandatory, since only after washing the product acquires its final size.
Knitting
To knit, you will need to have some knowledge and skills. In this case, these are elementary skills in casting on loops, knitting knit and purl loops, as well as closing them. Other skills are not required, since the main pattern used for such blankets is stockinette stitch. This is due to its simplicity - more complex manipulations will not be easy to perform on such material, as well as its thickness - large patterns will add more volume and weight to an already large product.

The making of the blanket itself occurs in two ways: with tools or by hand. The tools most often used are knitting needles and sometimes a crochet hook.
Spokes
To fulfill her idea, the needlewoman will only need the following:
- Suitable thick yarn.
- Knitting needles of the required diameter. The usual size is not suitable here, so you should take care of purchasing very thick knitting needles in advance - not all stores sell such products. Often improvised means are used, for example, plastic tubes with a diameter of about 2-3 cm are suitable as knitting needles.
The remaining steps are no different from regular knitting.

Hands
This method is not classic, but rather an innovation. It is performed on the performer's wrists. The first step is to set the loops. To do this, measure out about 3 meters and form the first loop on the right wrist, tightening it a little. In the same way, cast on the required number of loops.
The first row is performed as follows: the thread from the work is clamped in the fist of the right hand, after which the very first outermost loop is tightened on the wrist. The thread in the fist thus forms a new loop. As in the case of knitting needles, it is put on left hand. The entire row is also knitted.
All other rows are knitted in a similar way, with the purl rows being done in a mirror image and with purl stitches.
When closing, leave 4-5 meters of free yarn. Then the first 2 loops are knitted as usual. The 3rd one is removed from the wrist, and the next one is left on the hand. After knitting it, the previous one is removed from the hand. Continue in this manner until the end of the row. Thread the thread into the very last loop and simply tighten it.
Features of care
An unusual piece of furniture requires some special features in care, which are determined by its size, weight and material:
- remove small dirt using a dry brush, gently brushing the desired area with it;
- when washing, it is necessary to observe the temperature of the water - below 30? C;
- Only special products with lanolin intended for this purpose are suitable for washing;
- merino wool does not require stretching or friction during washing; the wet item should be slightly wrung out and laid out on a flat horizontal surface until completely dry;
If necessary, you can use dry cleaning. Proper care will preserve the beauty and qualities inherent in merino wool.
A beautiful and unusual item is an excellent decoration for the interior. And creating such a masterpiece with your own hands is a special pleasure.
Soft, airy, almost weightless – this hand-made, large-knit blanket has captivated fans of knitted art! Stylish, cozy blankets invite you to wrap yourself in a warm cloudy embrace on a gloomy morning or warm up on a cool evening...
idea original technology The Americans introduced knitting: the Modern Wool company started with blankets, bedspreads and pillows, but gradually switched to scarves, hats and snoods. A unique method of processing wool allows you to create a feeling of slight negligence and frayed threads. Do you think it’s impossible to create Gulliver’s loops from natural wool?! Oh, how wrong you are! Merino sheep wool lends itself well to processing, so the loops are even and smooth. Acrylic thread is in no way inferior in quality to natural wool, and the cost varies significantly.
Chunky knit blankets in basic shades
Magnificent knitted blankets made of merino wool or soft acrylic will complement the interior in Scandinavian, Provence and country styles. Giant loops create the most delicate fabric, which can be classic and strict, playful and openwork, sophisticated and stylish - it all depends on the imagination of the craftswoman.

Hand made is becoming more and more popular every day; it is a mistake to think that knitting is the lot of old ladies. Not at all! Simple large knitting of local colors is a trend for 2016-2017. Cool blue, rich red, rich green, pure purple, authentic white and black - win-win options! In addition, natural shades of mint, cold chocolate, and coffee with milk are in fashion. Muted coral, dusty blue and dirty pink will fit perfectly into any interior.
 Chunky knit blanket in a Scandinavian interior
 A do-it-yourself coarse knitted blanket or blanket will enliven a sofa in the living room and a bed in the bedroom, become a cozy cocoon for those who like to be alone, and turn into baby rug for games on the floor. Wear-resistant materials allow you to use a knitted blanket in any conditions. Believe me, even the most lively baby, once in the arms of gentle “lamps,” will not want to be capricious.
Is it possible to connect this miracle of designer imagination? It’s not difficult to create a large knit blanket with your own hands, however, the knitting needles are different from ordinary ones - Gulliver’s sizes impress even experienced knitters! But nothing is impossible for talent! Knitted creations made from merino wool are nothing like “grandmother’s” knitting. 
Chunky knit blanket for beginners
Methods “Rubber band” and “ Garter stitch"familiar to everyone. Even a novice needlewoman can easily create an airy fabric. True, you will have to get used to thick yarn and huge knitting needles... But the woolen miracle is worth the effort! The scheme is simple.
- Knit the row to the end.
- We remove the first one, do not knit it.
- Knit until the end of the row.

The point is that each row is knitted with knit stitches, which even inexperienced girls can do. By the way, if you prefer the pattern created by purl stitches, go for it! Knitting is similar to modeling from plasticine: once you master the basic techniques, you can create any pattern.
Knitting on ring needles
Knitting needles on a fishing line make the task much easier, since the fishing line allows you to gain the maximum large number loops, without fear that they will slip off at the most inopportune moment. We knit a large knit blanket according to the standard pattern.
- We cast on the required number of loops.
- We remove the first one, do not knit it.
- Knit the row to the end.
- We turn the finished row over and get purl rows.
- We remove the first one, do not knit it.
- Knit until the end of the row.
Video instruction “How to knit a blanket with circular knitting needles”:
Knitting by hand

Let's take the work into our own hands! Literally: hand knitting without knitting needles... How? Easily! If you say that you don’t know how to knit, we won’t believe you! Two knitting needles can replace two hands. Knitting will turn into a game: it will be fun to pick up stitches on your hands! And if to unusual knitting connect your daughter, the blanket will be twice as warm... The knitting pattern is no different from the usual one.
Video instructions for knitting a blanket on your hands (without knitting needles!):
Canvas of squares
One of the simplest, but at the same time complex options. The point is not in the knitting pattern, but in the assembly of the elements: each square is knitted separately in any way (with knit or purl stitches), and then carefully sewn together with threads in the color of the fabric. Show your imagination: sew knitted squares with large stitches using threads in contrasting shades. The advantage of this method is that you can combine colors and knitting methods. The result is a plaid that resembles a patchwork style.
Hi all!
Wandering around the Internet, I was wildly inspired by the idea of knitting a blanket from thick yarn with my own hands. I was once a voracious knitter in the past and my hands simply demanded this magical yarn, so airy and attractive.
I probably studied the entire Internet in search of affordable yarn made from natural Australian merino wool, it was not easy. And I came to the conclusion that my blanket would cost me a pretty penny anyway.
However, I was lucky. In the neighboring town of Nsk, I found a small store specializing in such yarn. According to the information on their website, the merino yarn is their own production.
The prices were the most reasonable, all summer there was a promotion for many shades - 1200 rubles per kilogram of yarn.
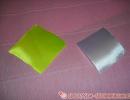
I managed to purchase during the promotion - the selection of promotional yarn was small, mostly leftovers. (Price list for new collection already 1900 rubles, a little expensive). I took the most beautiful shade from the leftovers - 2.5 kilograms of Wild Plum.
Somehow my phone camera can't capture its true deep plum shade. But the picture on the website shows the color perfectly
In general, the shades presented in the store amaze with their diversity. My eyes just widen. Very beautiful marshmallow-candy colors. It is very difficult to choose just one, they are all so delicate and trendy.
Let's move on to the skein, this is such a handsome guy weighing more than 2 kilos. To compare the photo with my hand.

Yarn good quality, no complaints. But the yarn itself in knitting is a little capricious, be prepared for this. The fibers get tangled periodically and it’s hard to knit with your hands if you’re not used to it.
I will not describe the process of knitting a blanket, because... There are many different master classes and video lessons on YouTube.
I’ll just say that be sure to knit a “test piece”; this is necessary in order to determine the knitting density and generally get used to the yarn.
I practically didn’t take any photos of the process, it captivated me so much.


I knitted a blanket 80 x 200 in 2 hours by hand without knitting needles.

According to information from the master classes, for a blanket 1 meter wide you need to cast on 15 loops, I cast on 15, but it turned out to be less than a meter. I thought about undoing it and bandaging it, but it turned out too good and even, so I left it as is.
A common question that often arises among knitters is how to discreetly join threads and seal threads at the beginning and end of knitting?
It's much easier than with regular thin yarn. No knots needed.
Just buy special needle for felting. It costs 60 rubles. Take a regular dish sponge and place the 2 ends that need to be connected. And quickly, quickly stick the needle in. The wool fibers mix and the thread becomes solid and strong.

I'm delighted with the blanket. I use it as a warm shawl, I like to completely deceive myself with it. A merino wool blanket provides amazing enveloping warmth.

Knitting with this yarn is a real pleasure! If I had such an opportunity, I would knit and knit... I advise you to knit from natural merino yarn, and not from synthetic analogues from Aliexpress, which are the same in price (if not more expensive) Such a ready-made blanket costs more than 6 thousand on the Internet , but knitting with your own hands is much more profitable and interesting. Go for it!